> ## Documentation Index
> Fetch the complete documentation index at: https://docs.oxen.ai/llms.txt
> Use this file to discover all available pages before exploring further.
# 👨🎨 Image Editing
> How to fine-tune an image editing model in Oxen.ai
Oxen.ai allows you to get higher quality image edits with consistent brand assets, characters, products, or your own style with no infrastructure setup required. Fine-tune your models with a few clicks, track results during training, and own all your weights to download and use anywhere.
## The Task
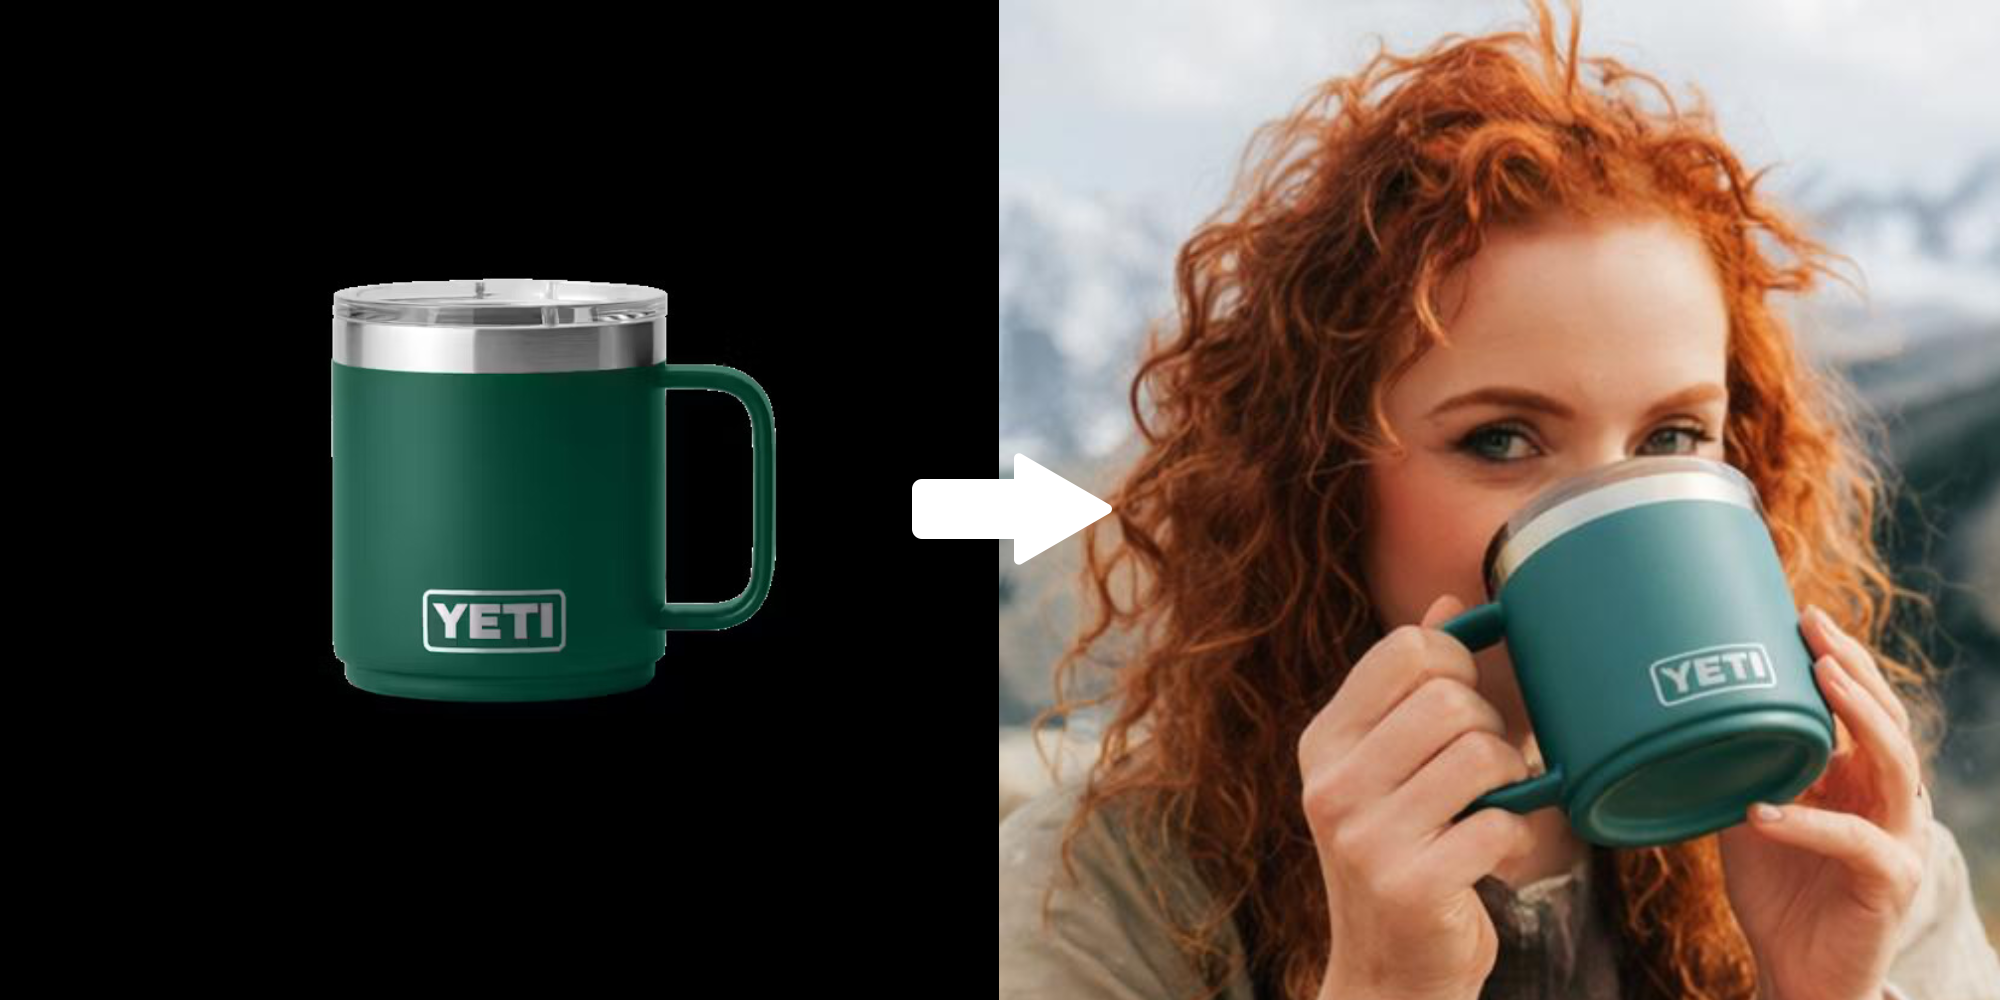
For this example, we are going to fine-tune Qwen-Image-Edit to be able to turn a photo of a Yeti Mug from a product catalogue into a photo of the mug being used in the wild. The input images will be the mug we want in the scene on a black background (left) and the output will be the mug in a beautiful scene (right).
The prompt that generated the image on the right was *"a red headed woman sipping from the mug outdoors"*. Notice we did not have to say "yeti mug", but instead we teach the model that "mug" in our context should always be the mug from the reference image.
## Creating a Repository
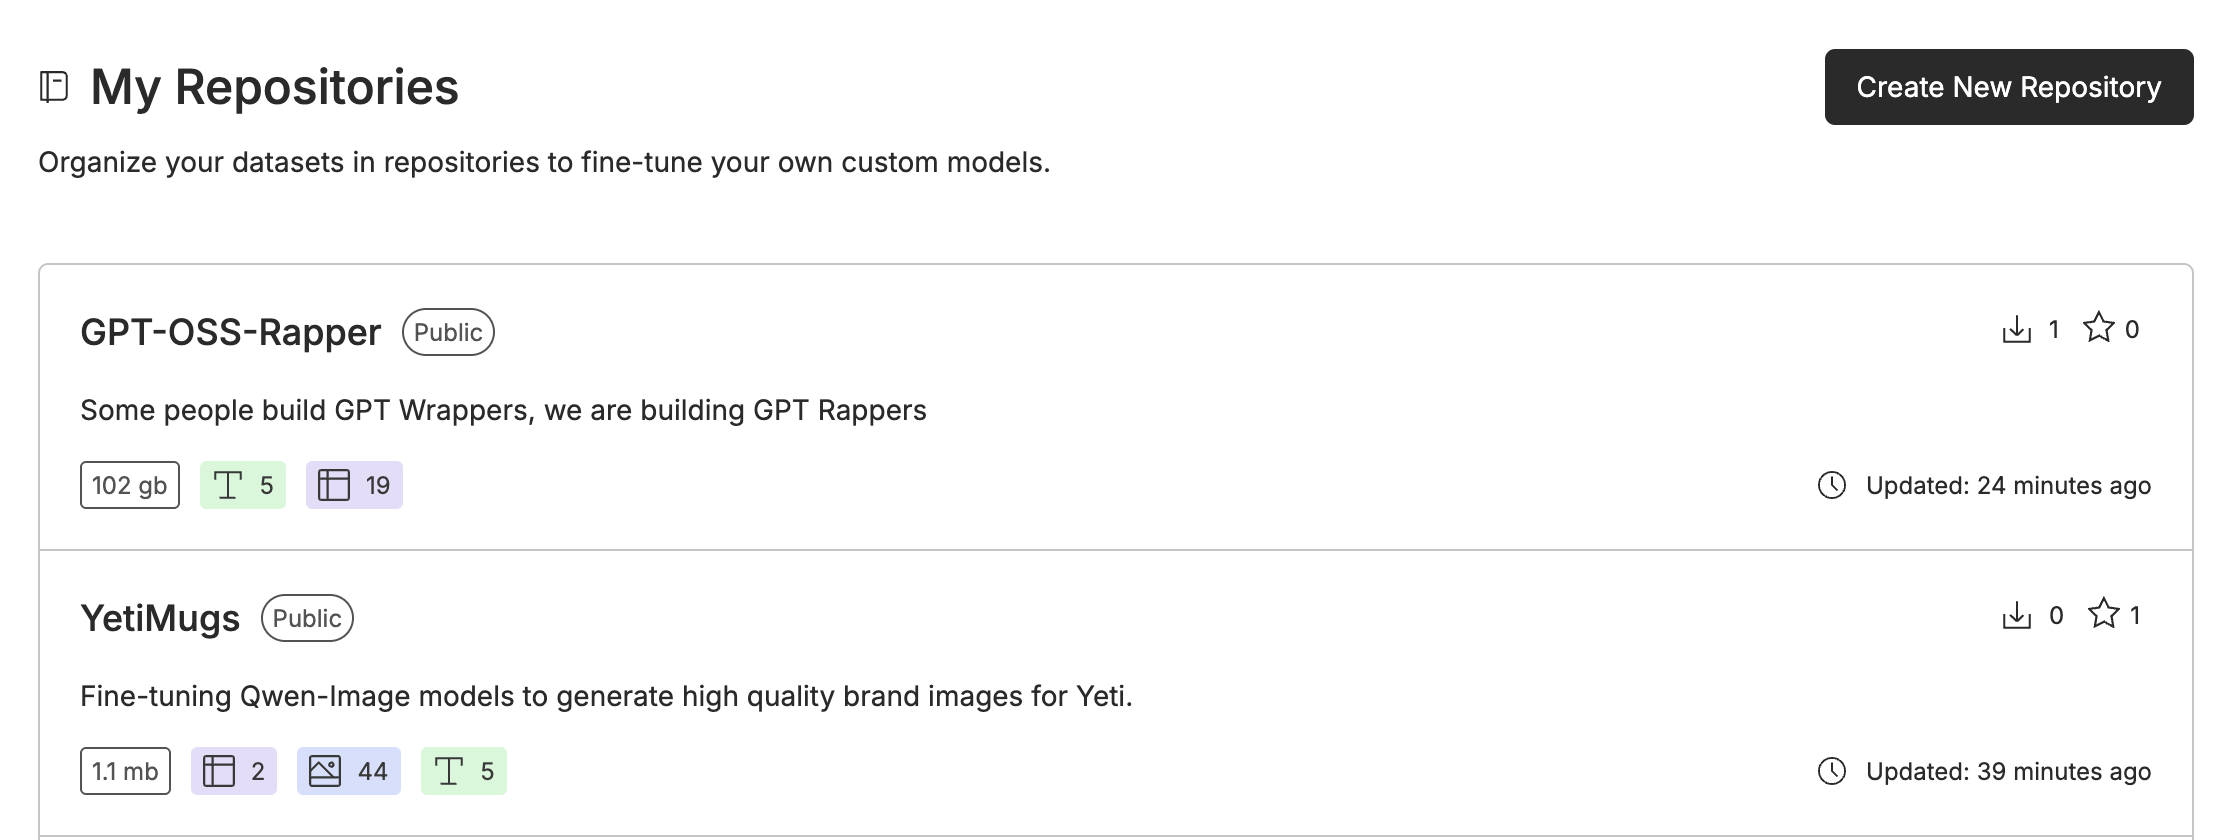
Oxen.ai repositories are used to store and [version](/examples/data/versioning) your data and models. We can create a new repository by clicking the "Create New Repository" button in your Oxen.ai dashboard.
You will upload your dataset to the repository, and when the fine-tune is complete, the model weights will be saved to the repository on a branch. By versioning your data and models together, you can always track the data that was used to train the model.
## Uploading the Dataset
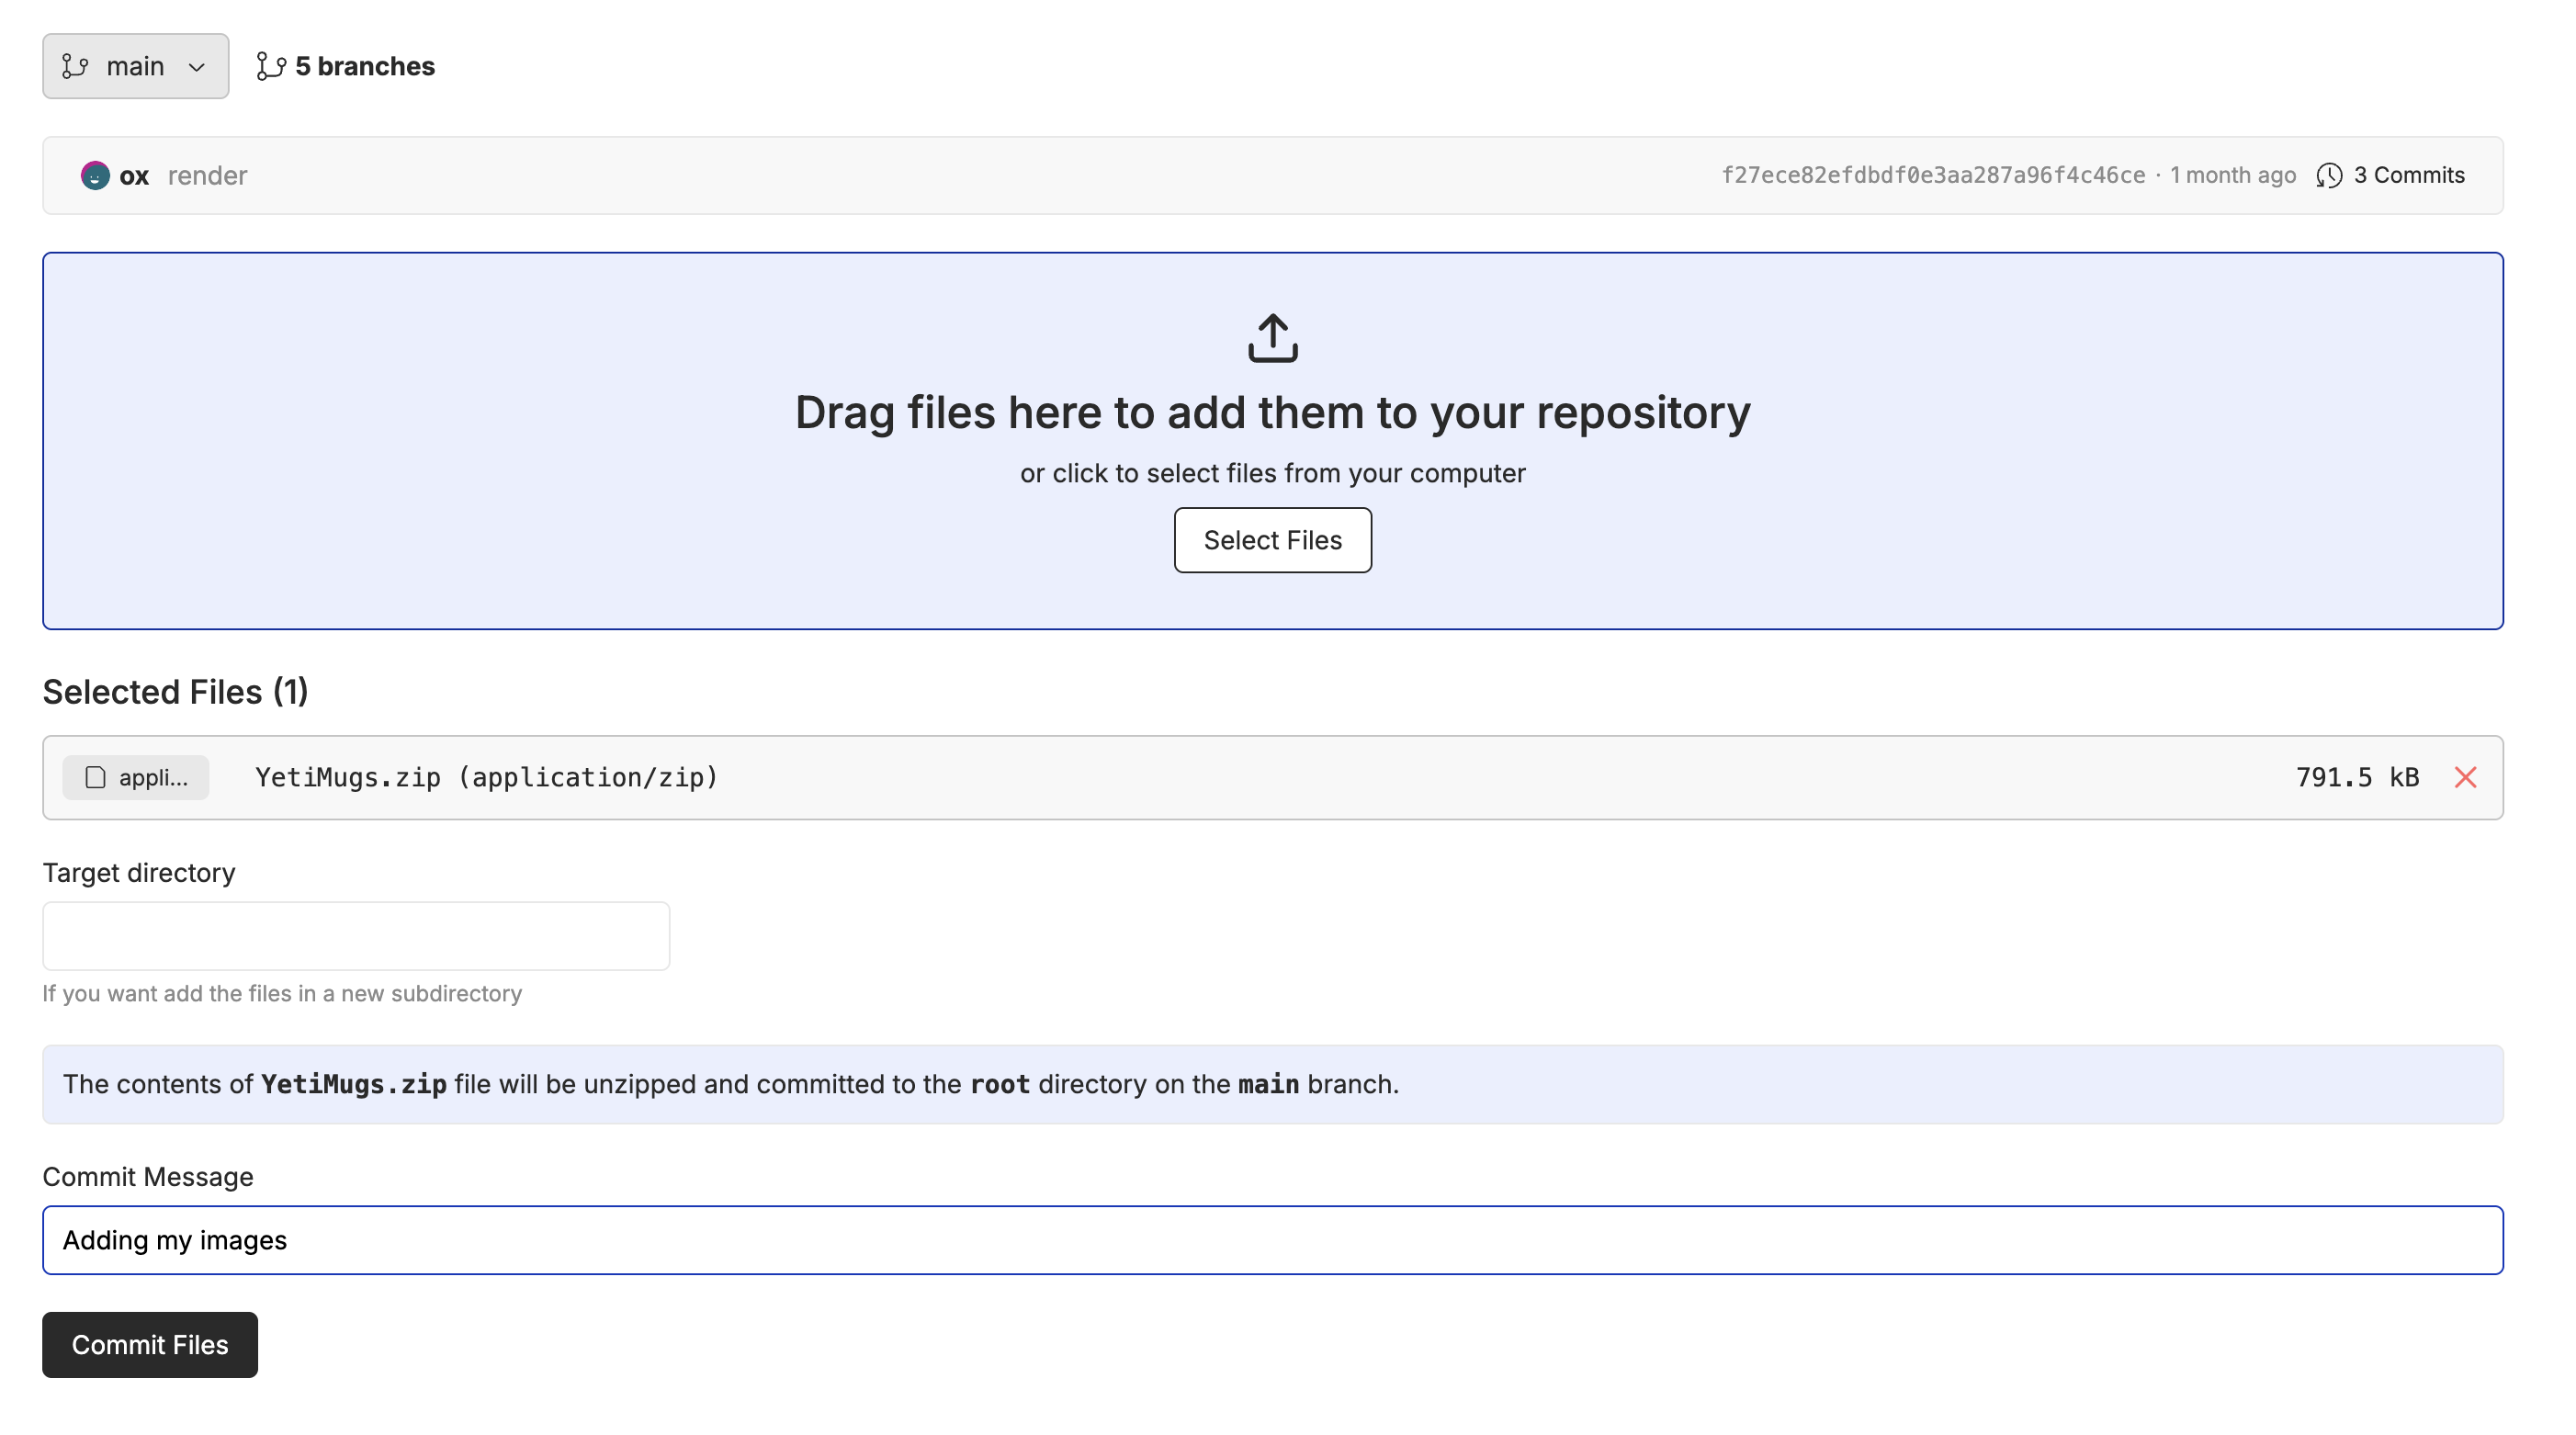
From your repository, you can click the "Add File" button to upload your dataset. The upload supports unpacking zip files if you want to upload a directory of images.
For image editing models, you will need three things:
1. Input images
2. Reference images
3. Prompts for the edits or changes we want to make
Start by collecting the input images, reference images, and uploading them to the repository. You will also need a csv file that will contain the prompts for the edits or changes we want to make.
## Formatting the Dataset
When you upload tabular data files (like CSV, JSONL, or Parquet) to Oxen.ai, they get superpowers. For example, you can enable image rendering on your image columns to show as thumbnails in the dataset. To view the images, click the "✏️" edit button above the dataset, then edit the column to enable image rendering. The video below shows the whole process.
This lets you view images, reference images, and prompts all in one place.
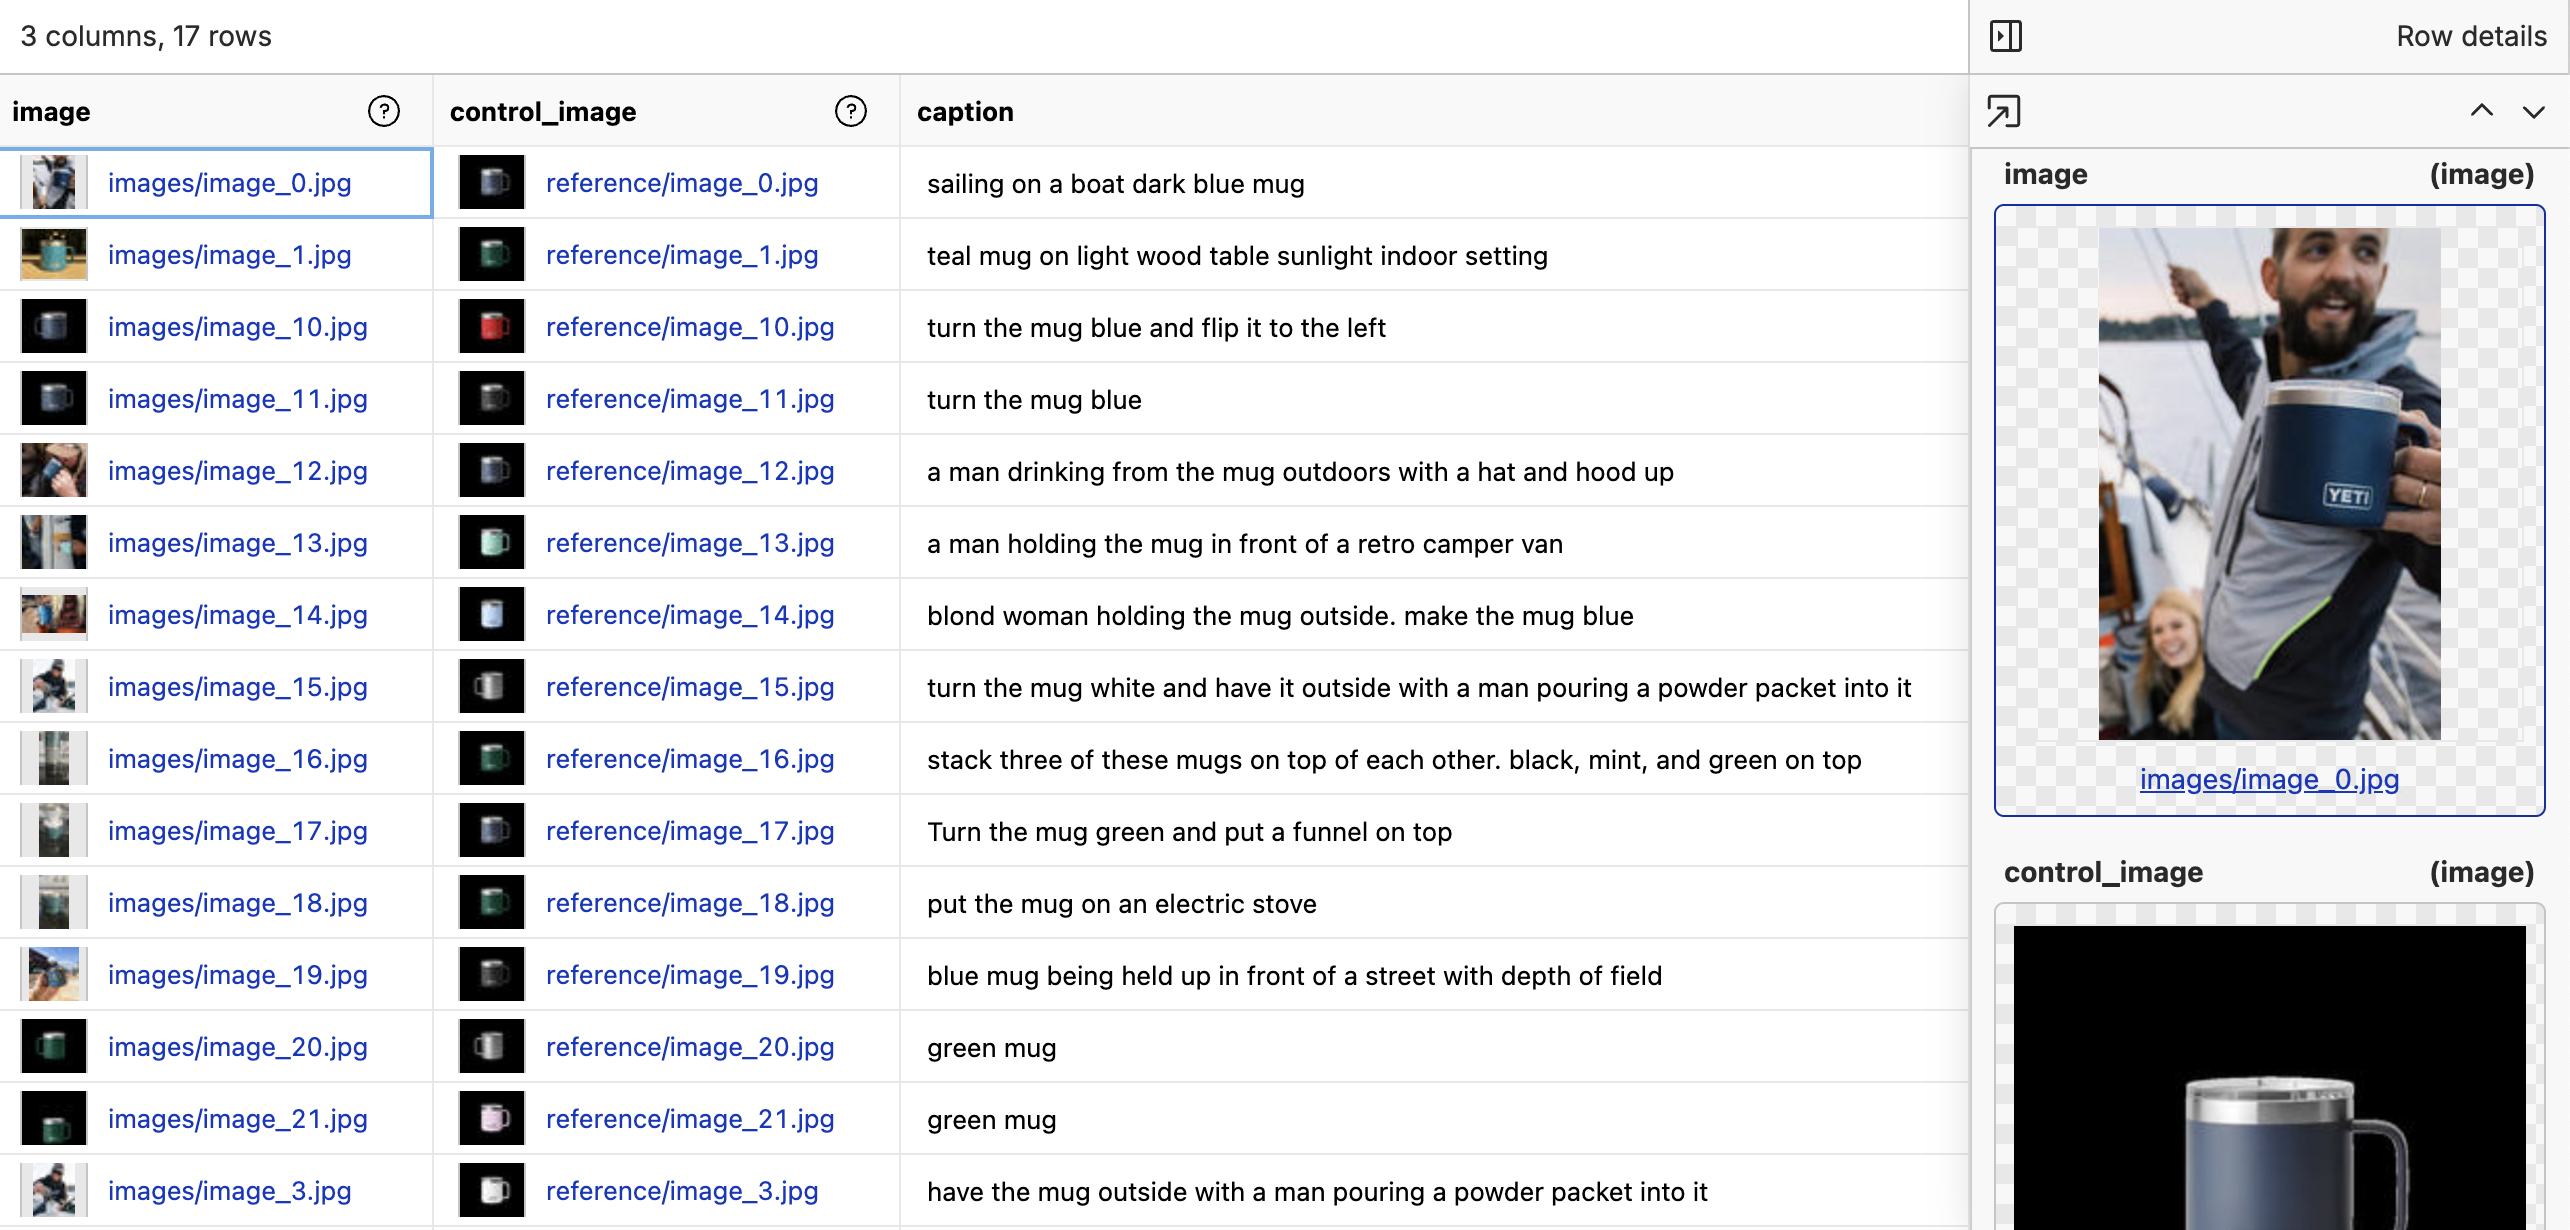
In this case we have one column called `image` that represents the output we want, and a column called `control_image` that represents the reference image that we want to feed as input. There is a third column for the `prompt` that describes the edits or changes we want to make.
The image column needs to contain the **relative path** to the image from the root of the repository. For example, if the image is in the `images` folder, the path should be `images/image_0.png`.
## Kicking off the Fine-Tune
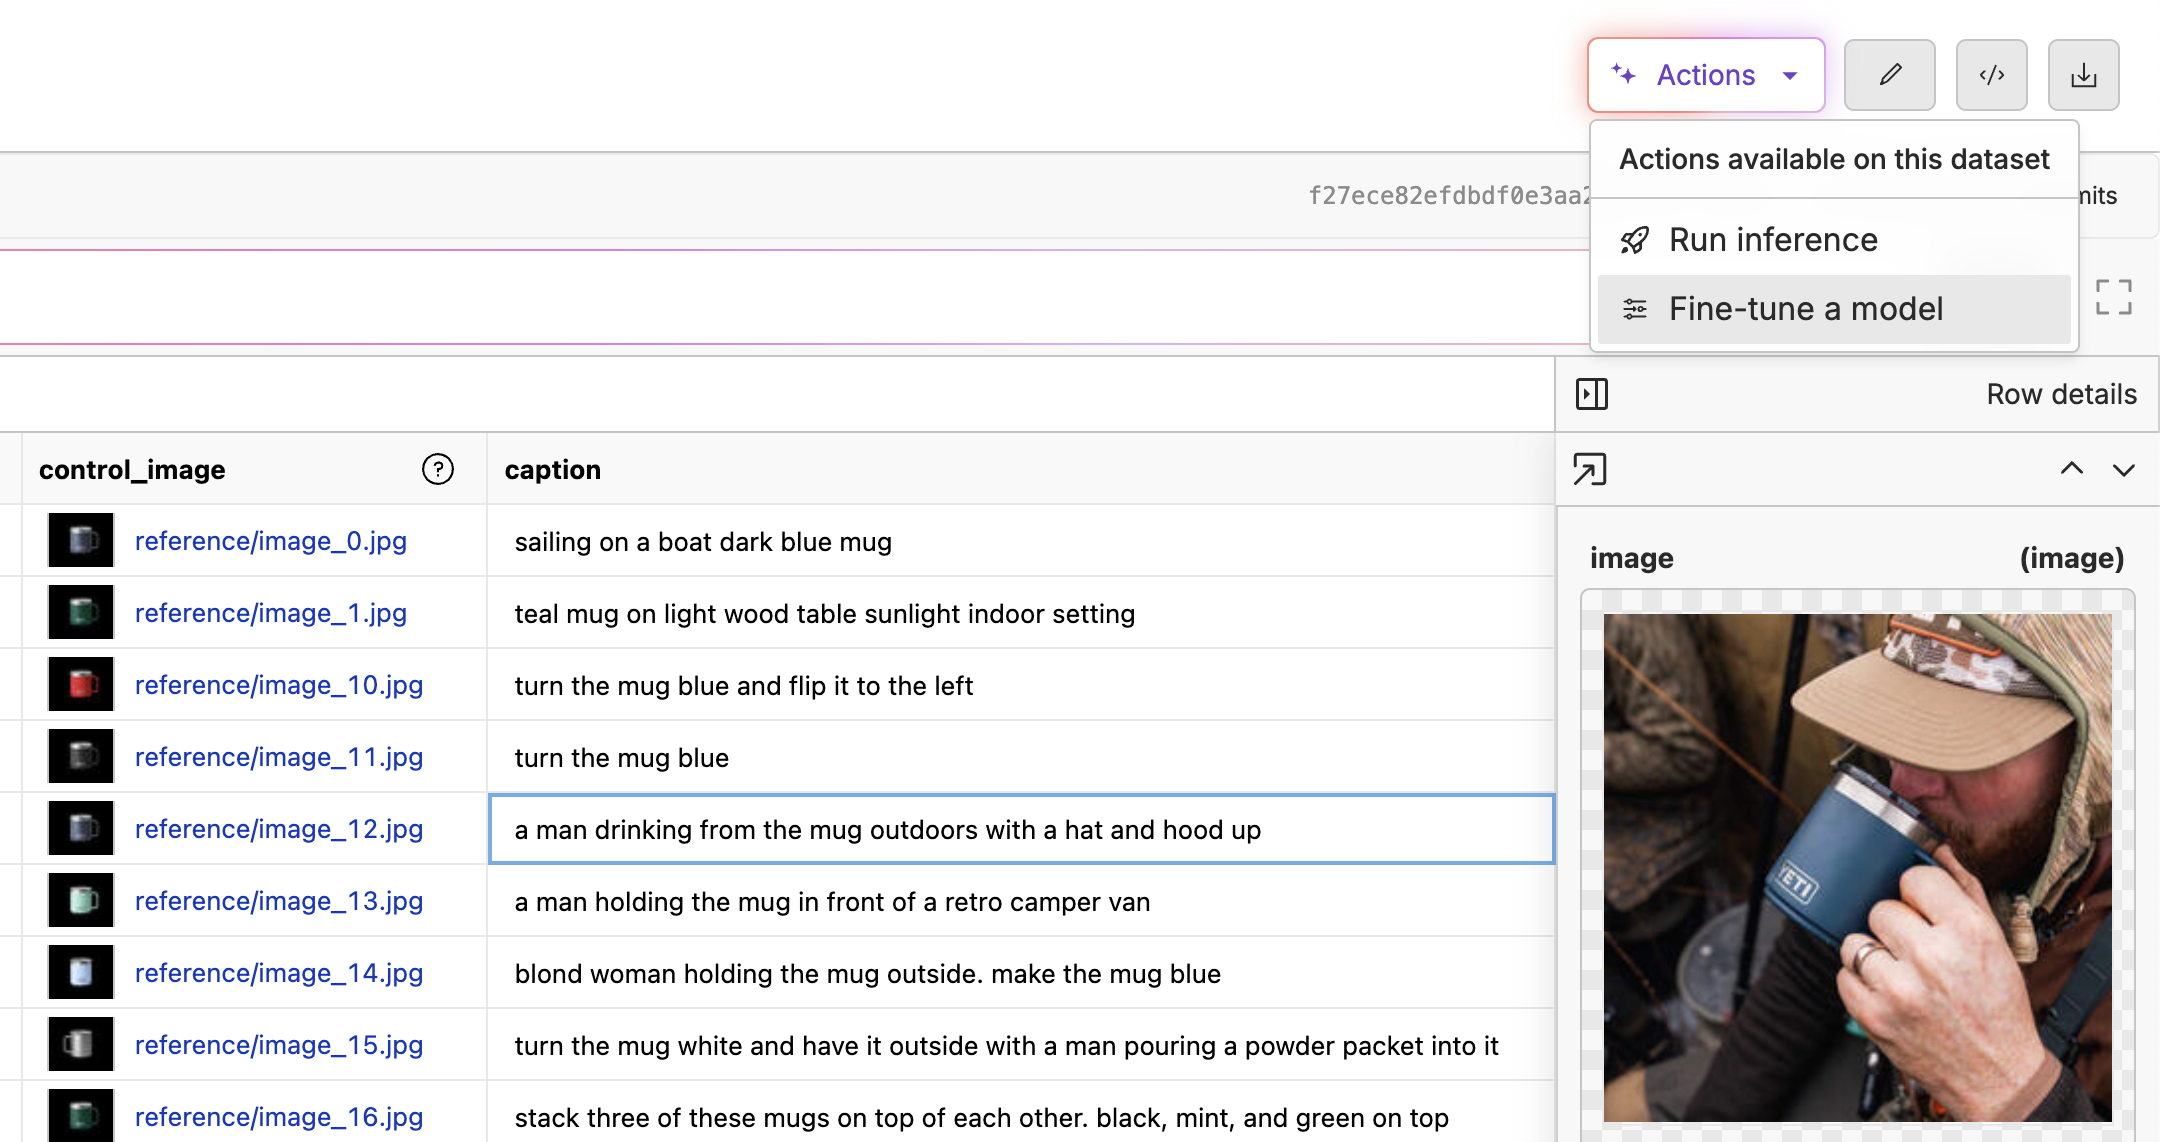
The other superpower your csv file gets is that you can kick off a fine-tune from the dataset page. Click the "Actions" button and select "Fine-Tune a Model".
This will take you to the fine-tune page where you can select the model you want to fine-tune. Select the "Qwen-Image-Edit" model, and make sure the "Control Image" column is set to `control_image` column, the "Image" column is set to `image` column, and the "Prompt" column is set to `prompt` column.
You can also upload some test images and prompts that will be used as samples during the fine-tune.
## Advanced Parameters
Click the "Advanced Parameters" button to see the advanced parameters for the fine-tune. You can set the learning rate, batch size, number of steps, and other parameters here.
One of the best parts of fine-tuning with Oxen.ai is that we track all your experiments for you, so that you can always refer back to the parameters that worked best for future fine-tunes.
## Monitoring the Fine-Tune
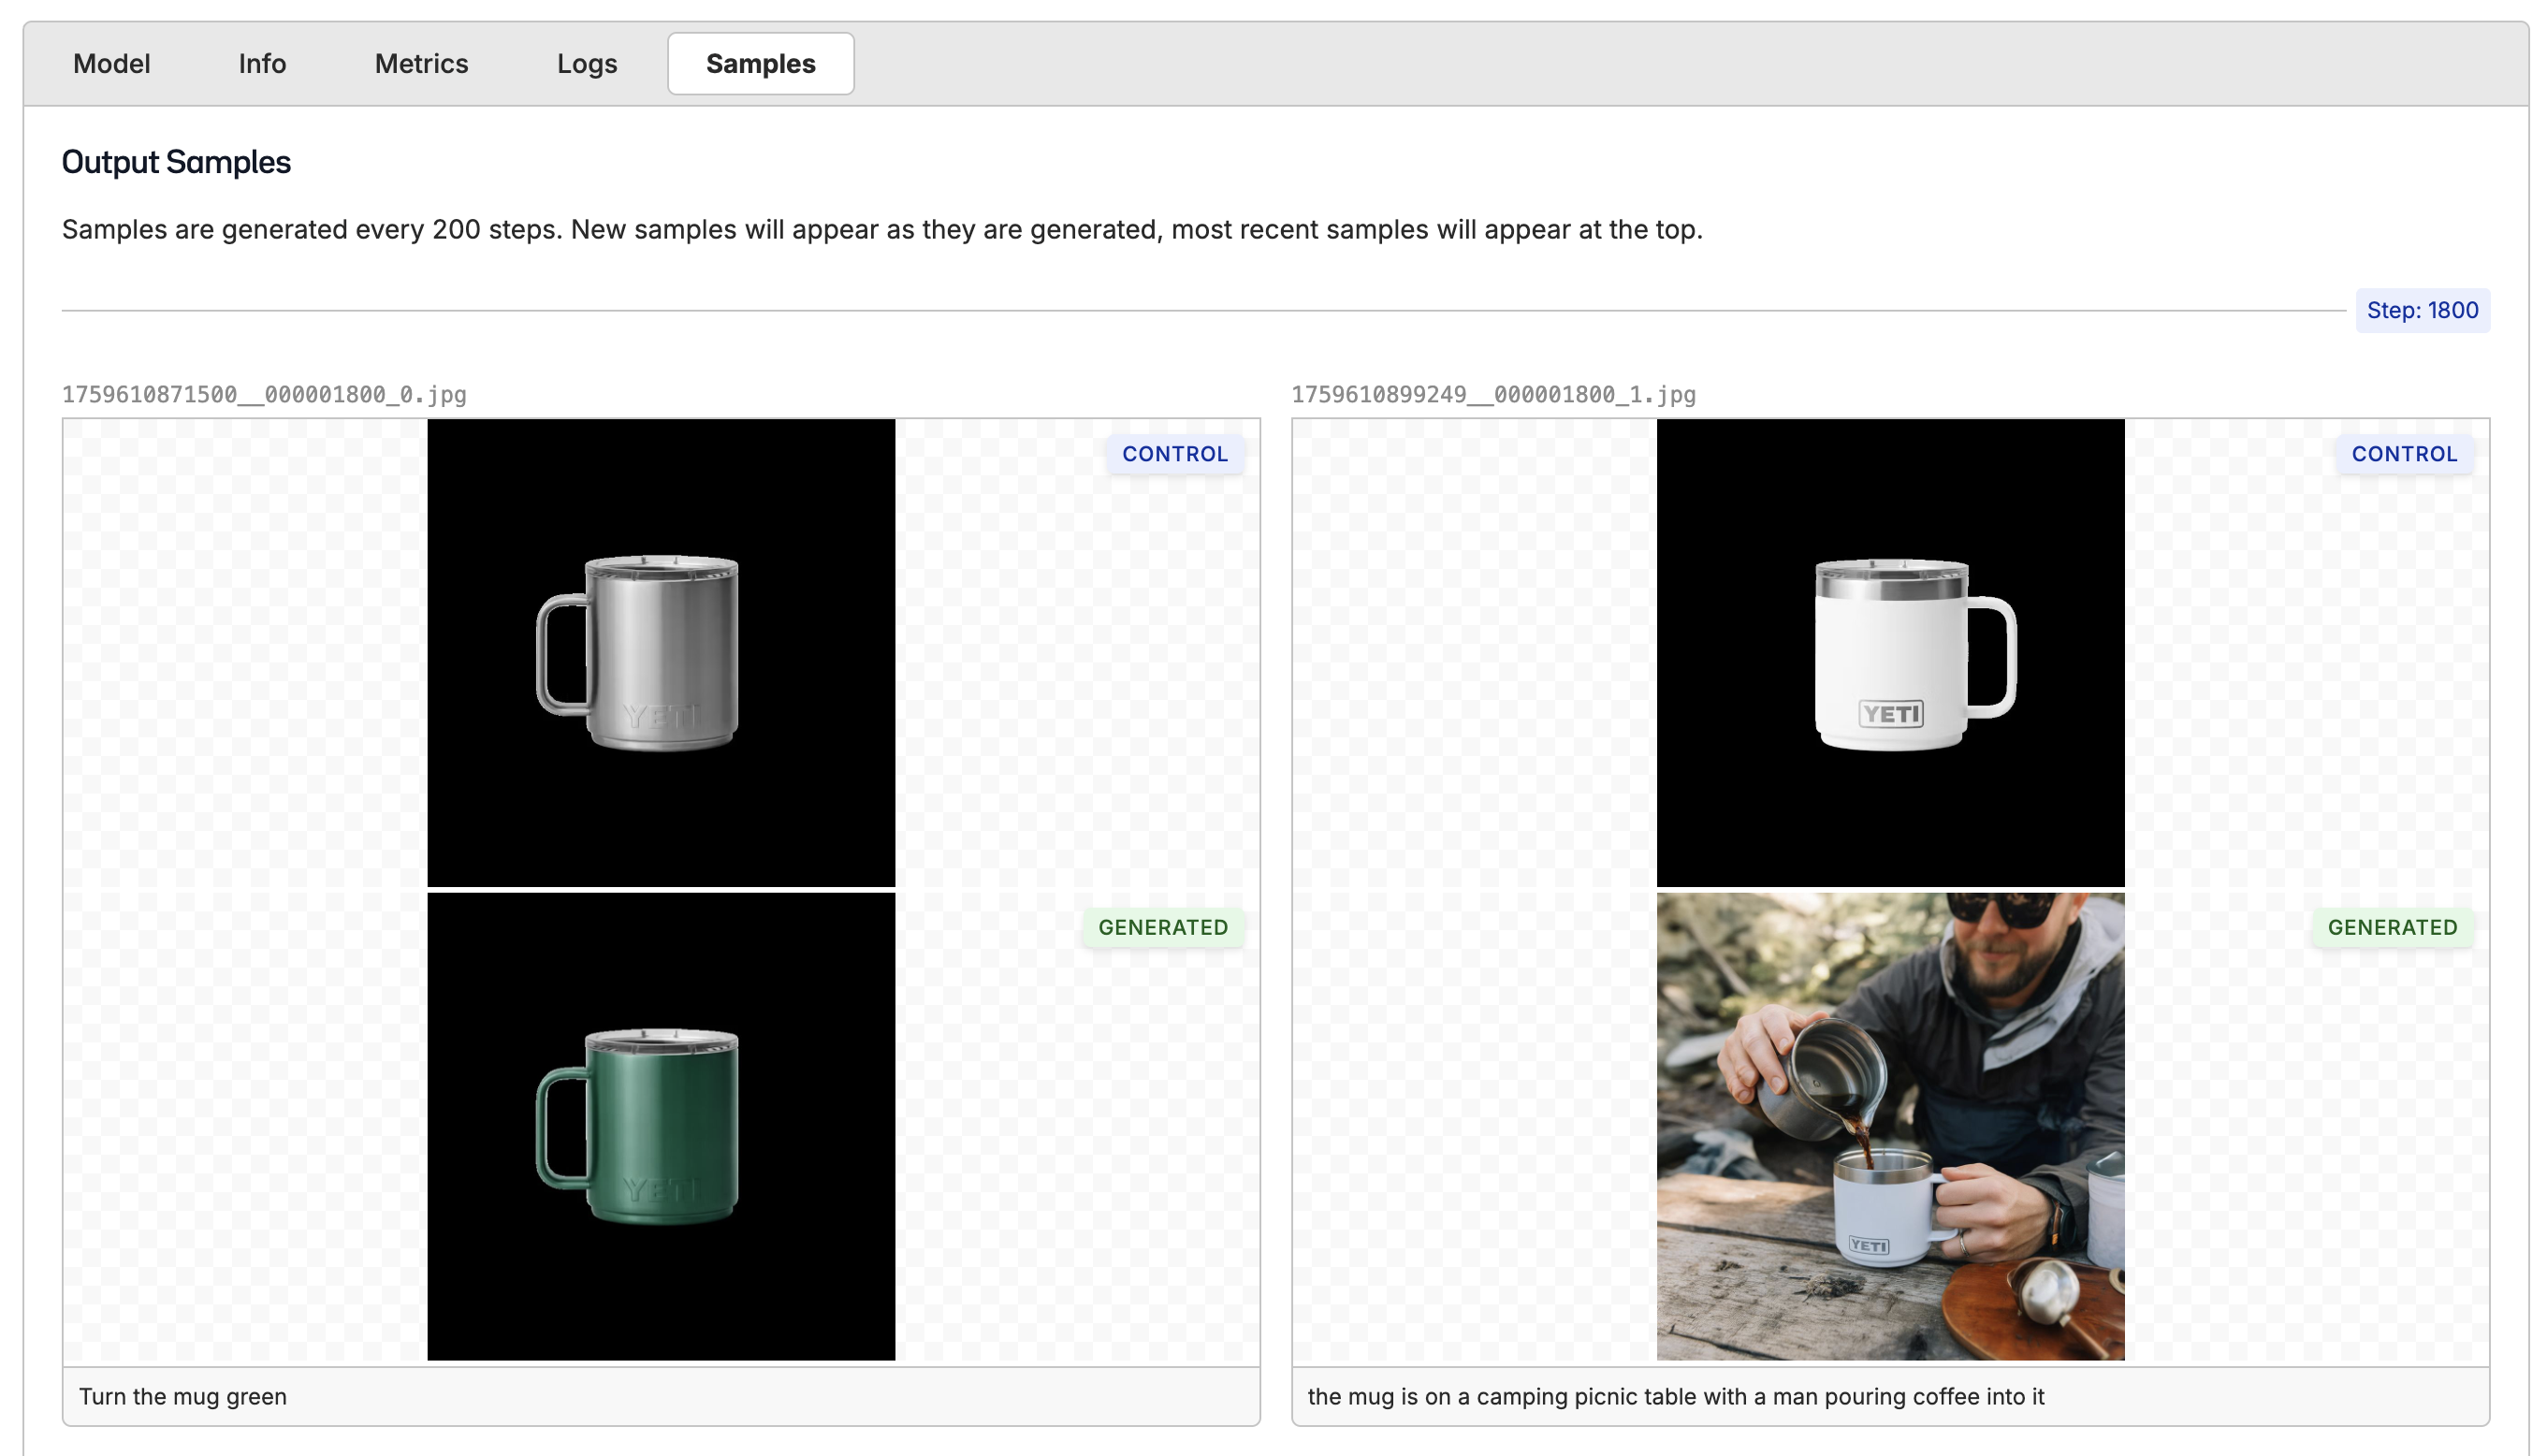
While the model is training, you can monitor the progress by clicking the "Samples" tab. This will show you the images that the model has generated so far.
## Deploying the Model
When the model has finished training, you can deploy it to a new model by clicking the "Deploy Model" button.
Once the model is deployed, you can use it in the playground or via the API.
```bash theme={null}
curl -X POST \
-H "Authorization: Bearer " \
-H "Content-Type: application/json" \
-d '{
"model": "oxen:ox-busy-scarlet-beaver",
"input_image": "https://hub.oxen.ai/api/repos/ox/Oxen-Character-Simple-Vector-Graphic/file/main/images/reference/bloxy_white_bg.png",
"prompt": "Add a funny hat to the ox",
"num_inference_steps": 20
}' https://hub.oxen.ai/api/ai/images/edit
```
## Using the Playground
Click the "Open Playground" button to use the model in the playground. This allows you to prompt the model with different images and prompts to see how it performs.
The playground will save a history of your prompts and images so that you can refer back to them later.
## Exporting the Model
All of the model weights are stored back in your repository when the fine-tune is complete. Navigate to the fine-tune info tab, and you will see a link to the model weights. This is helpful if you want to download the weights to run in ComfyUI or your own infrastructure.
This will take you to the file viewer where you can download the model safetensors.
You can also automatically download the weights with the [oxen cli](/getting-started/command-line/start_repository) or [python library](/python-api).
```bash CLI theme={null}
oxen download user-name/repo-name path/to/model.safetensors --revision COMMIT_OR_BRANCH
```
```python Python theme={null}
from oxen import RemoteRepo
repo = RemoteRepo("user-name/repo-name")
repo.download("path/to/model.safetensors", revision="COMMIT_OR_BRANCH")
```
## Need Help Fine-Tuning?
If you need help fine-tuning your model, contact us at [hello@oxen.ai](mailto:hello@oxen.ai) and we are happy to help you get started.
 The prompt that generated the image on the right was *"a red headed woman sipping from the mug outdoors"*. Notice we did not have to say "yeti mug", but instead we teach the model that "mug" in our context should always be the mug from the reference image.
## Creating a Repository
Oxen.ai repositories are used to store and [version](/examples/data/versioning) your data and models. We can create a new repository by clicking the "Create New Repository" button in your Oxen.ai dashboard.
The prompt that generated the image on the right was *"a red headed woman sipping from the mug outdoors"*. Notice we did not have to say "yeti mug", but instead we teach the model that "mug" in our context should always be the mug from the reference image.
## Creating a Repository
Oxen.ai repositories are used to store and [version](/examples/data/versioning) your data and models. We can create a new repository by clicking the "Create New Repository" button in your Oxen.ai dashboard.
 You will upload your dataset to the repository, and when the fine-tune is complete, the model weights will be saved to the repository on a branch. By versioning your data and models together, you can always track the data that was used to train the model.
## Uploading the Dataset
From your repository, you can click the "Add File" button to upload your dataset. The upload supports unpacking zip files if you want to upload a directory of images.
You will upload your dataset to the repository, and when the fine-tune is complete, the model weights will be saved to the repository on a branch. By versioning your data and models together, you can always track the data that was used to train the model.
## Uploading the Dataset
From your repository, you can click the "Add File" button to upload your dataset. The upload supports unpacking zip files if you want to upload a directory of images.
 For image editing models, you will need three things:
1. Input images
2. Reference images
3. Prompts for the edits or changes we want to make
Start by collecting the input images, reference images, and uploading them to the repository. You will also need a csv file that will contain the prompts for the edits or changes we want to make.
## Formatting the Dataset
When you upload tabular data files (like CSV, JSONL, or Parquet) to Oxen.ai, they get superpowers. For example, you can enable image rendering on your image columns to show as thumbnails in the dataset. To view the images, click the "✏️" edit button above the dataset, then edit the column to enable image rendering. The video below shows the whole process.
This lets you view images, reference images, and prompts all in one place.
For image editing models, you will need three things:
1. Input images
2. Reference images
3. Prompts for the edits or changes we want to make
Start by collecting the input images, reference images, and uploading them to the repository. You will also need a csv file that will contain the prompts for the edits or changes we want to make.
## Formatting the Dataset
When you upload tabular data files (like CSV, JSONL, or Parquet) to Oxen.ai, they get superpowers. For example, you can enable image rendering on your image columns to show as thumbnails in the dataset. To view the images, click the "✏️" edit button above the dataset, then edit the column to enable image rendering. The video below shows the whole process.
This lets you view images, reference images, and prompts all in one place.
 In this case we have one column called `image` that represents the output we want, and a column called `control_image` that represents the reference image that we want to feed as input. There is a third column for the `prompt` that describes the edits or changes we want to make.
The image column needs to contain the **relative path** to the image from the root of the repository. For example, if the image is in the `images` folder, the path should be `images/image_0.png`.
## Kicking off the Fine-Tune
The other superpower your csv file gets is that you can kick off a fine-tune from the dataset page. Click the "Actions" button and select "Fine-Tune a Model".
In this case we have one column called `image` that represents the output we want, and a column called `control_image` that represents the reference image that we want to feed as input. There is a third column for the `prompt` that describes the edits or changes we want to make.
The image column needs to contain the **relative path** to the image from the root of the repository. For example, if the image is in the `images` folder, the path should be `images/image_0.png`.
## Kicking off the Fine-Tune
The other superpower your csv file gets is that you can kick off a fine-tune from the dataset page. Click the "Actions" button and select "Fine-Tune a Model".
 This will take you to the fine-tune page where you can select the model you want to fine-tune. Select the "Qwen-Image-Edit" model, and make sure the "Control Image" column is set to `control_image` column, the "Image" column is set to `image` column, and the "Prompt" column is set to `prompt` column.
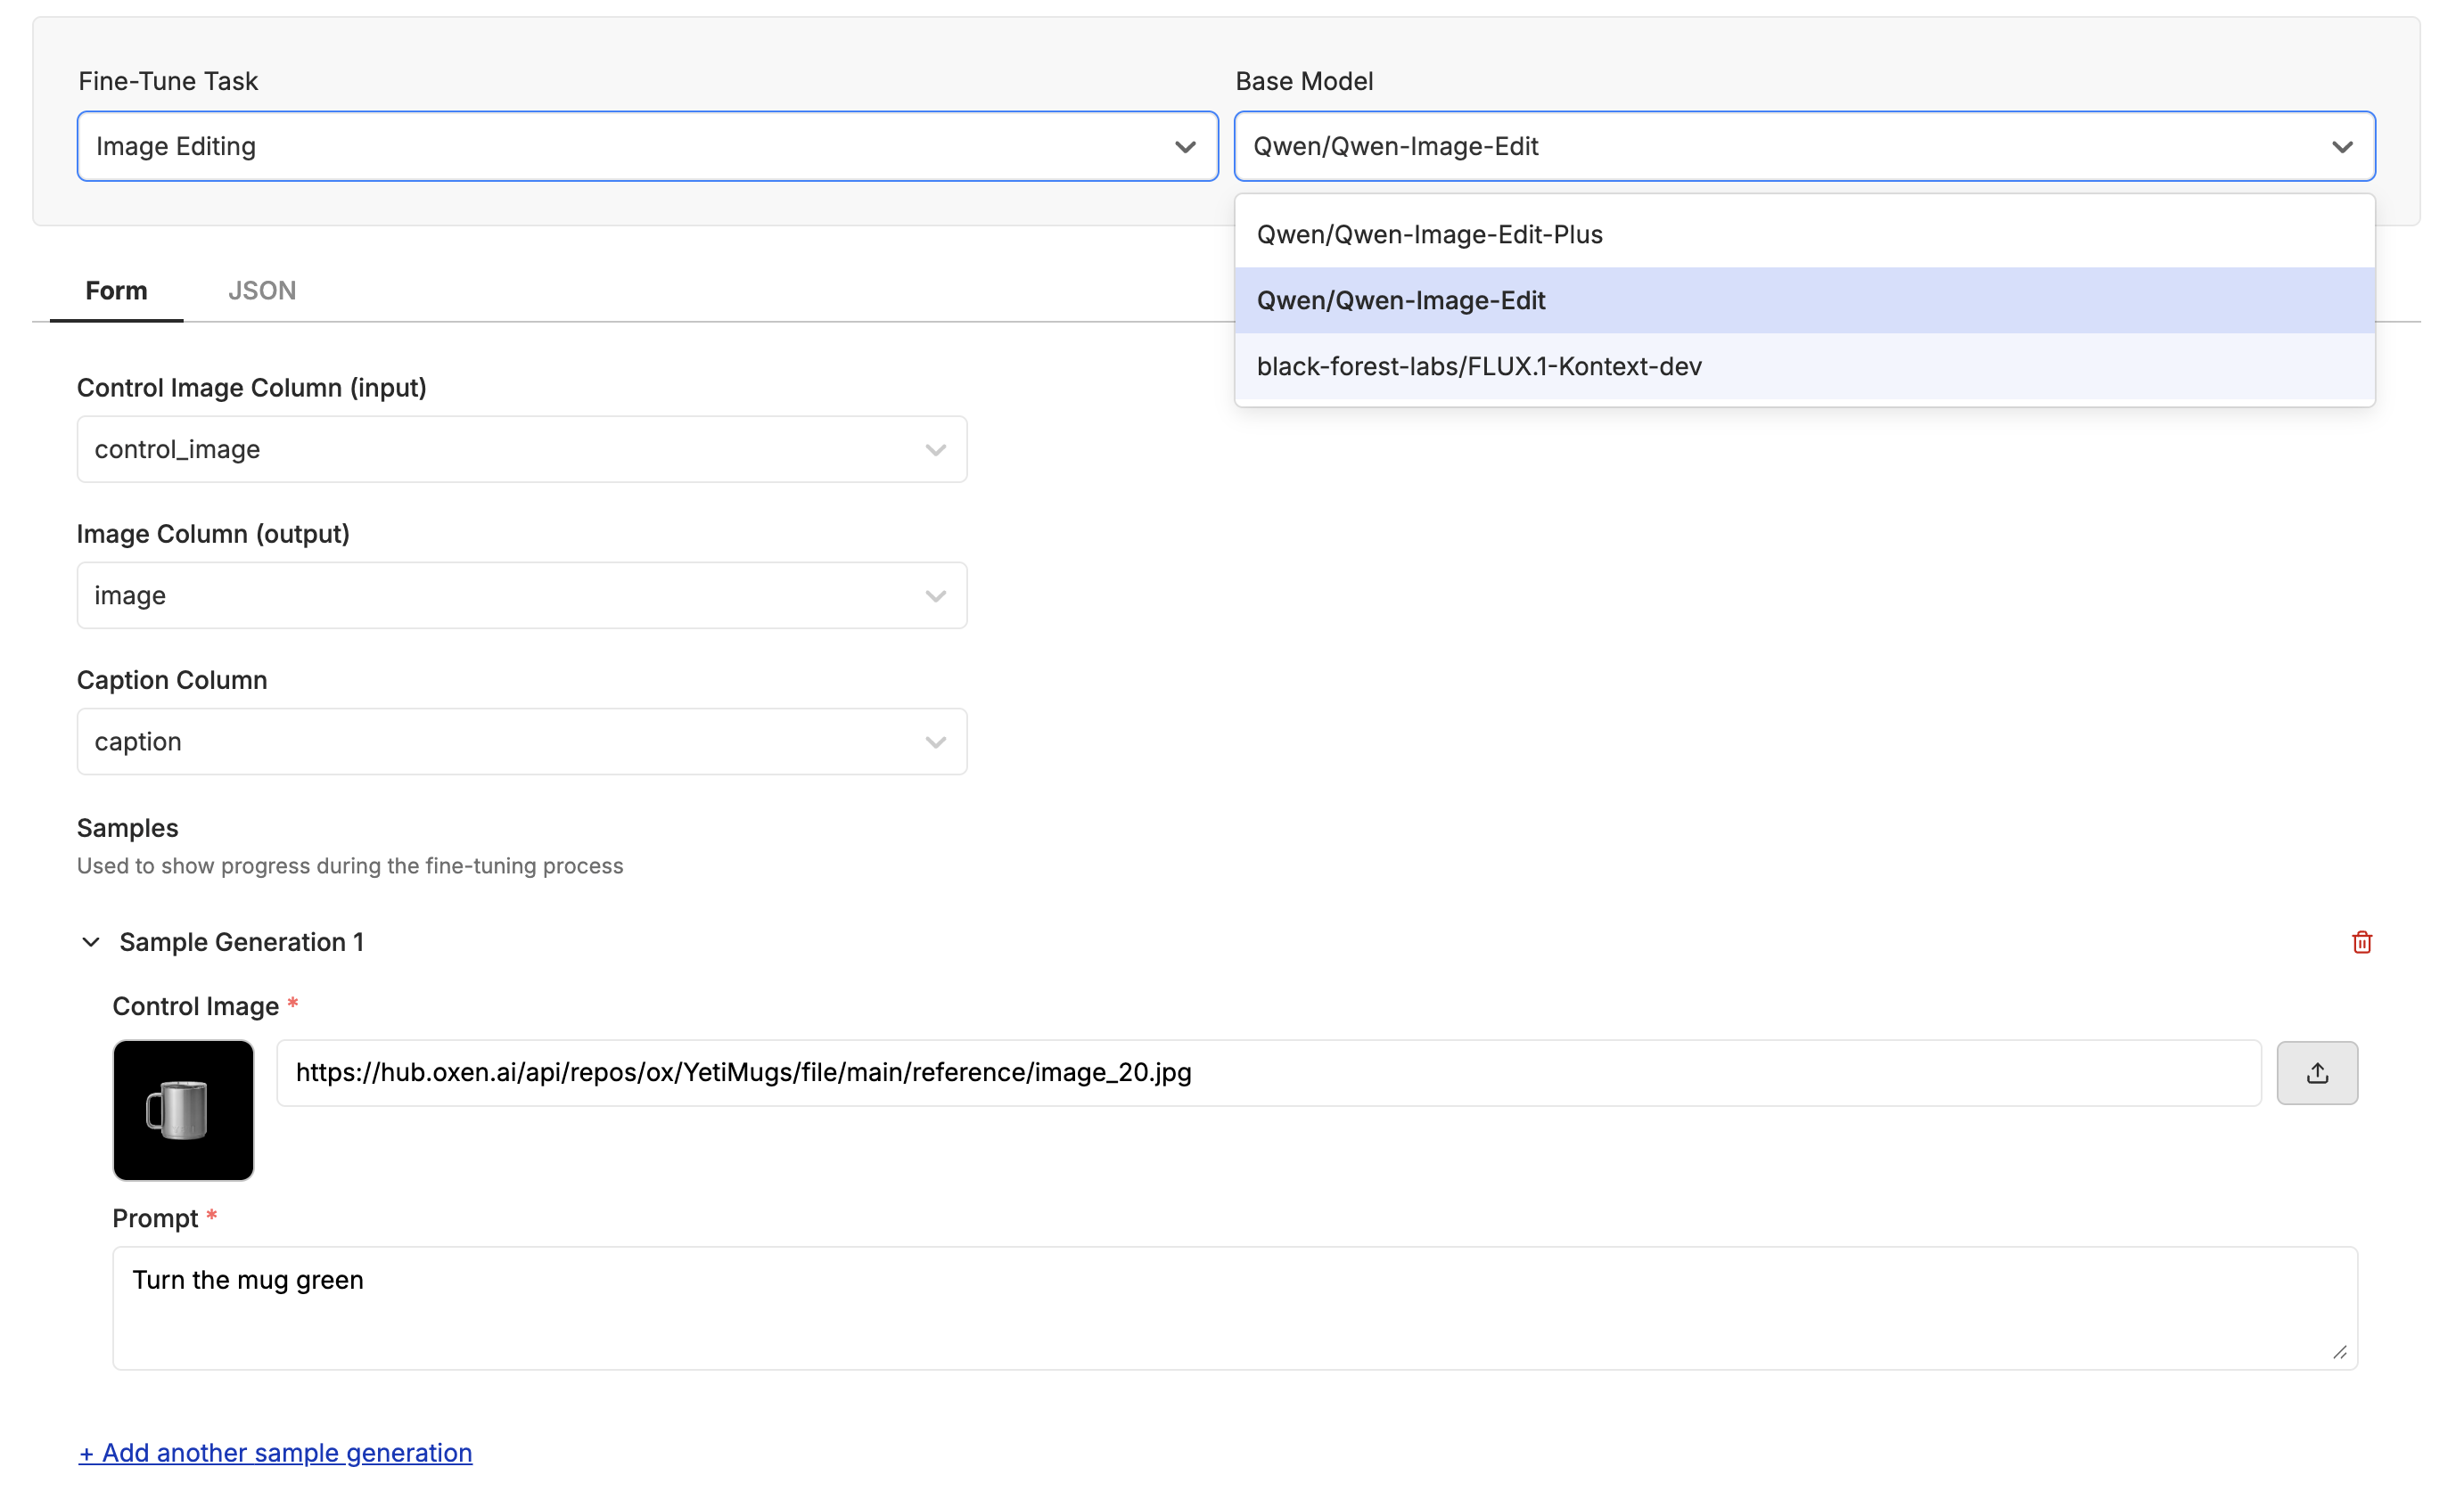 You can also upload some test images and prompts that will be used as samples during the fine-tune.
## Advanced Parameters
Click the "Advanced Parameters" button to see the advanced parameters for the fine-tune. You can set the learning rate, batch size, number of steps, and other parameters here.
You can also upload some test images and prompts that will be used as samples during the fine-tune.
## Advanced Parameters
Click the "Advanced Parameters" button to see the advanced parameters for the fine-tune. You can set the learning rate, batch size, number of steps, and other parameters here.
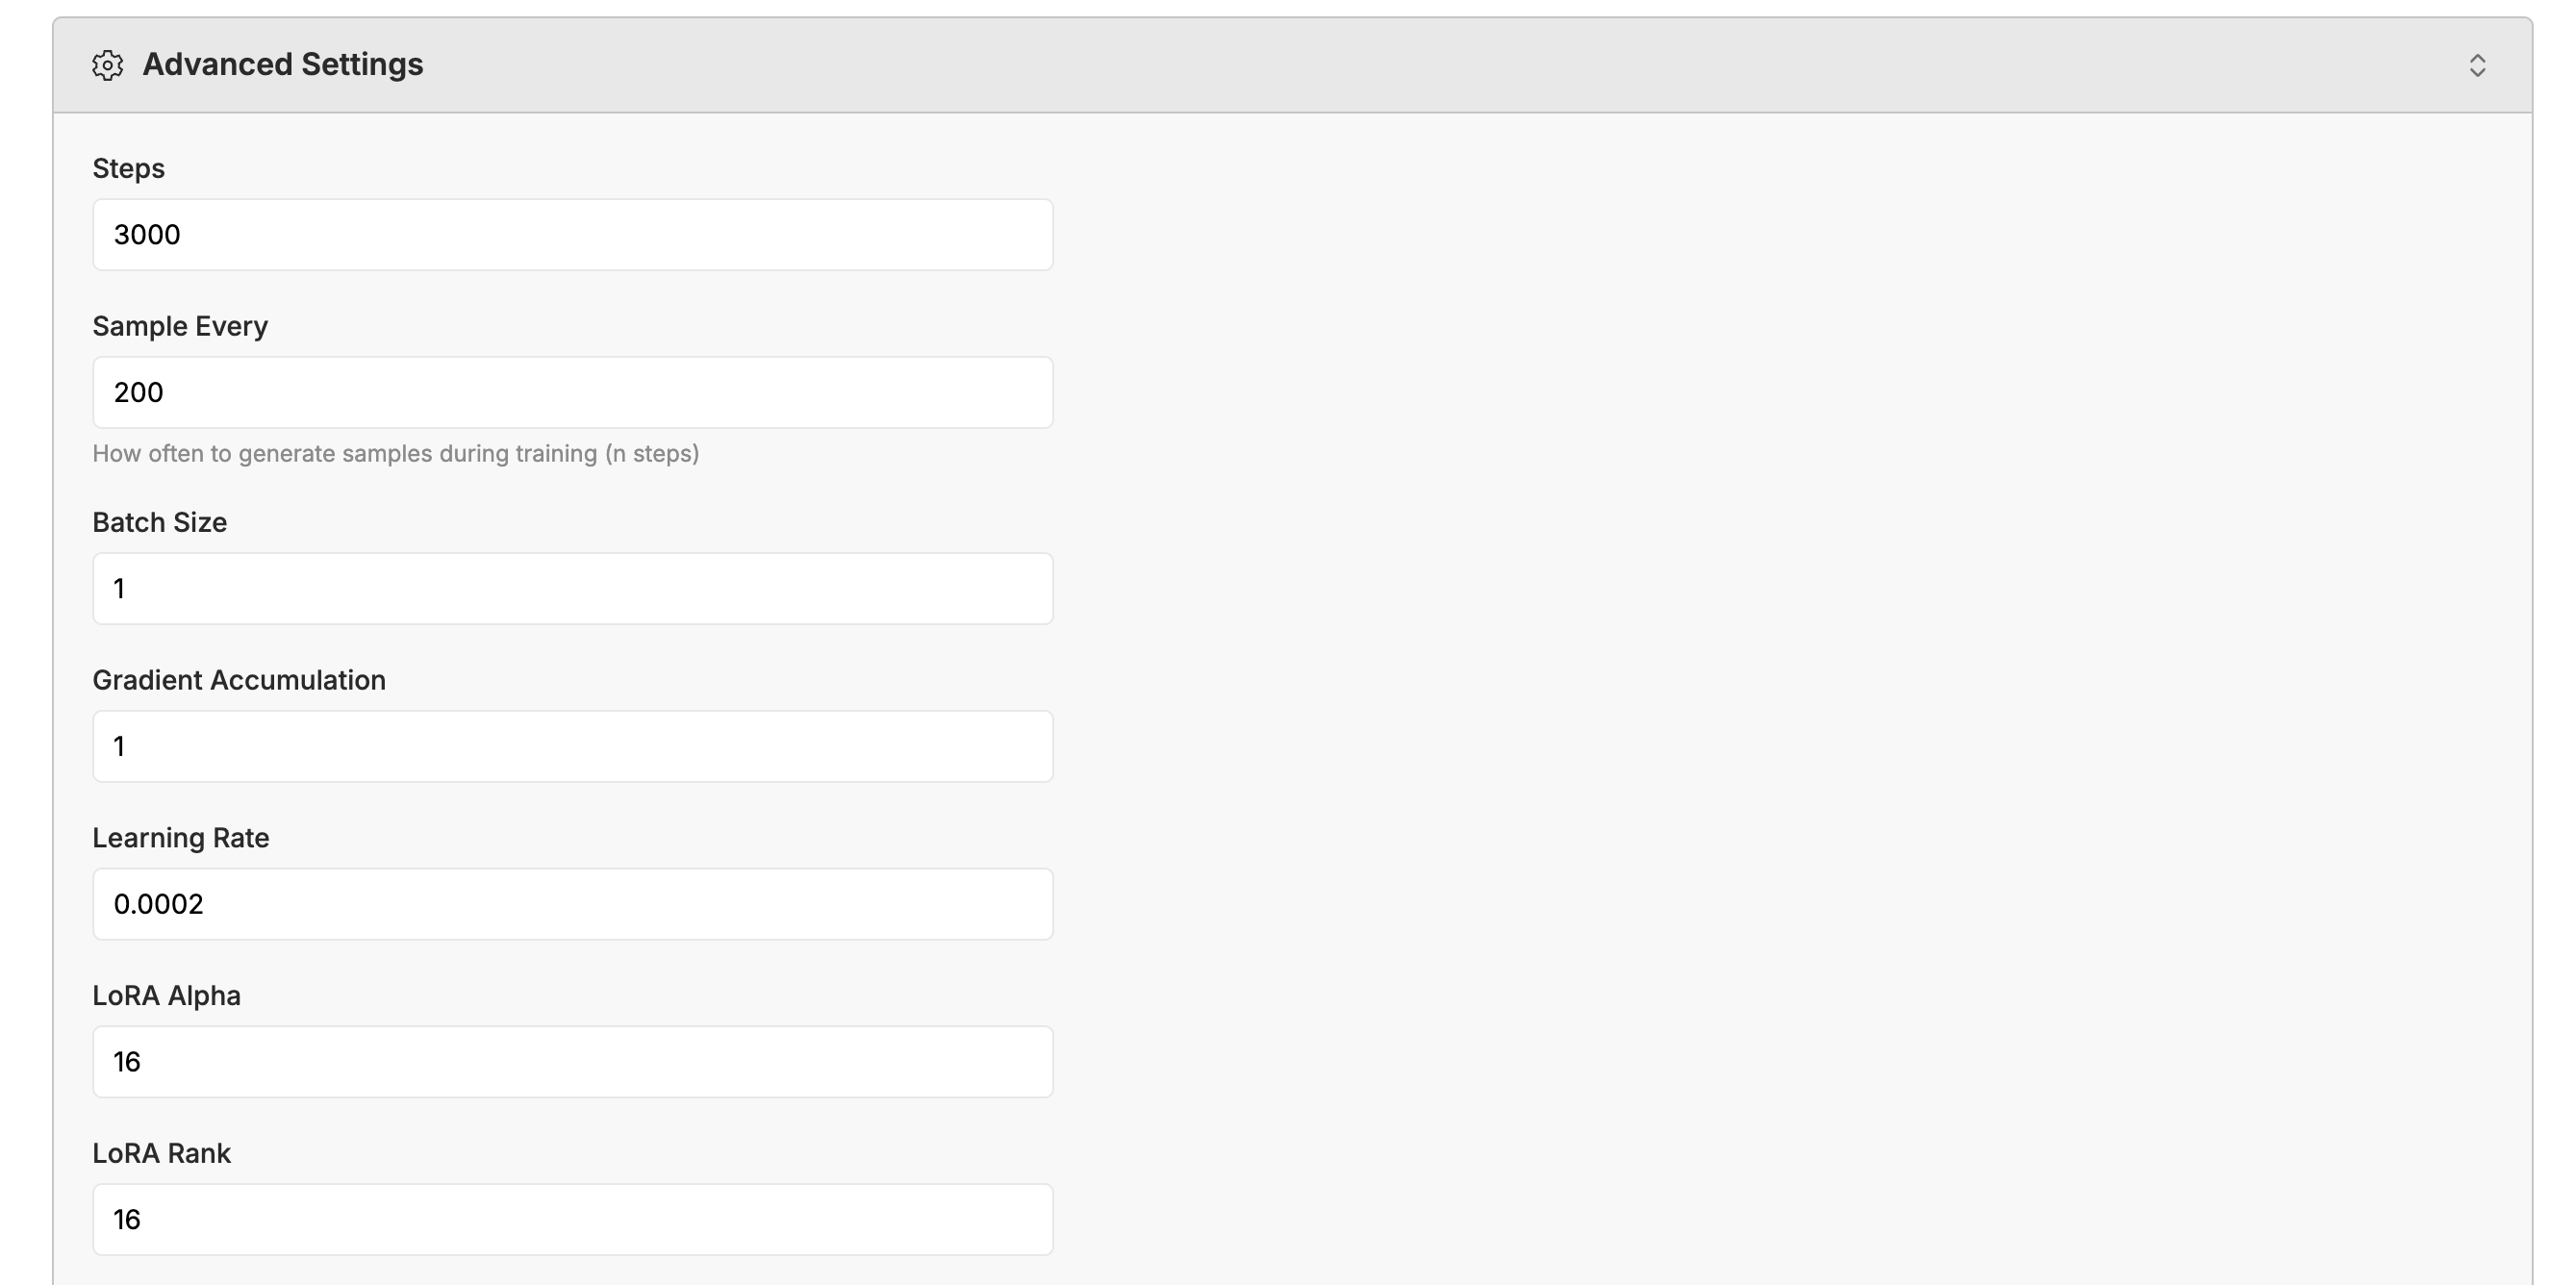 One of the best parts of fine-tuning with Oxen.ai is that we track all your experiments for you, so that you can always refer back to the parameters that worked best for future fine-tunes.
## Monitoring the Fine-Tune
While the model is training, you can monitor the progress by clicking the "Samples" tab. This will show you the images that the model has generated so far.
One of the best parts of fine-tuning with Oxen.ai is that we track all your experiments for you, so that you can always refer back to the parameters that worked best for future fine-tunes.
## Monitoring the Fine-Tune
While the model is training, you can monitor the progress by clicking the "Samples" tab. This will show you the images that the model has generated so far.
 ## Deploying the Model
When the model has finished training, you can deploy it to a new model by clicking the "Deploy Model" button.
## Deploying the Model
When the model has finished training, you can deploy it to a new model by clicking the "Deploy Model" button.
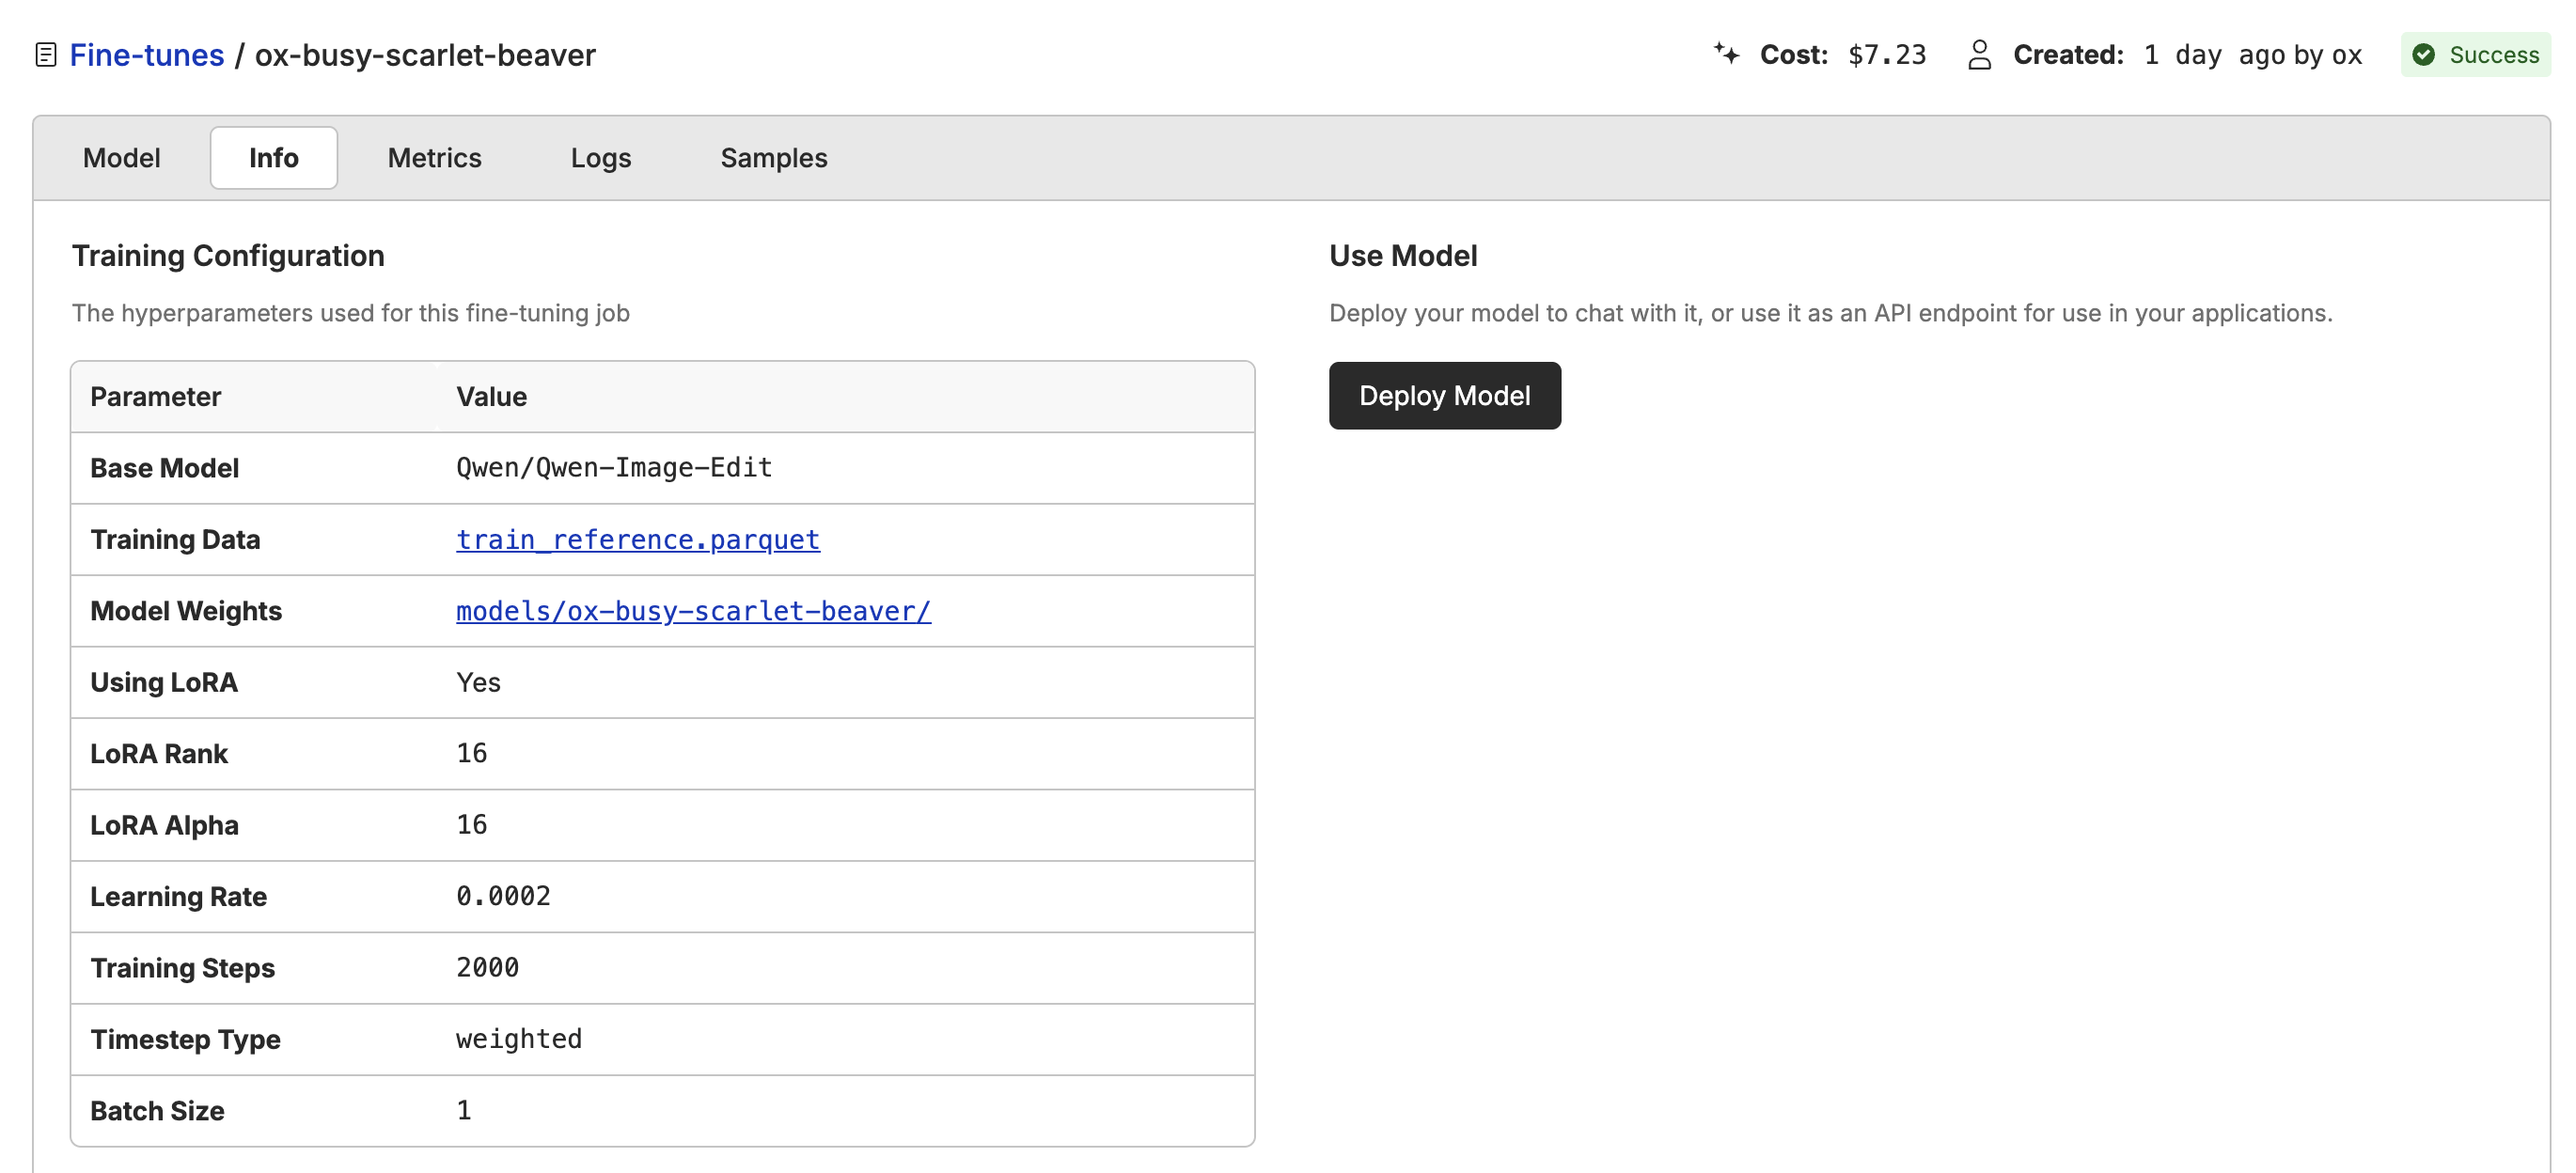 Once the model is deployed, you can use it in the playground or via the API.
```bash theme={null}
curl -X POST \
-H "Authorization: Bearer
Once the model is deployed, you can use it in the playground or via the API.
```bash theme={null}
curl -X POST \
-H "Authorization: Bearer 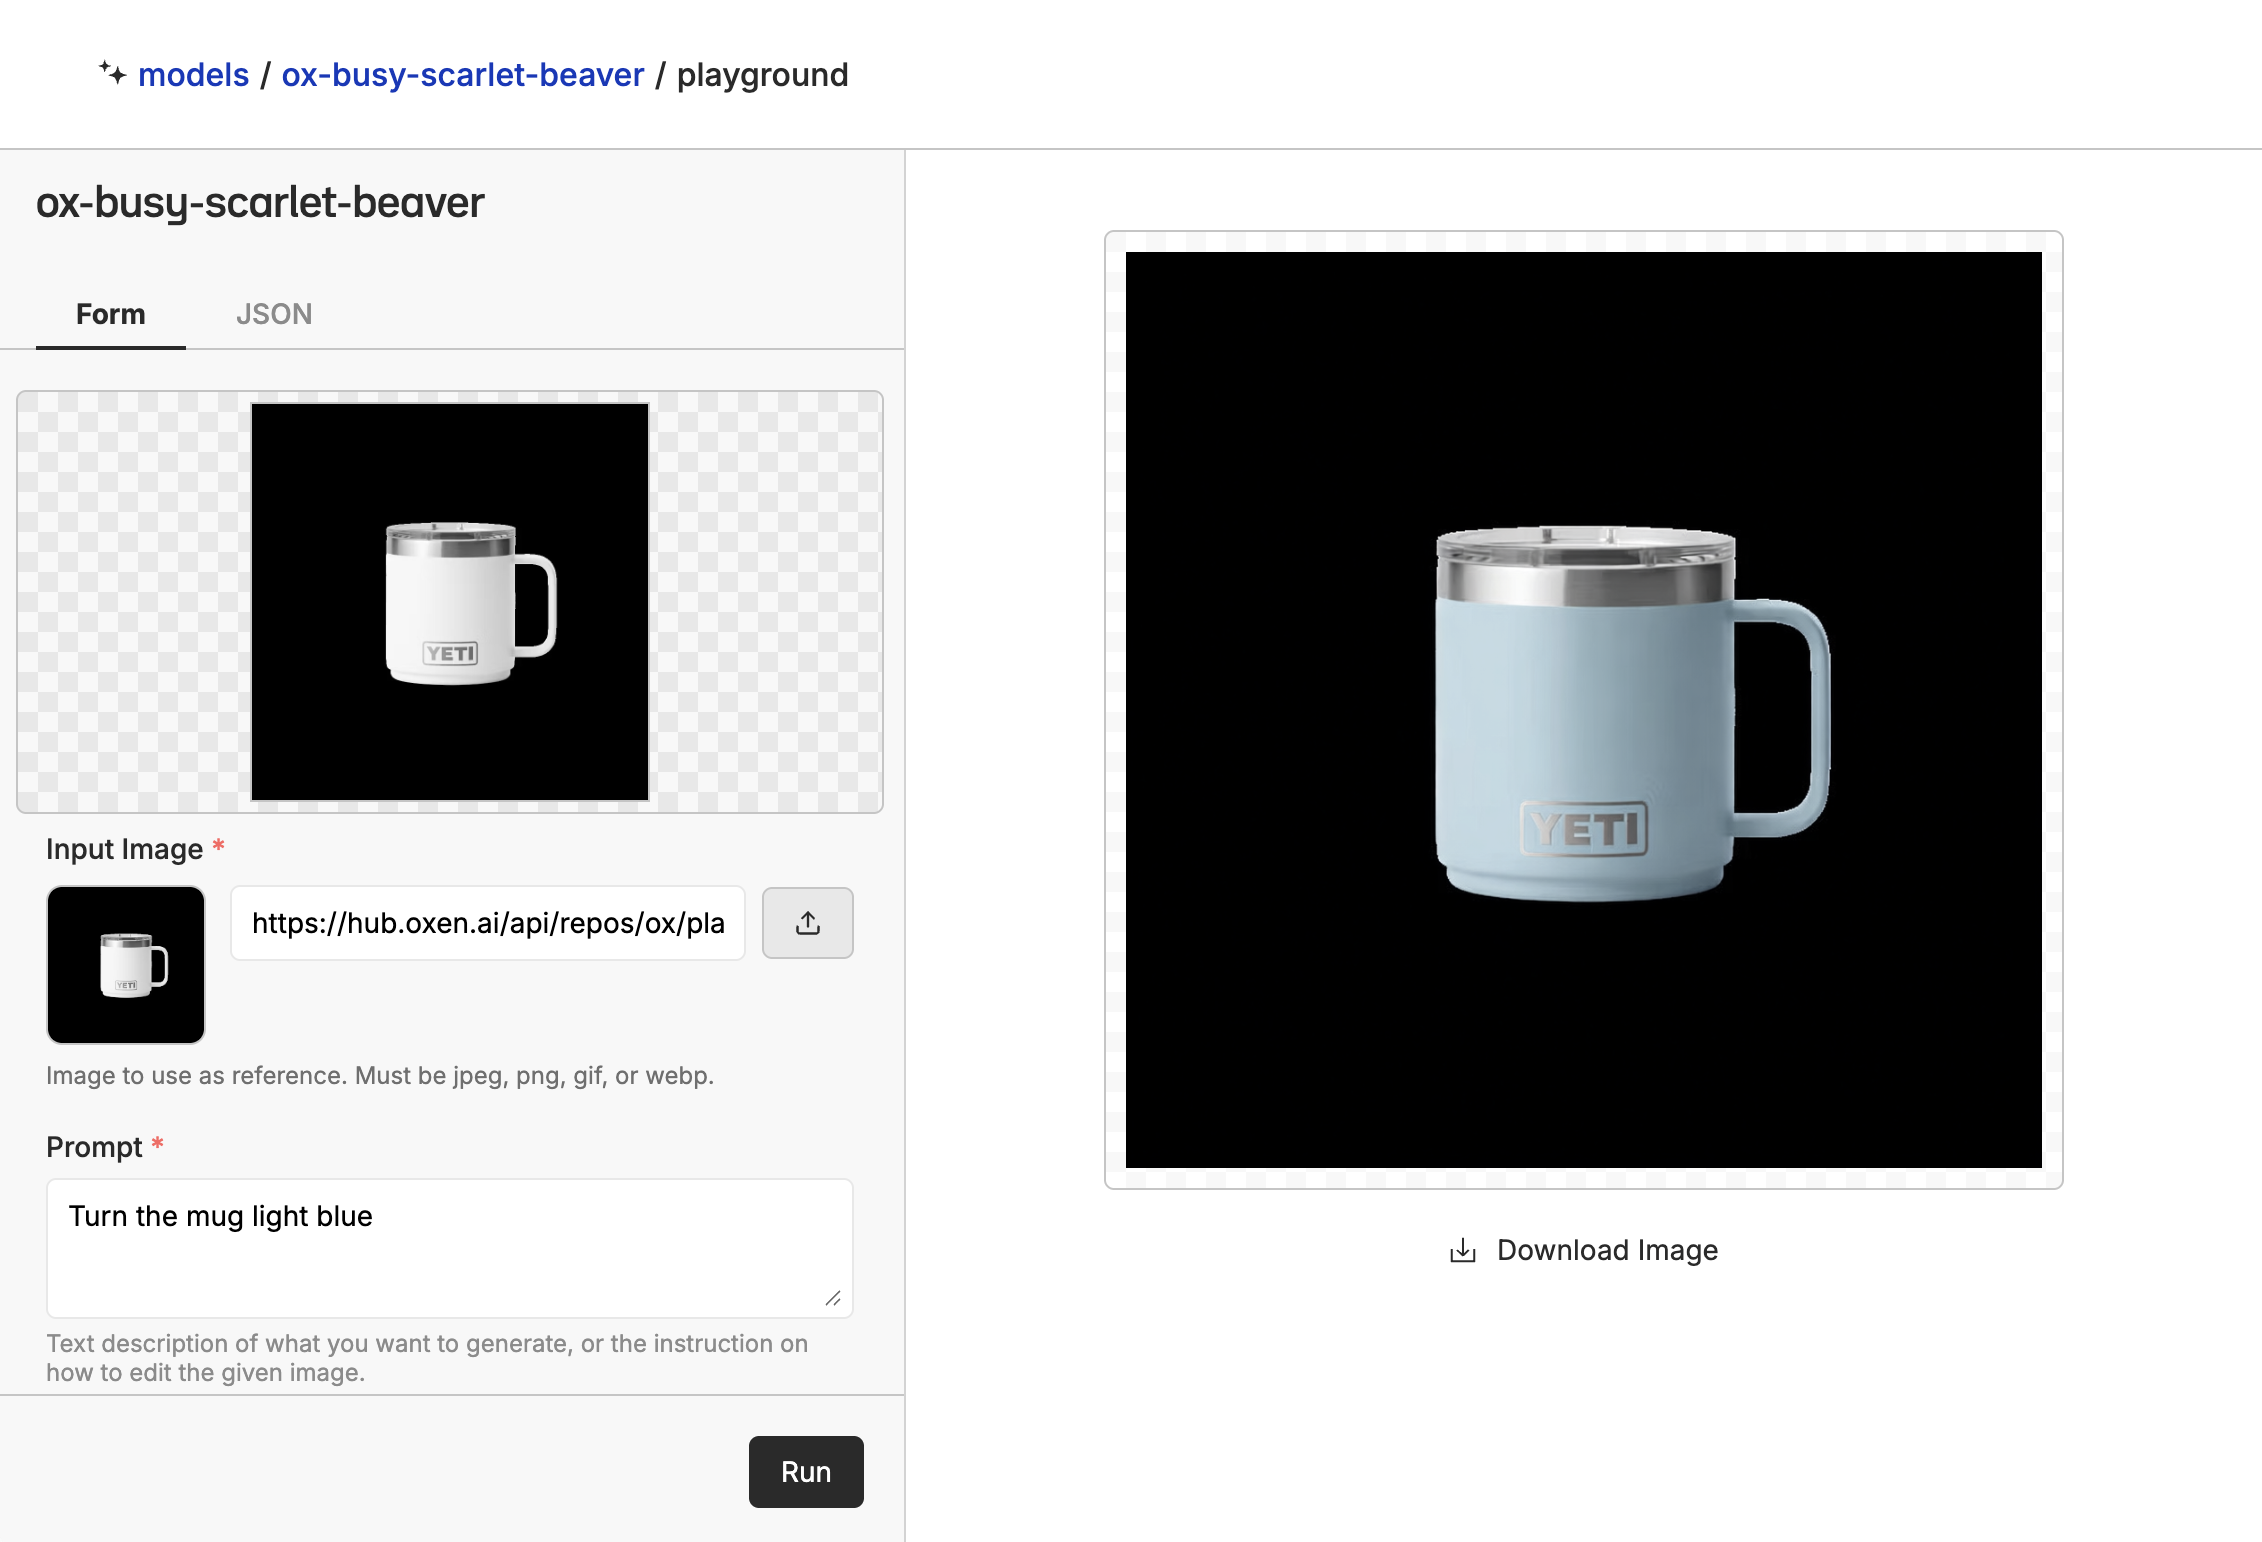 The playground will save a history of your prompts and images so that you can refer back to them later.
## Exporting the Model
All of the model weights are stored back in your repository when the fine-tune is complete. Navigate to the fine-tune info tab, and you will see a link to the model weights. This is helpful if you want to download the weights to run in ComfyUI or your own infrastructure.
The playground will save a history of your prompts and images so that you can refer back to them later.
## Exporting the Model
All of the model weights are stored back in your repository when the fine-tune is complete. Navigate to the fine-tune info tab, and you will see a link to the model weights. This is helpful if you want to download the weights to run in ComfyUI or your own infrastructure.
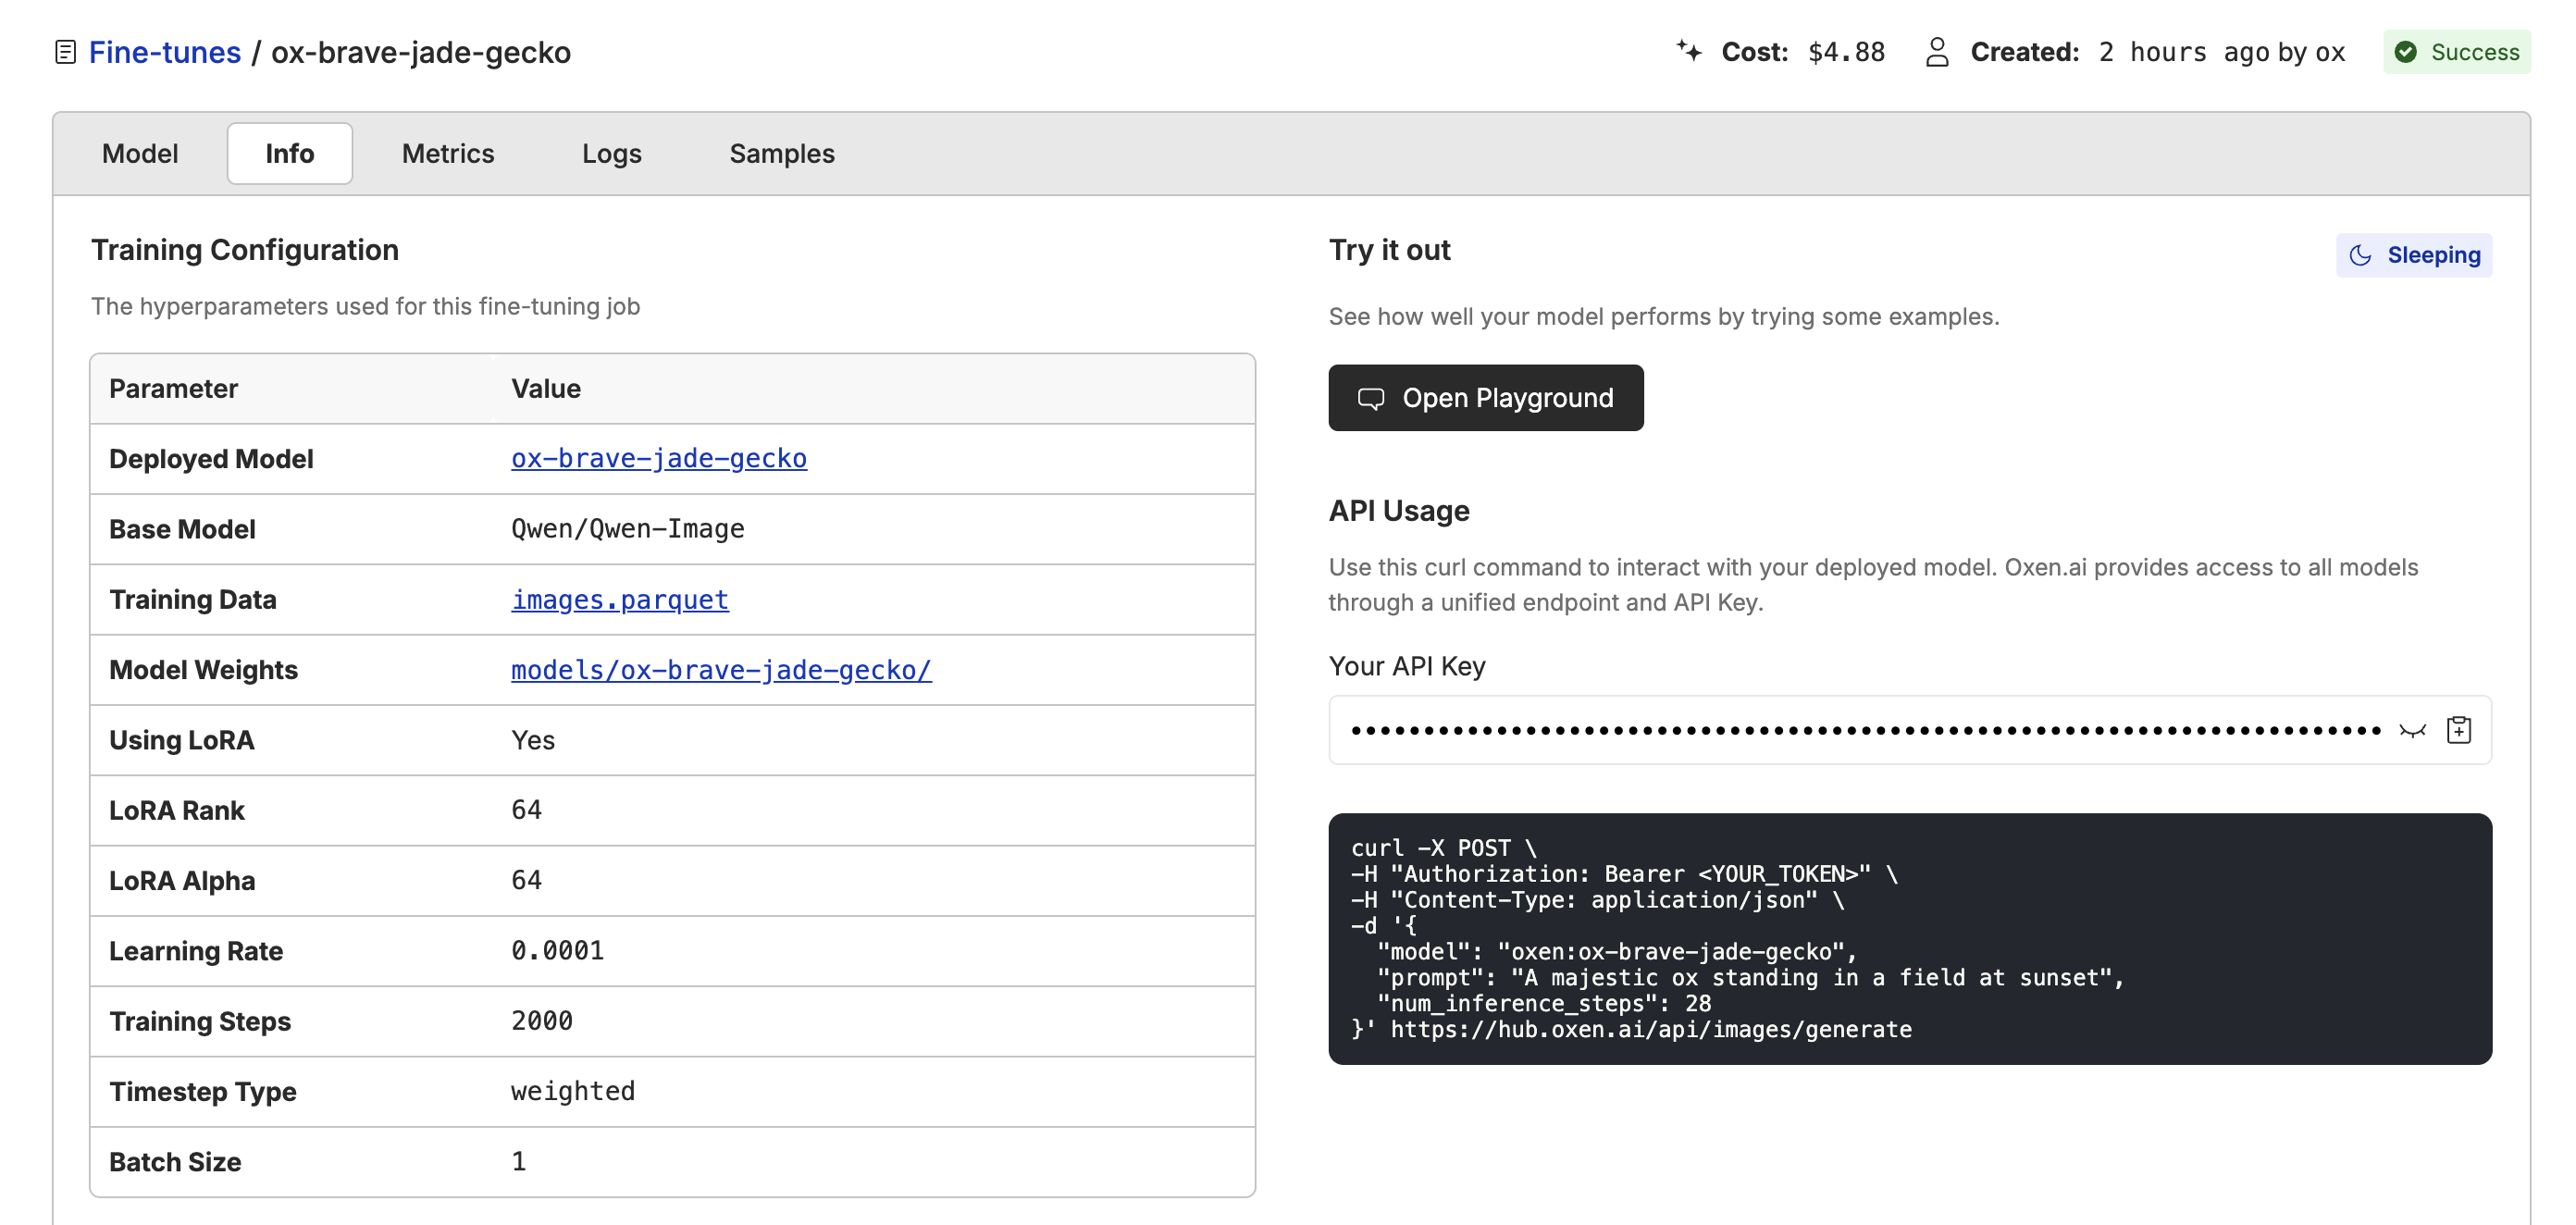 This will take you to the file viewer where you can download the model safetensors.
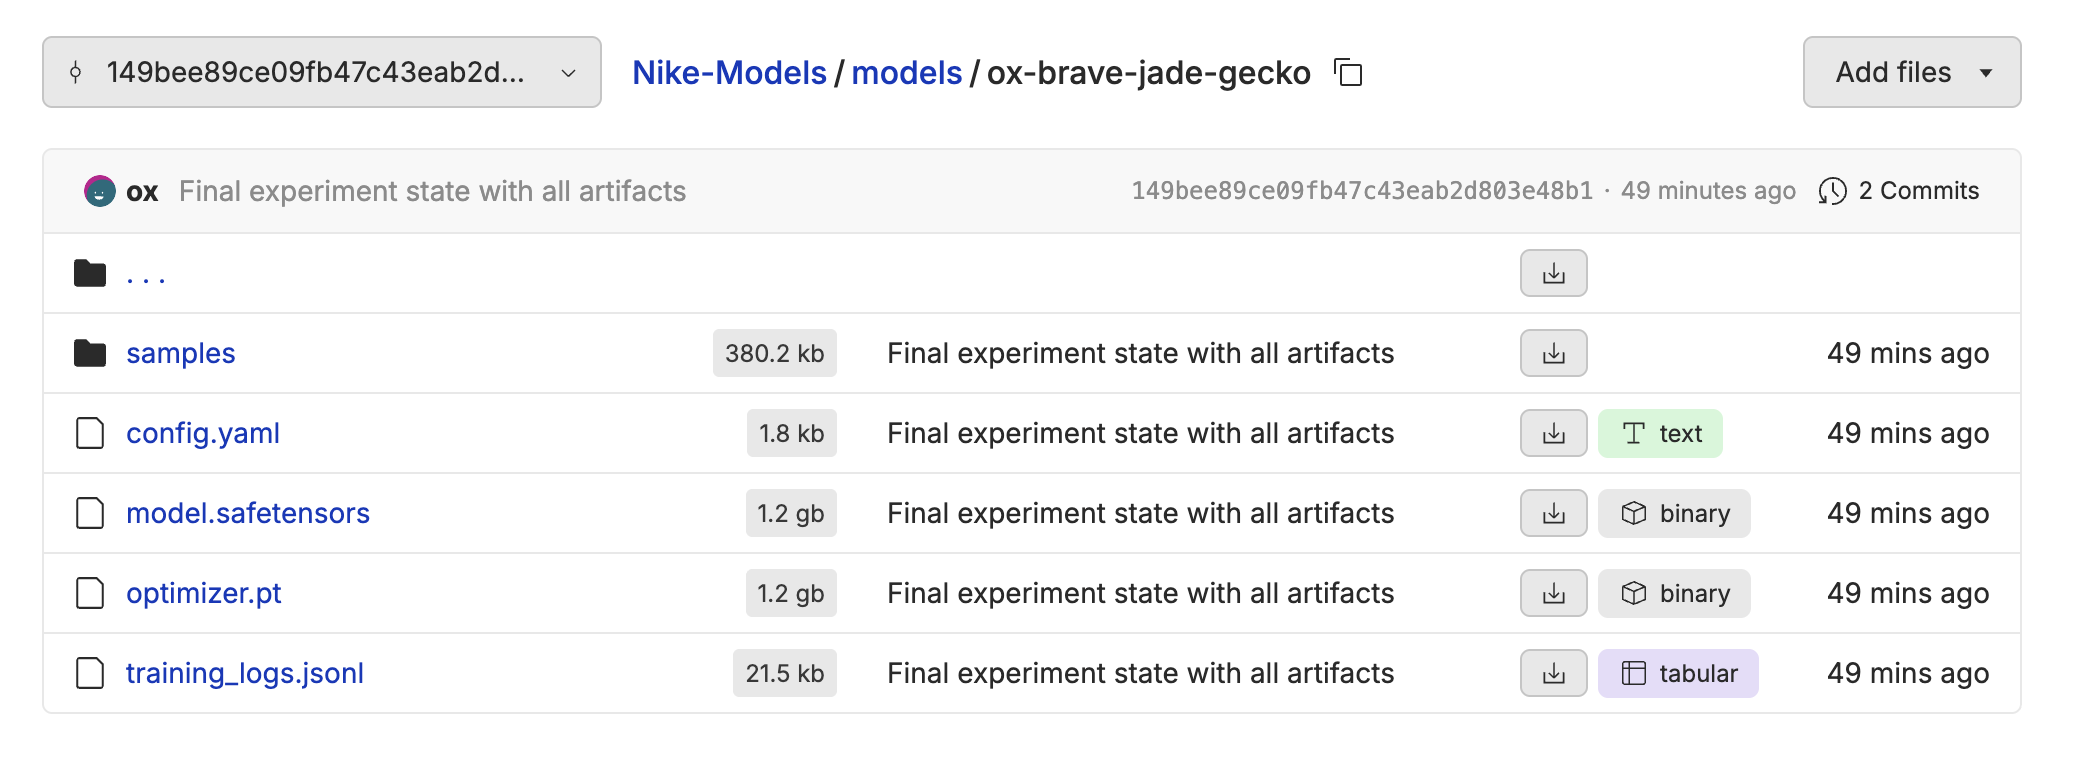 You can also automatically download the weights with the [oxen cli](/getting-started/command-line/start_repository) or [python library](/python-api).