> ## Documentation Index
> Fetch the complete documentation index at: https://docs.oxen.ai/llms.txt
> Use this file to discover all available pages before exploring further.
# 🏷️ Labeling Workflows
> Edit data on Oxen.ai or build your own workflows with the Python Library.
# Web UI vs. Python
With Oxen.ai you can either perform your labeling workflows directly in the [web interface](https://oxen.ai), or build your own using the [Python Library](/features/labeling_data#using-the-python-library).
## Using the UI
Oxen.ai has a data frame interface built in that allows your to view, query and edit any csv, json, or parquet file. The data can be multimodal, allowing you to see images and text side by side.
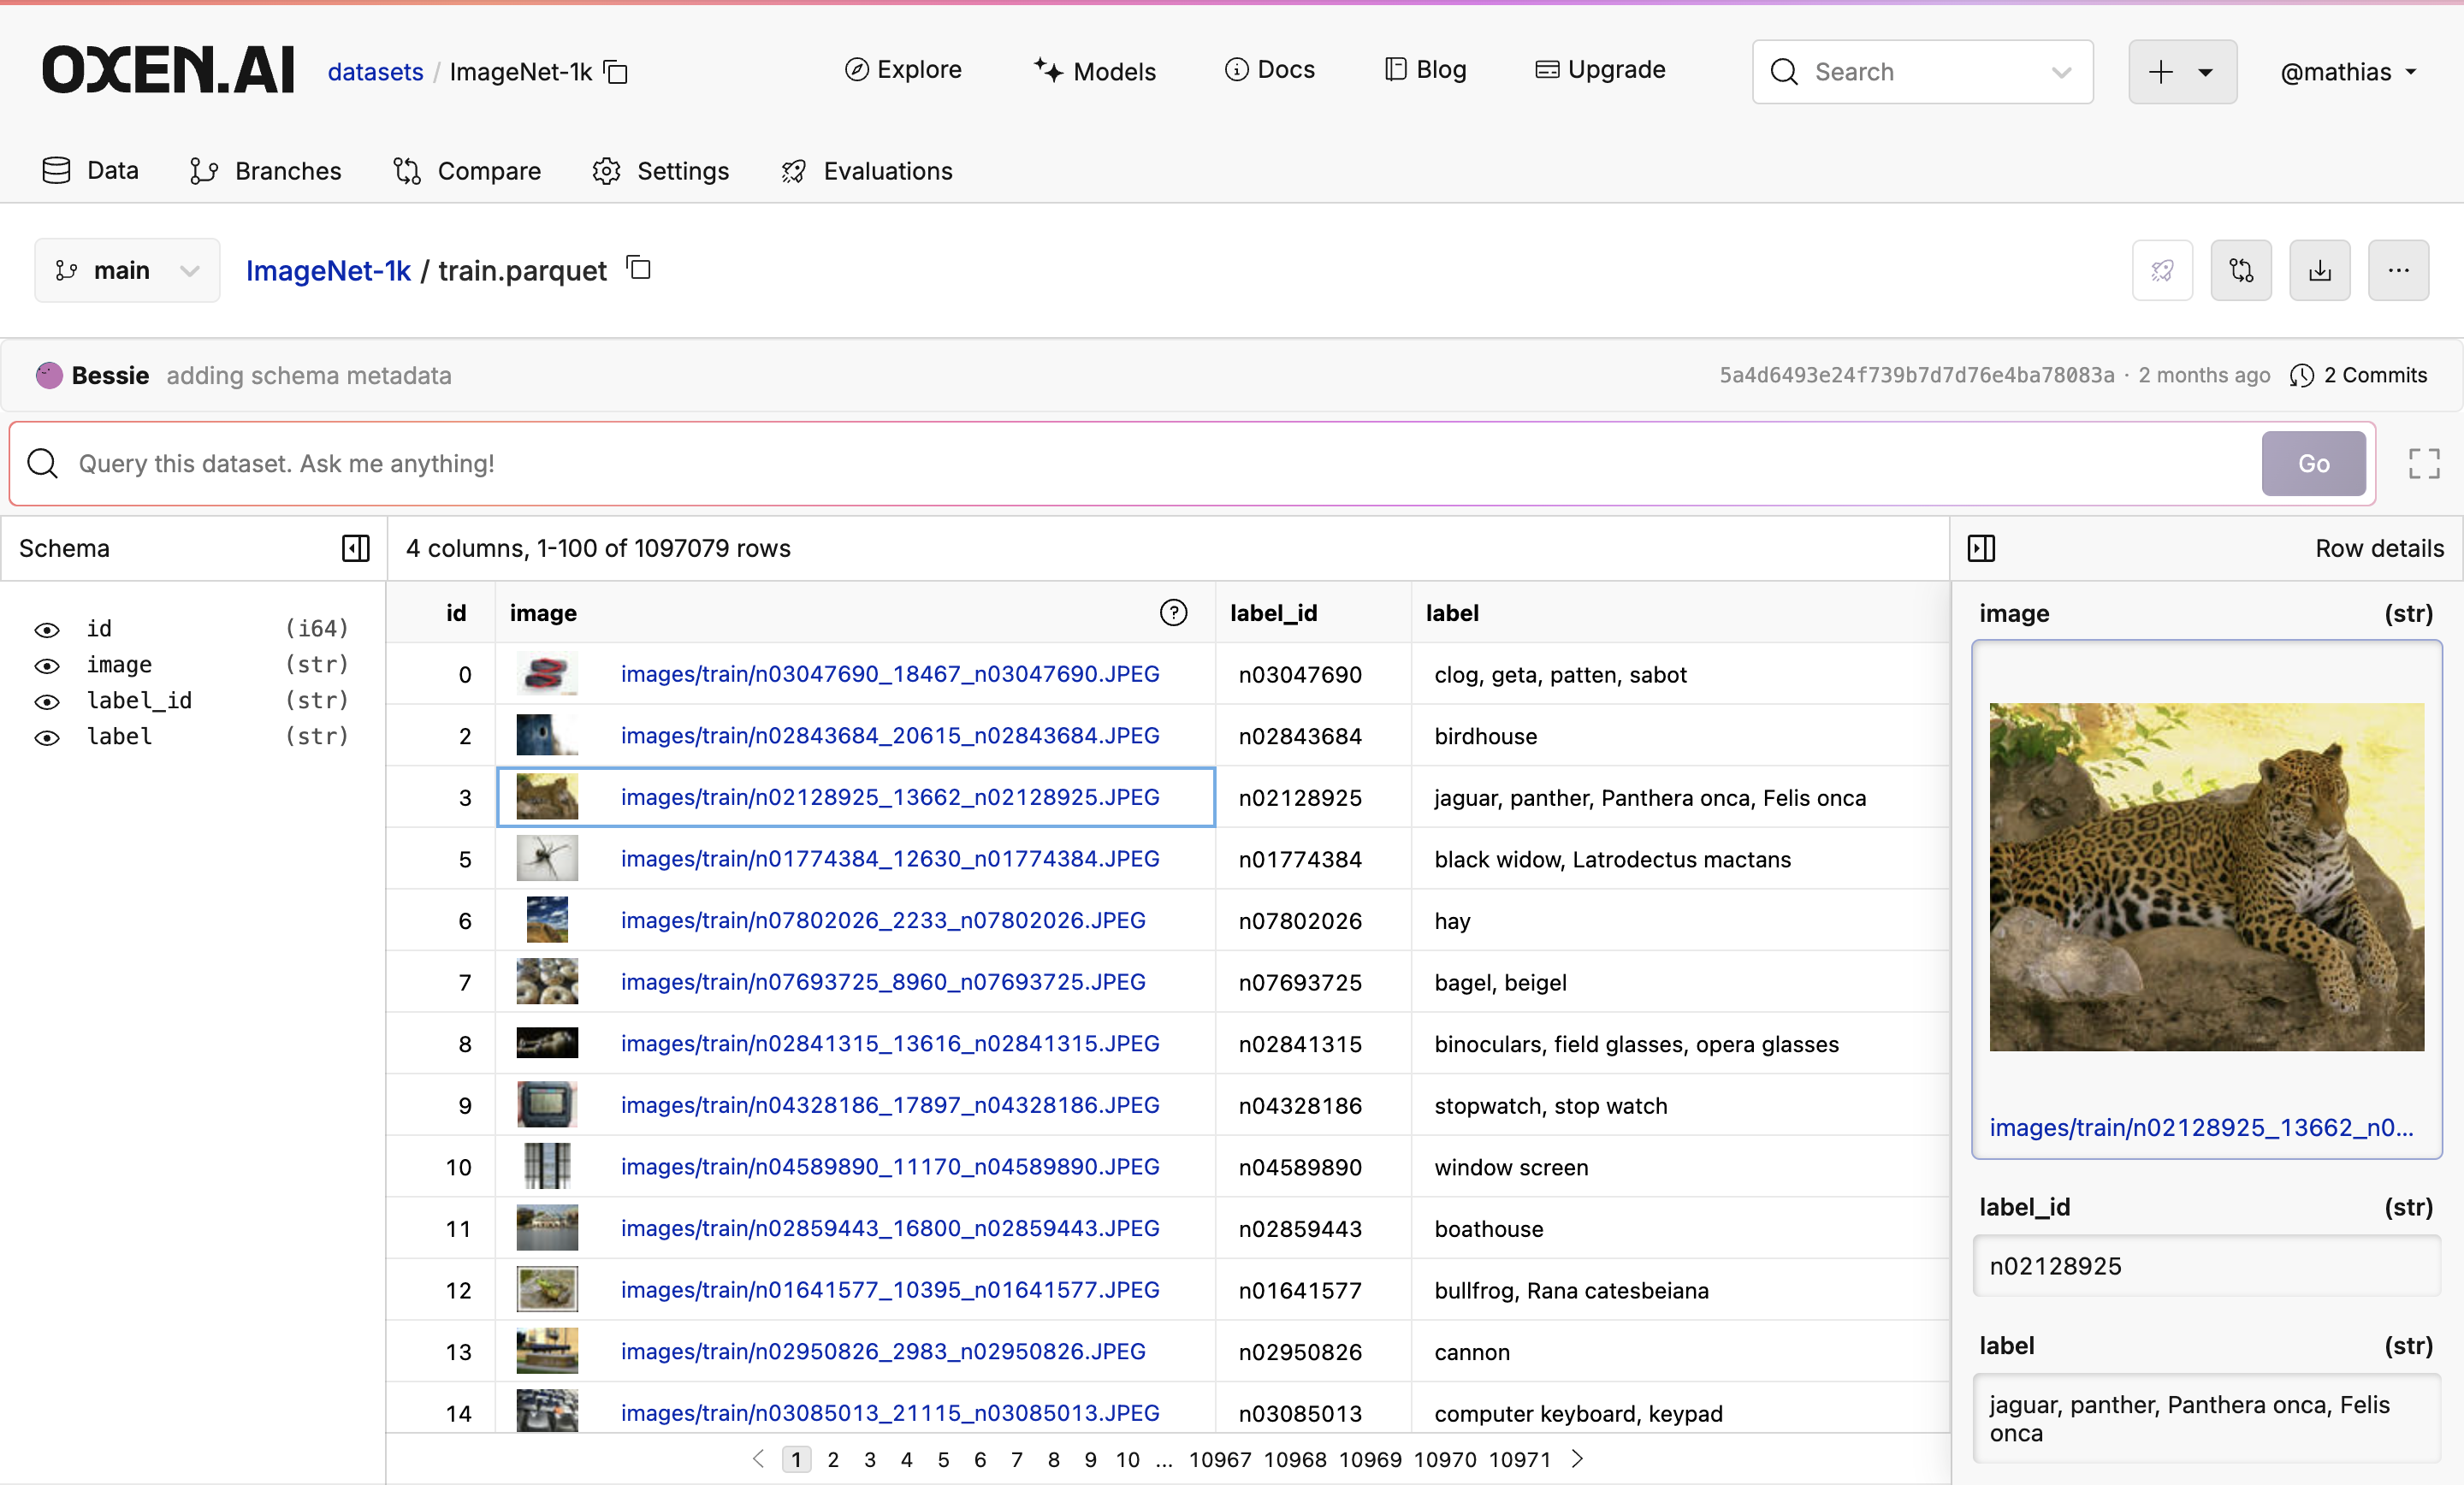 If you are using google sheets or excel for your datasets this is a great place to get started before building out more powerful workflows.
### Upload Your Dataset
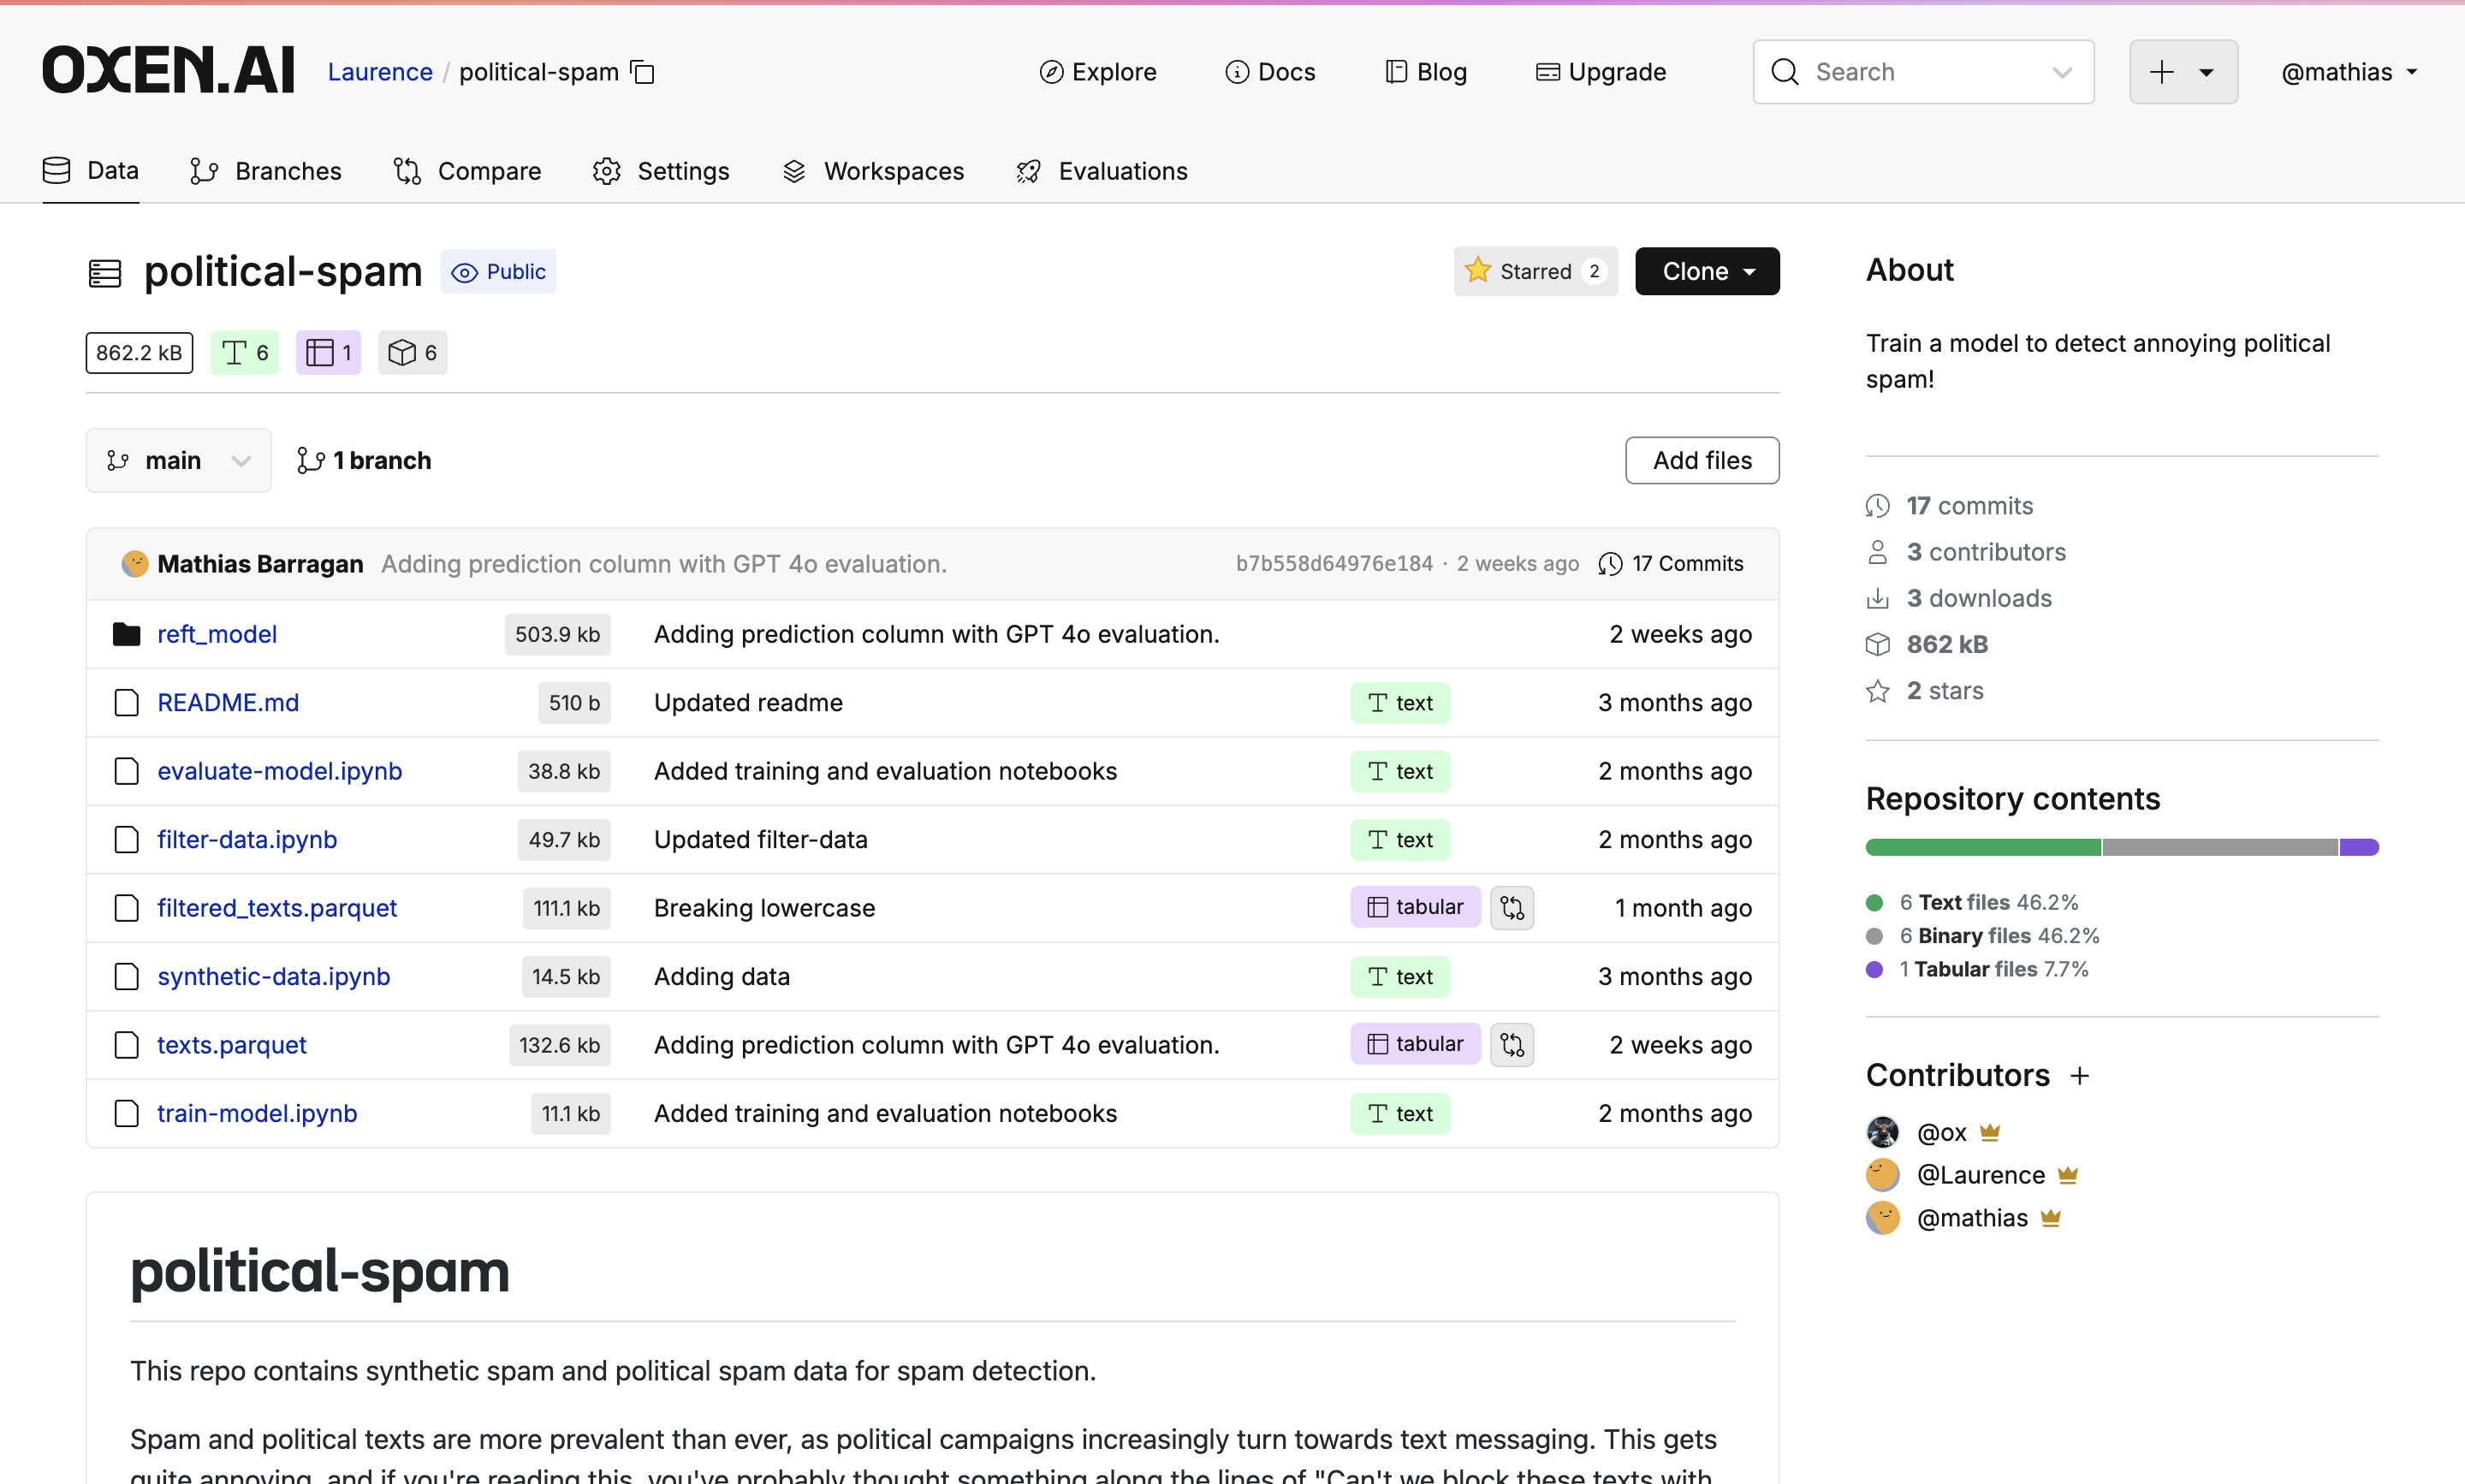
Navigate to the repository you want to work with, or create a new one. If you need starter data, you can find example datasets on our [explore page](https://www.oxen.ai/explore). To follow along with the example, you can clone the [Synthetic Political Spam Dataset](https://www.oxen.ai/Laurence/political-spam) we are using.
```bash theme={null}
oxen clone https://hub.oxen.ai/Laurence/political-spam --all
oxen create-remote --name "your-username/political-spam"
oxen config --set-remote origin "your-username/political-spam"
oxen push origin main
```
If you are using google sheets or excel for your datasets this is a great place to get started before building out more powerful workflows.
### Upload Your Dataset
Navigate to the repository you want to work with, or create a new one. If you need starter data, you can find example datasets on our [explore page](https://www.oxen.ai/explore). To follow along with the example, you can clone the [Synthetic Political Spam Dataset](https://www.oxen.ai/Laurence/political-spam) we are using.
```bash theme={null}
oxen clone https://hub.oxen.ai/Laurence/political-spam --all
oxen create-remote --name "your-username/political-spam"
oxen config --set-remote origin "your-username/political-spam"
oxen push origin main
```
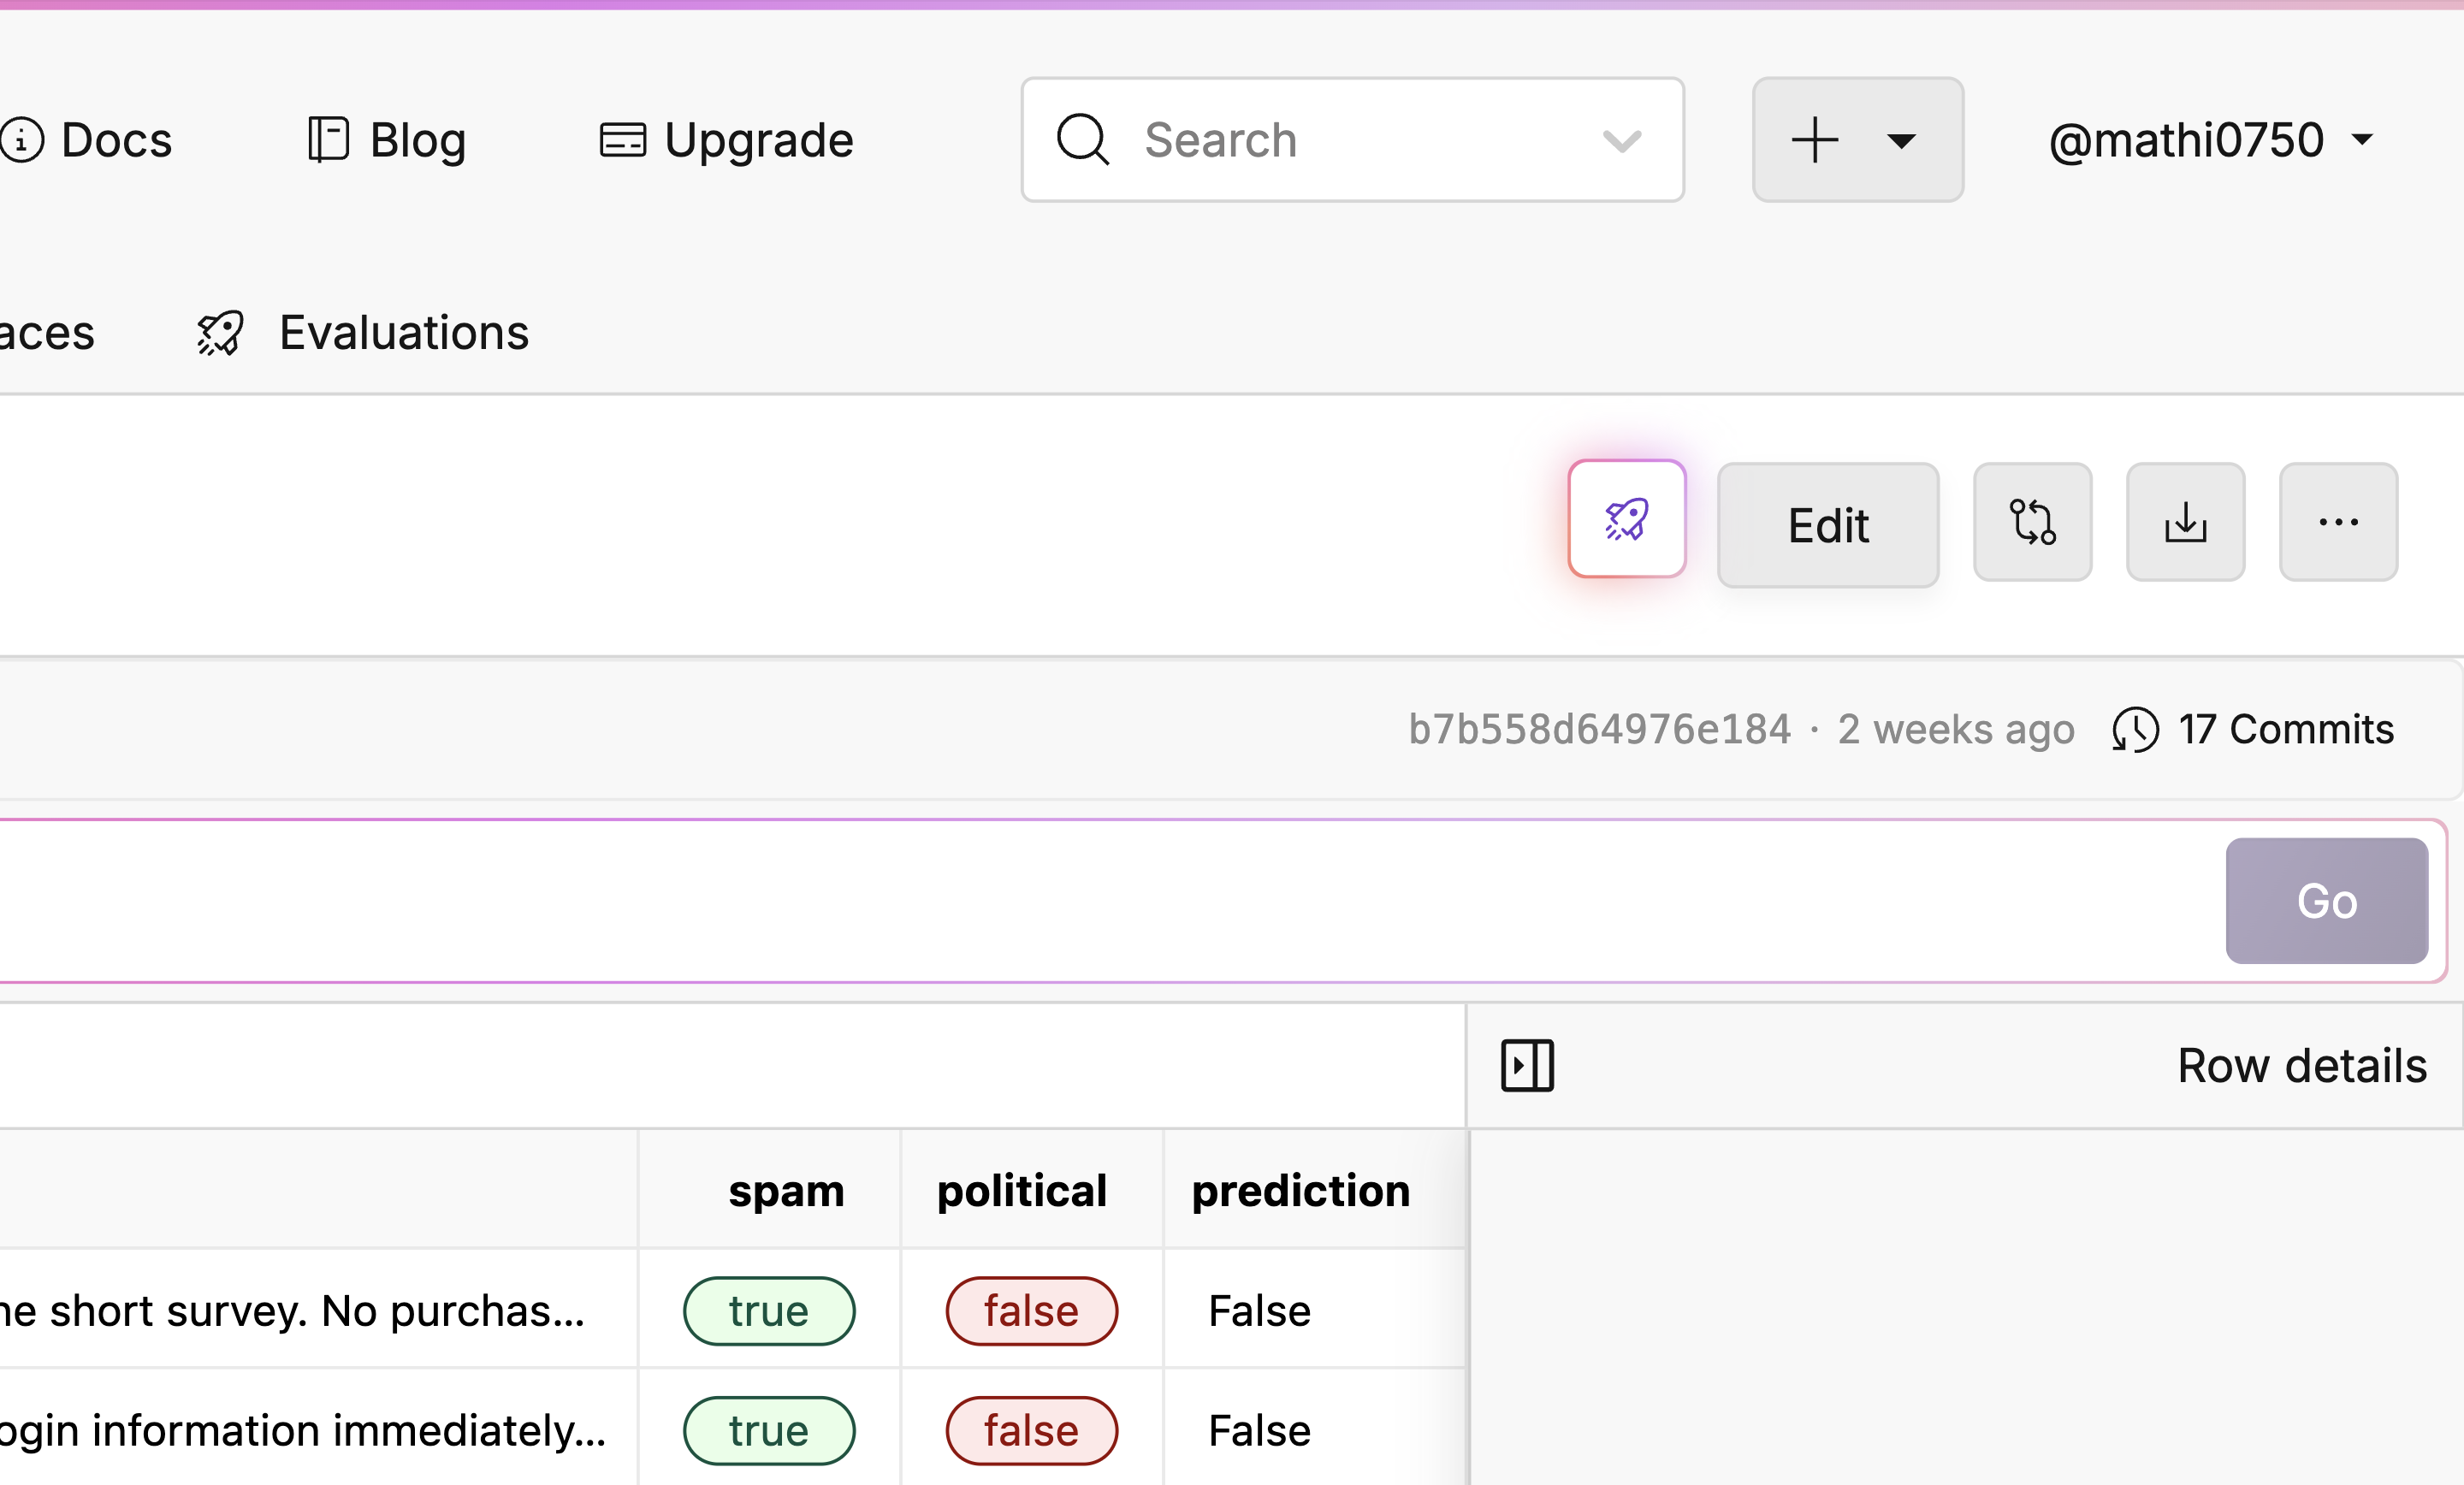
 ### Edit File
Open the file you want to edit and press the *Edit* button above your data.
### Edit File
Open the file you want to edit and press the *Edit* button above your data.
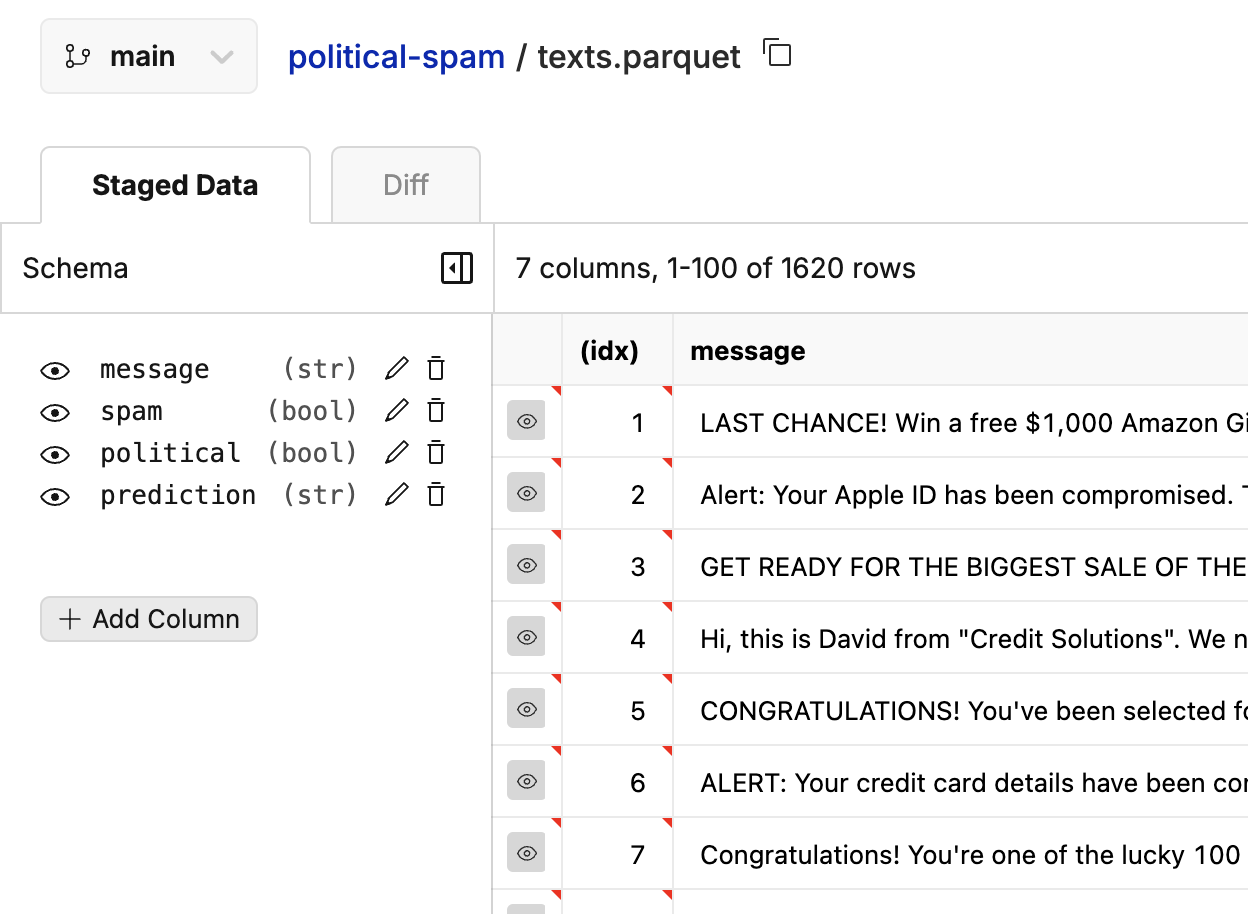
 ### Editing Columns
To edit columns, go to the *Schema* section on the left of your dataset. Here, there are four actions you can take:
* Add a Column: Click the *Add Column* button.
* Delete a Column: Click the Trash icon next to the column name you would like to delete.
* Edit a Column: Click the pencil icon to change the column name or the data type.
* Hide a Column: Click the Eye icon to the left of the column name you would like to hide for the edit.
### Editing Columns
To edit columns, go to the *Schema* section on the left of your dataset. Here, there are four actions you can take:
* Add a Column: Click the *Add Column* button.
* Delete a Column: Click the Trash icon next to the column name you would like to delete.
* Edit a Column: Click the pencil icon to change the column name or the data type.
* Hide a Column: Click the Eye icon to the left of the column name you would like to hide for the edit.
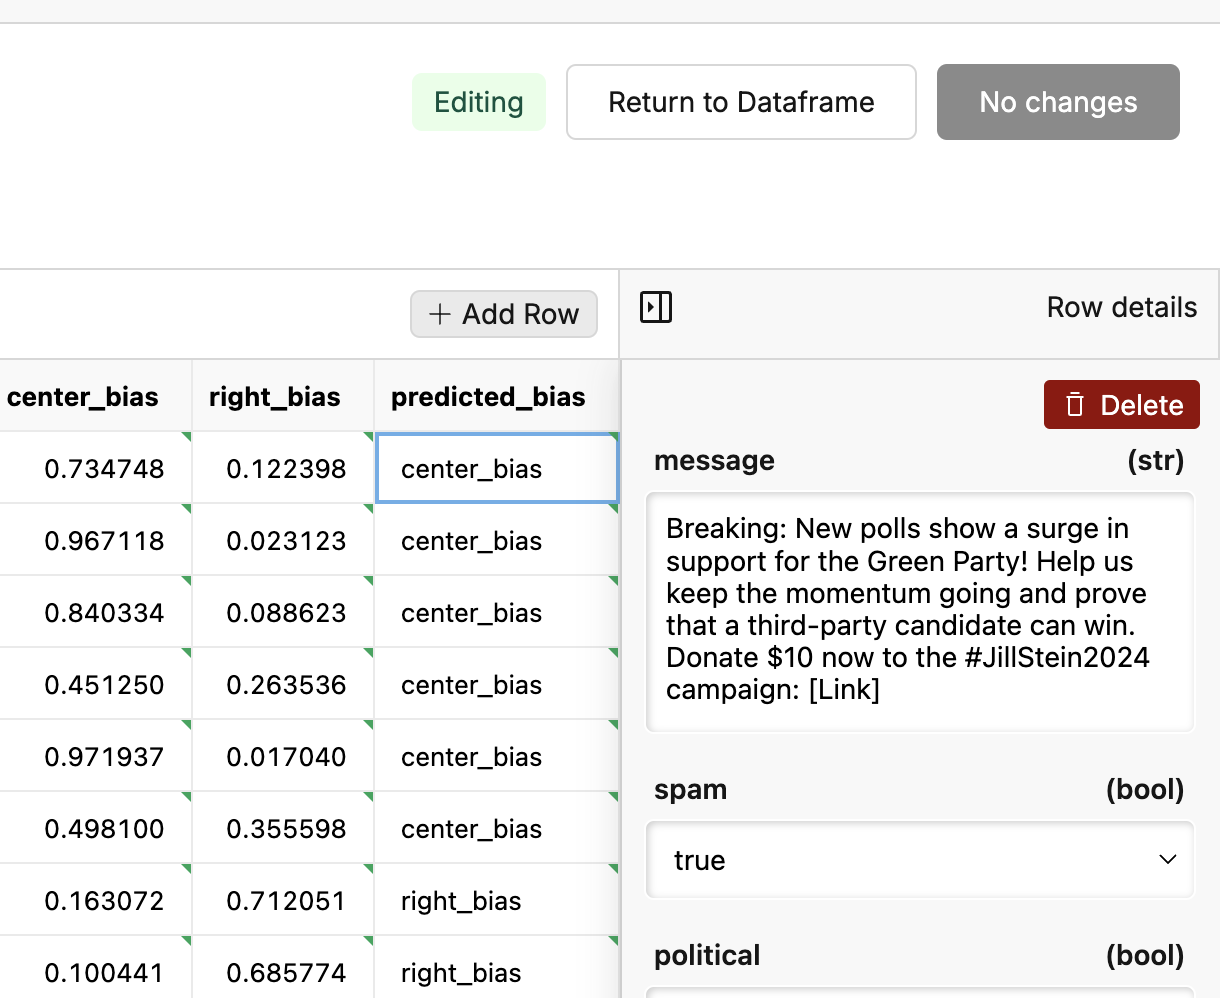
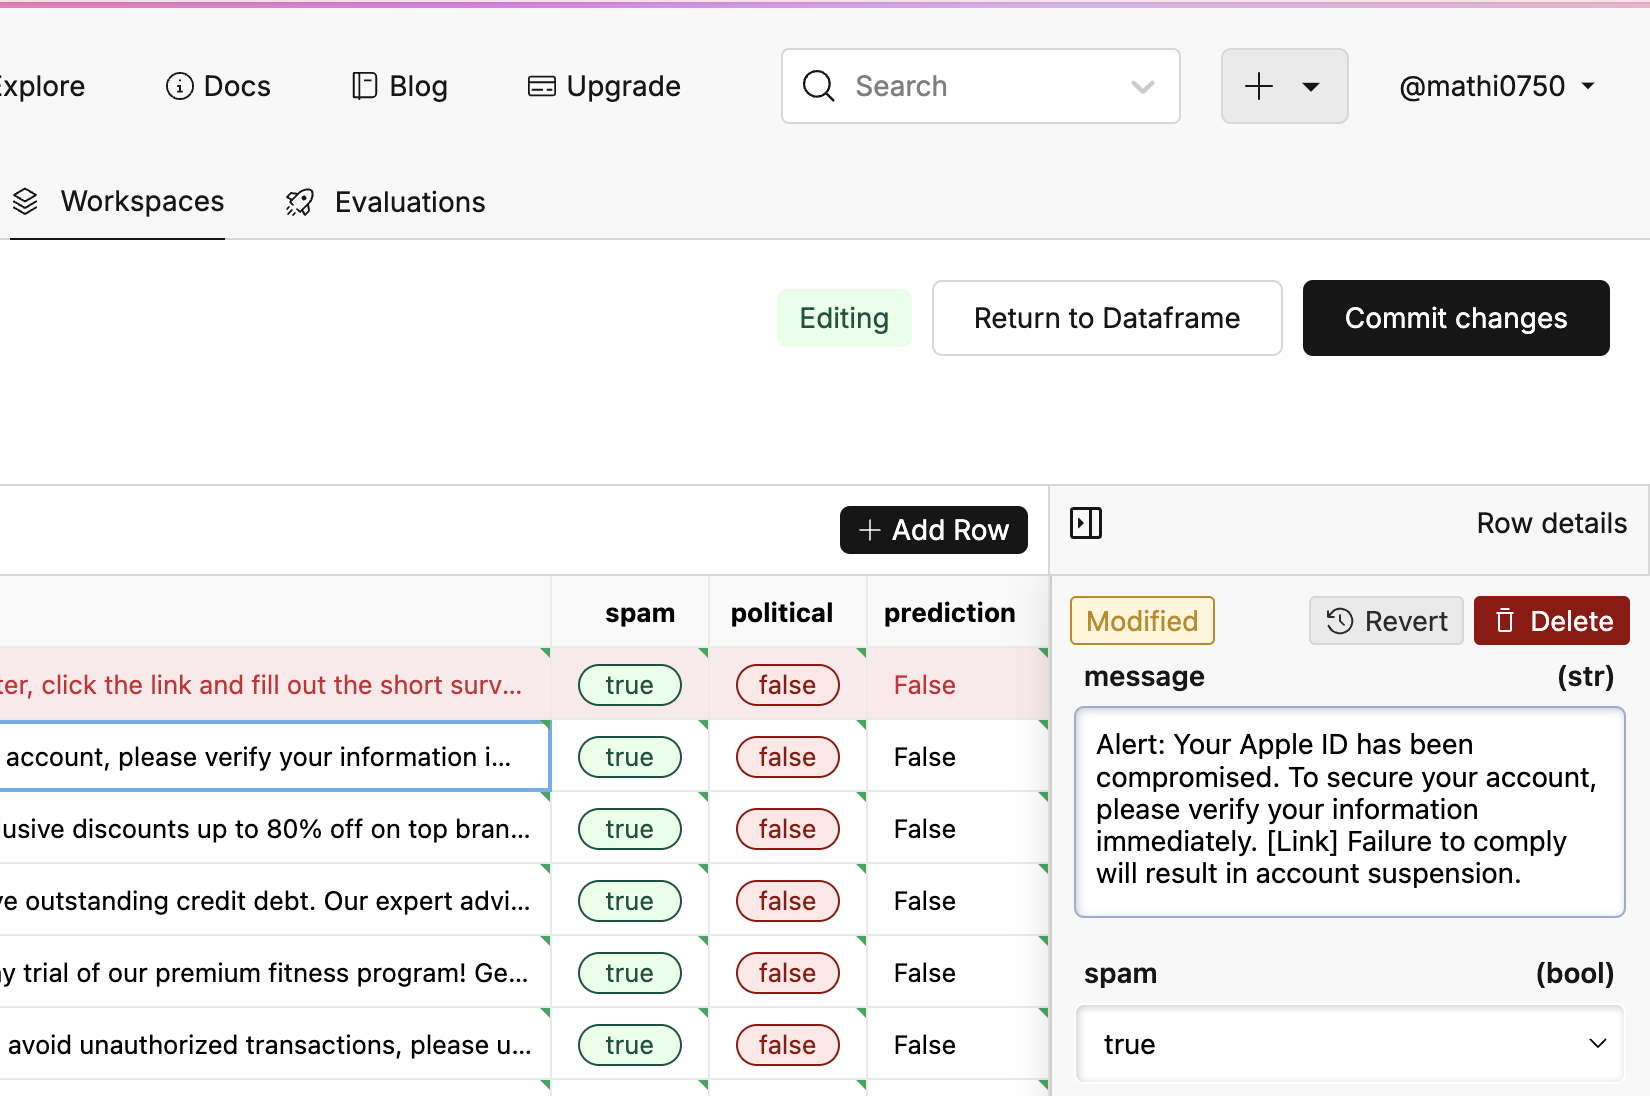
 ### Editing Rows
To edit your rows, there are two actions you can take:
* Add a Row: Click the *Add Row* button to get a new blank row at the end of your dataset.
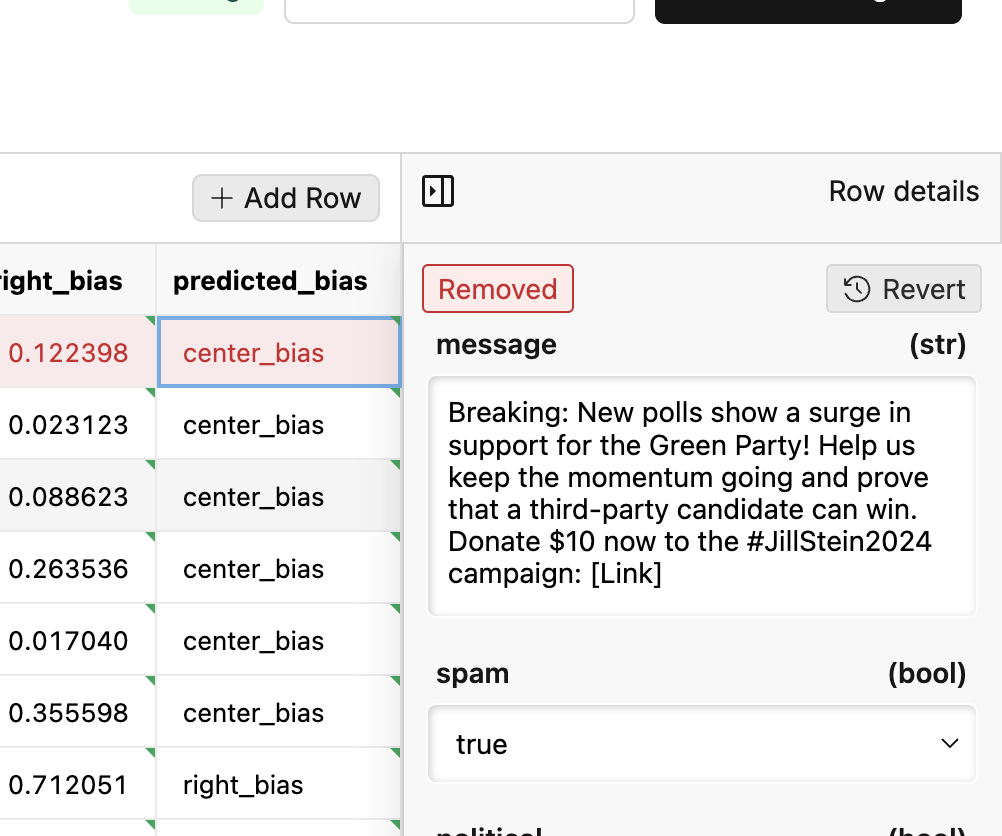
* Delete a Row: Click one of the cells in the row you would like to delete. Then click the large red "delete" button on the right of the screen.
### Editing Rows
To edit your rows, there are two actions you can take:
* Add a Row: Click the *Add Row* button to get a new blank row at the end of your dataset.
* Delete a Row: Click one of the cells in the row you would like to delete. Then click the large red "delete" button on the right of the screen.
 To undo a deleted row, click the revert button.
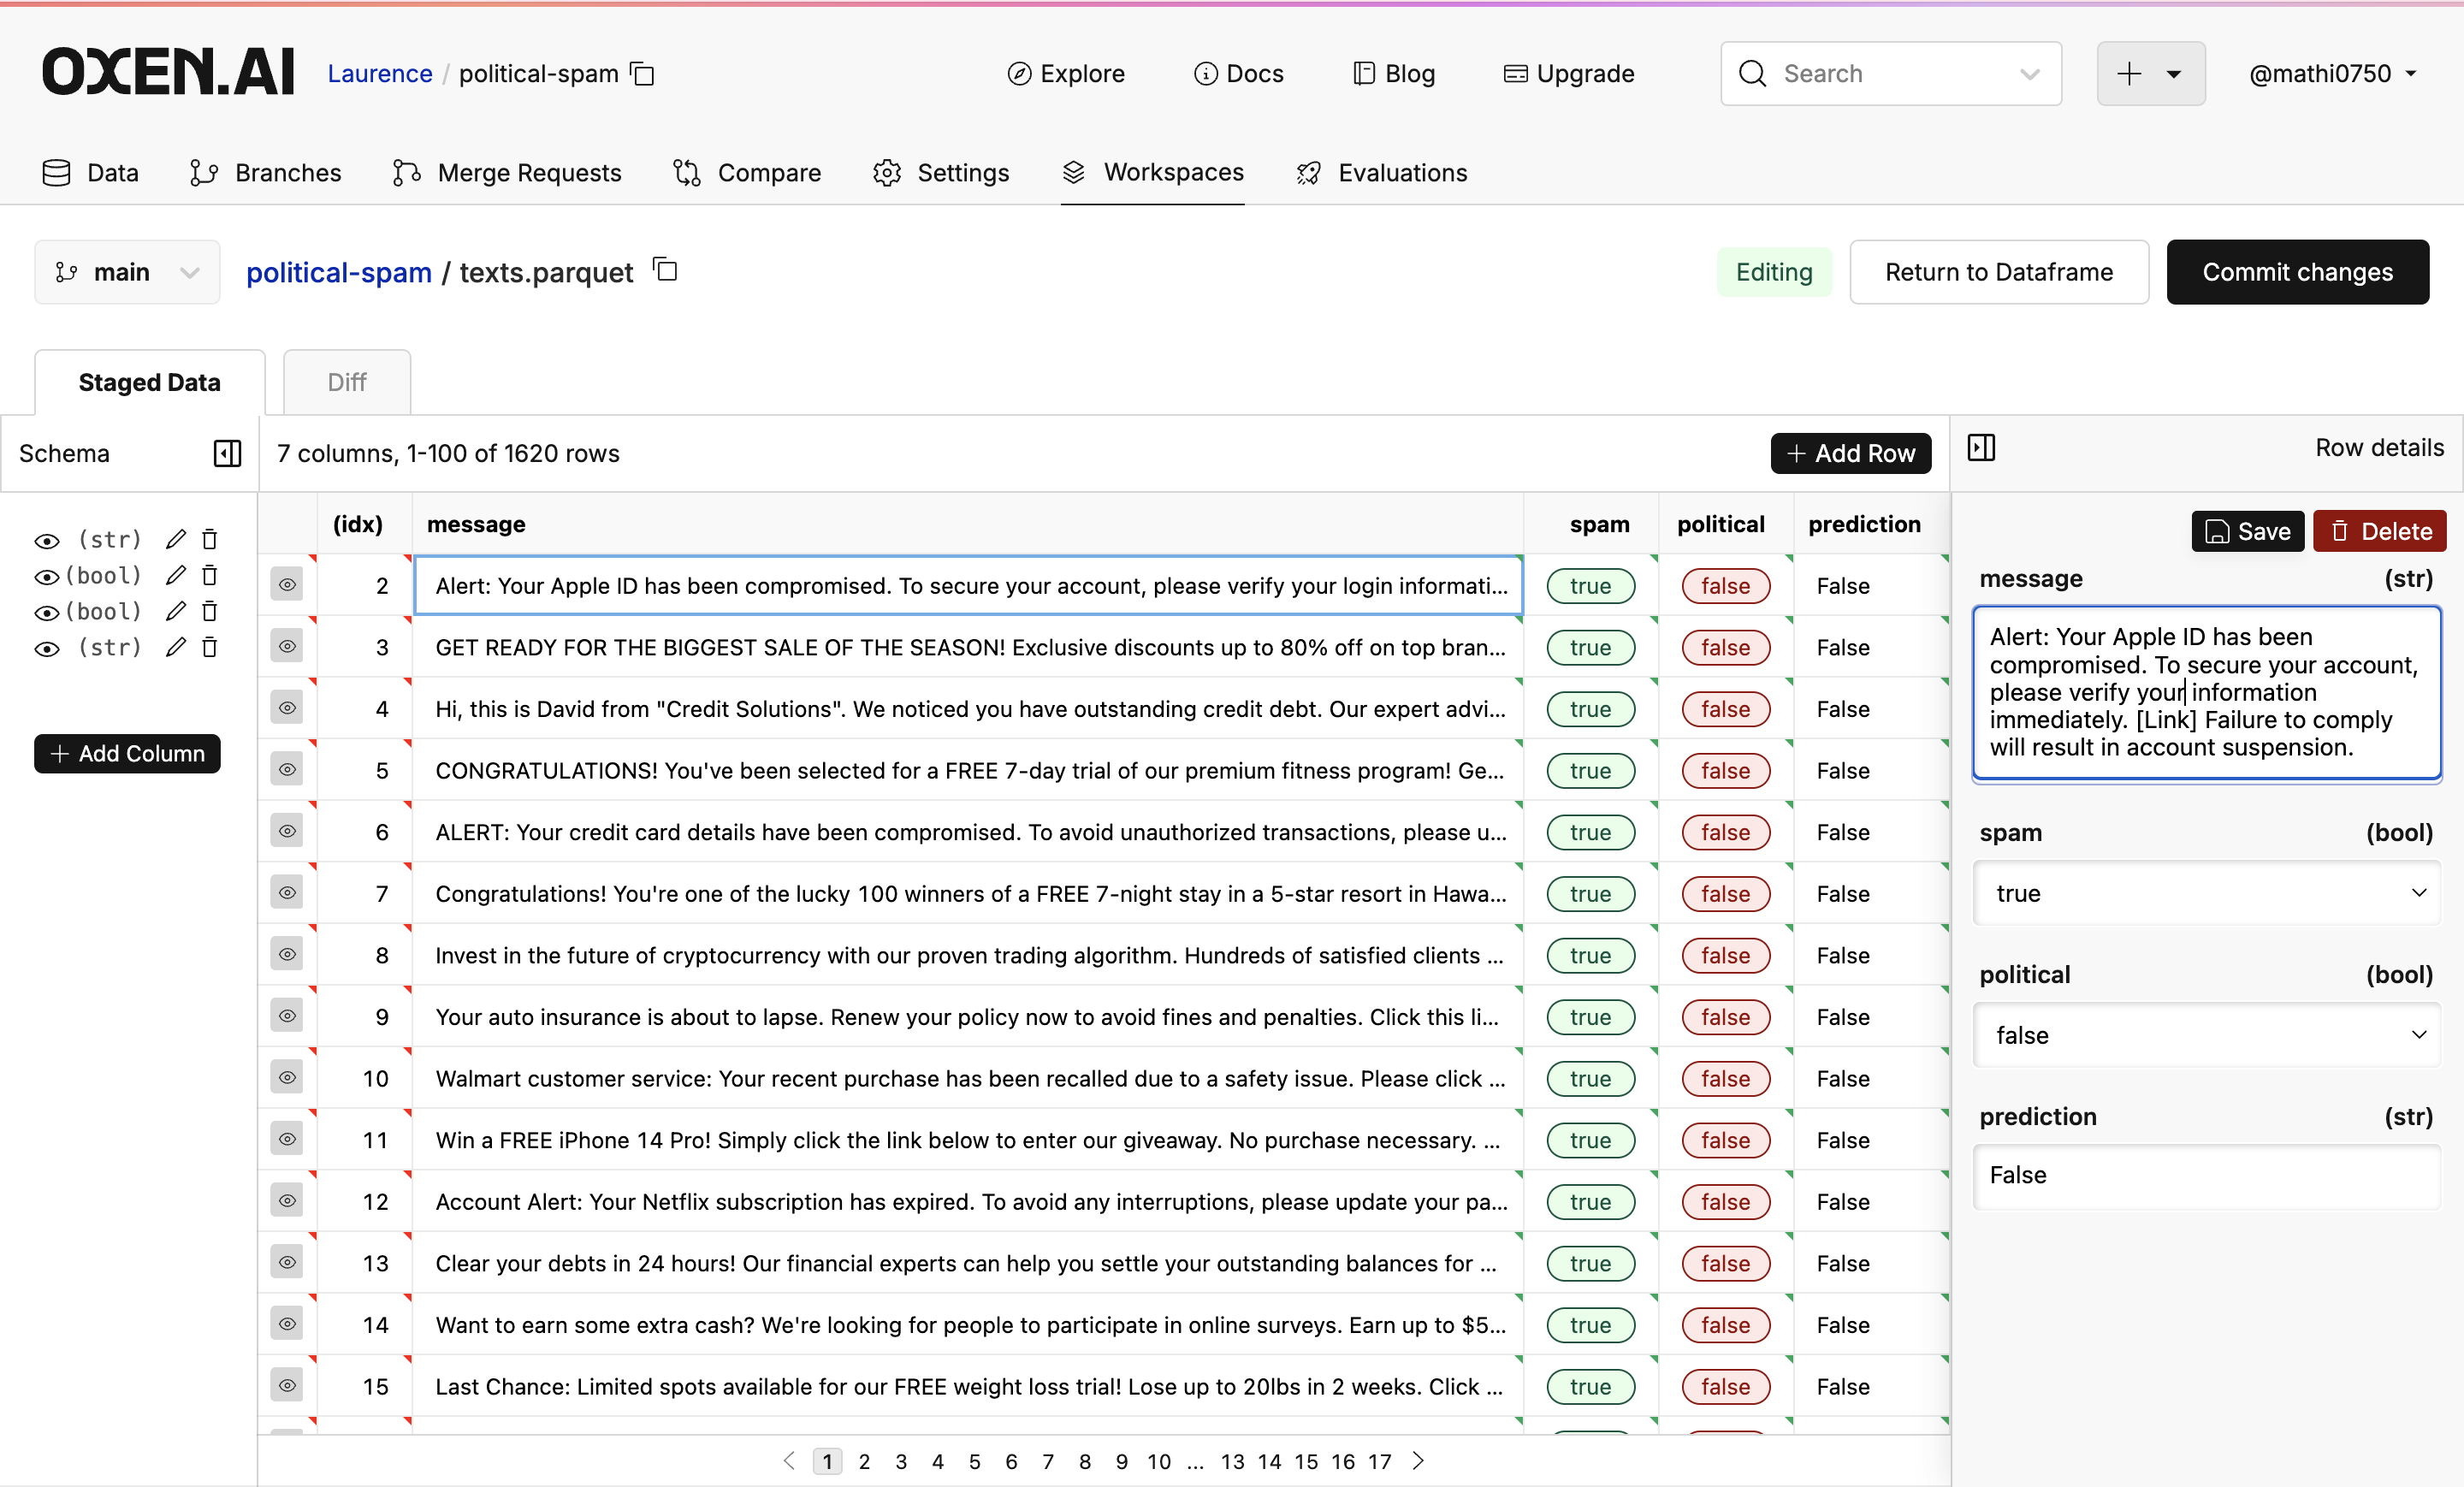
 ### Editing Cells
To edit cells, click on the cell you would like to edit and make any changes you would like to the data. Then click the *Save* button to save progress.
### Editing Cells
To edit cells, click on the cell you would like to edit and make any changes you would like to the data. Then click the *Save* button to save progress.
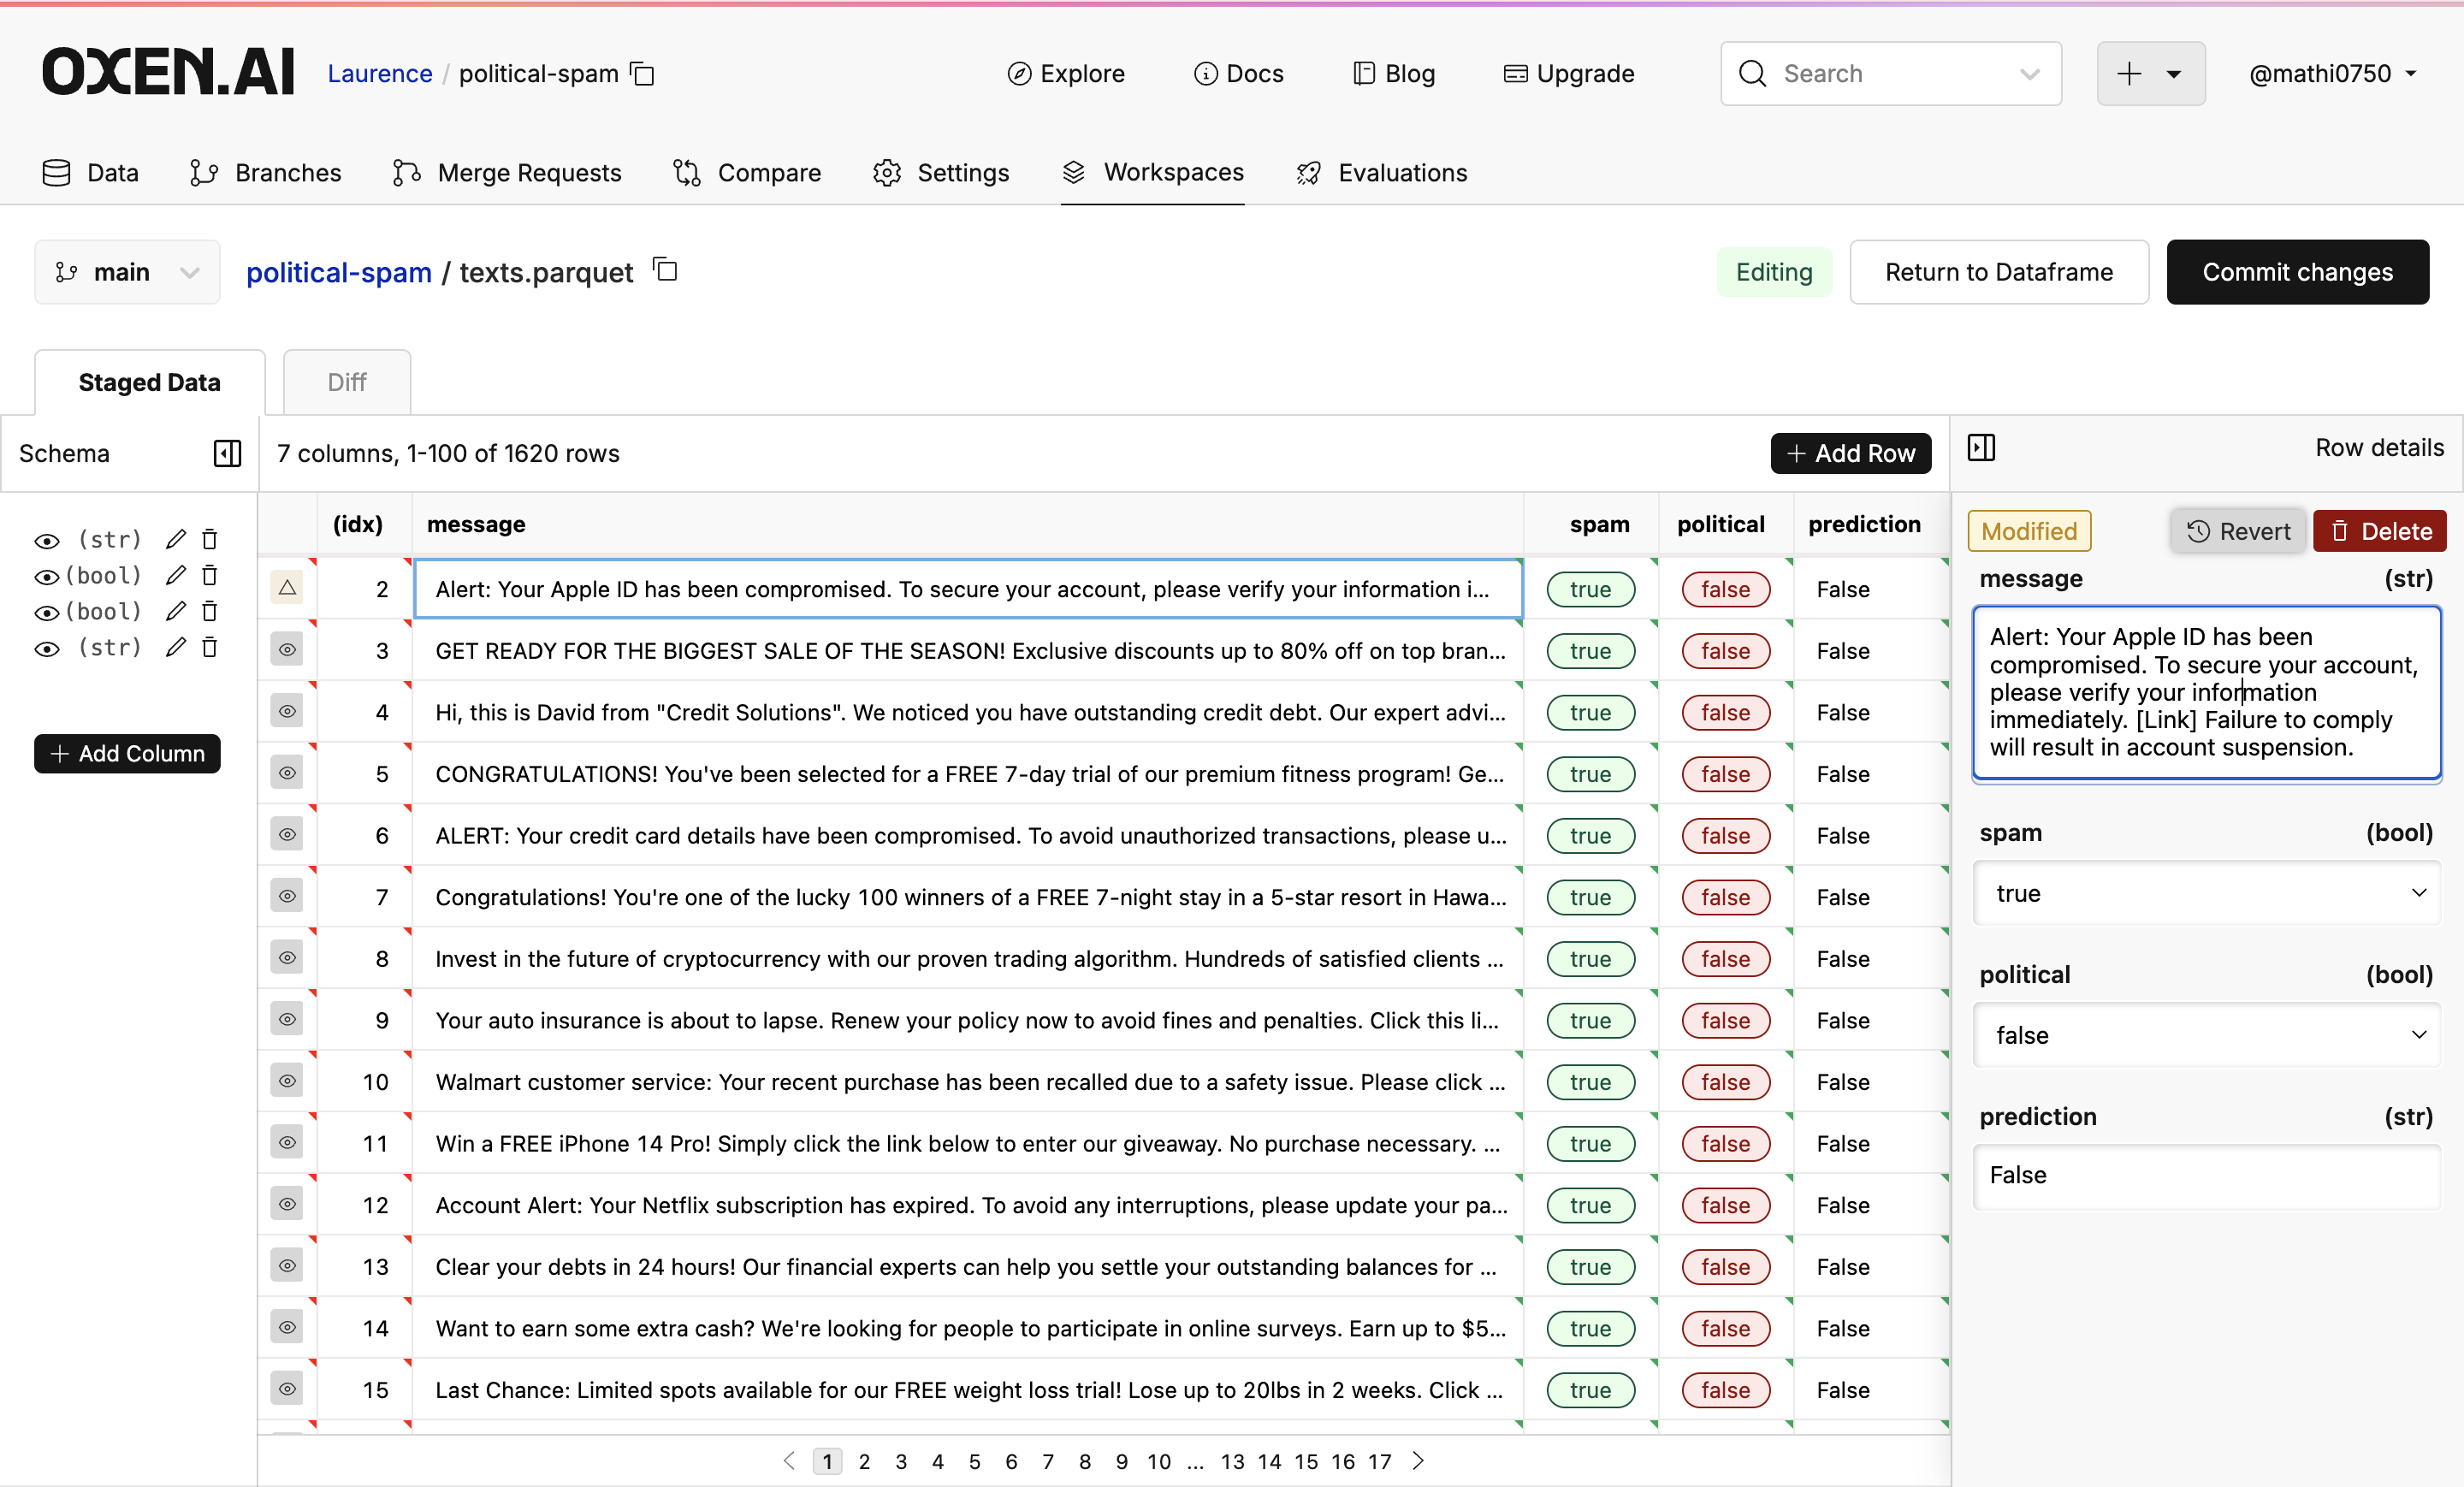
 To undo any saved changes, click the revert button.
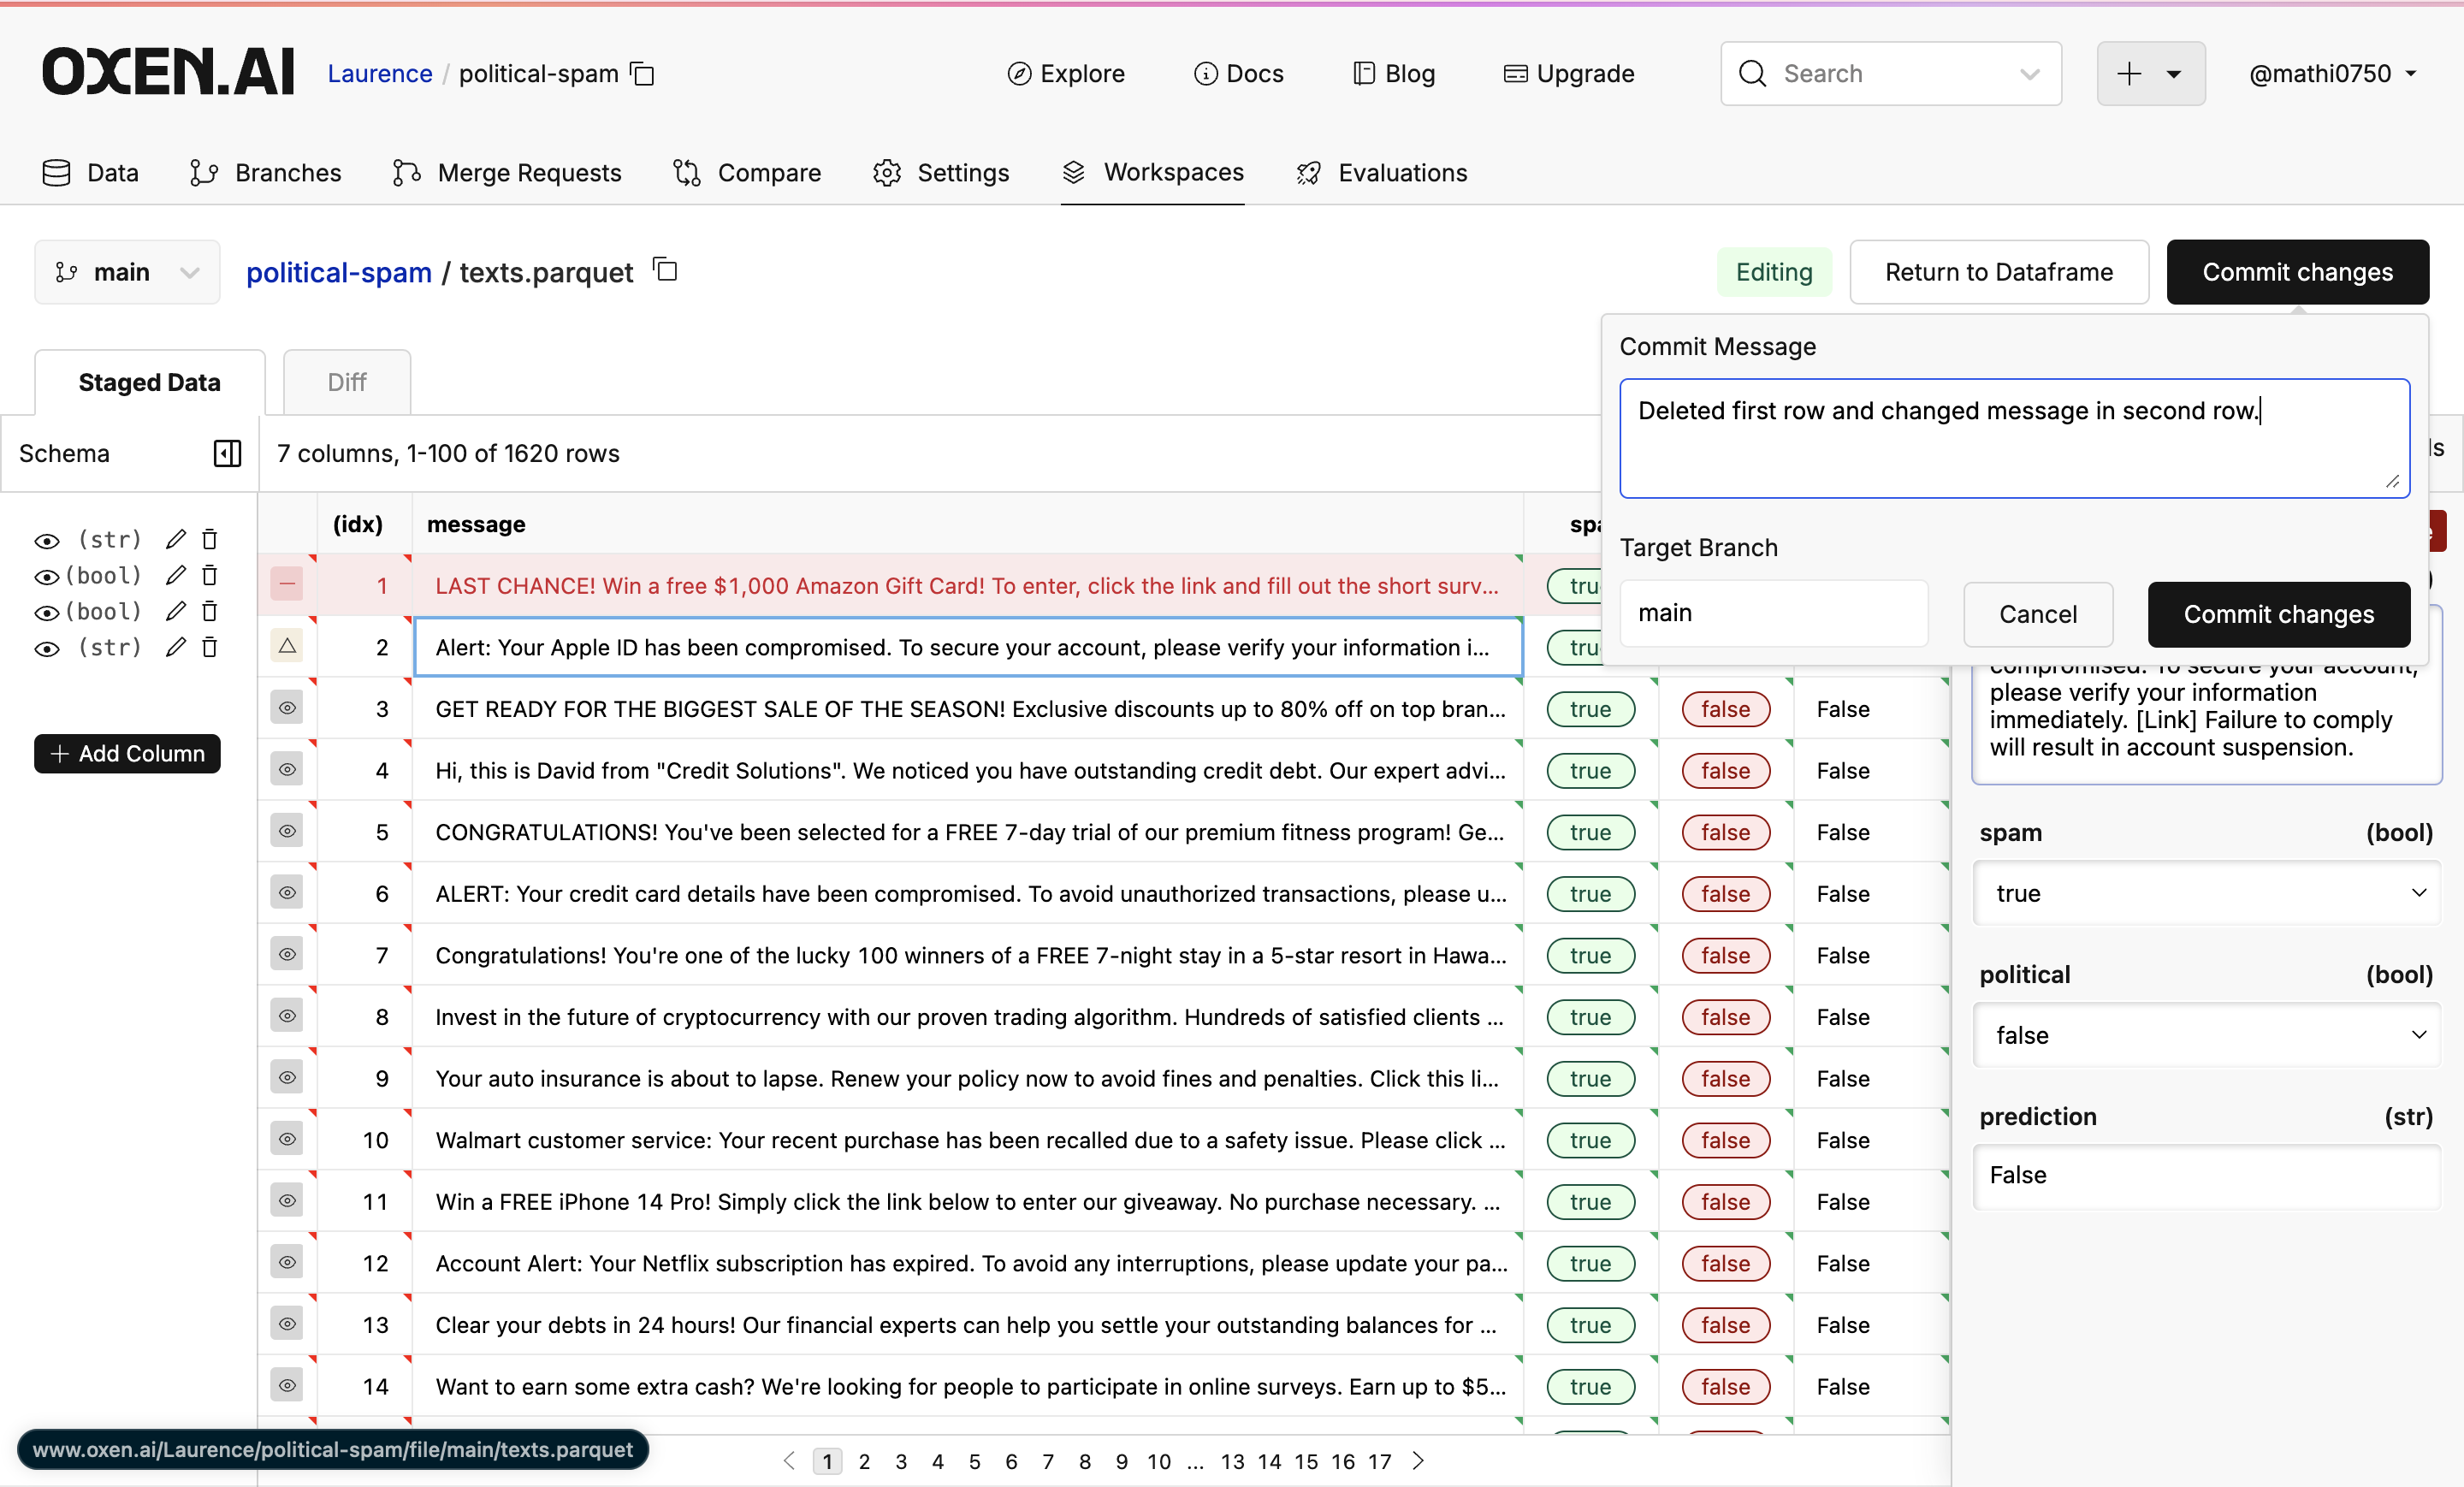
 ### Committing Changes
To commit your changes, click on the *Commit* button, write your commit message, choose the branch, and click "Commit changes".
### Committing Changes
To commit your changes, click on the *Commit* button, write your commit message, choose the branch, and click "Commit changes".
 ### Returning to Data Frame
To return to the original dataframe, click the *Return to dataframe* button on the left of the commit button.
### Returning to Data Frame
To return to the original dataframe, click the *Return to dataframe* button on the left of the commit button.
 Congratulations! You've just seen how easy it is to edit your datasets without downloading on Oxen.AI. For more examples of different uses, [click here](/use-cases/sentiment-analysis)!
## Using the Python Library
The web interface is built on top of [HTTP APIs](/http-api/data-frames/get-data-frame-slice) that are also exposed through Oxen.ai's [Python Library](/python-api/data_frame). This makes it easy to interact with data frames programatically and build your own custom labeling tools. Under the hood the dataset will be indexed into DuckDB within a Workspace to make it fast to query and update the data before fully committing it back to your repository.
### Indexing a Data Frame
When you instantiate a DataFrame object, the data will automatically get indexed into an Oxen Workspace in an uncommitted state. This gives you fast read/write access to the data frame without committing it.
```python theme={null}
from oxen import DataFrame
# Connect to the data frame with the repository name and file path
df = DataFrame("my-username/spam-or-ham", "data.tsv")
```
### Fetching Rows
To get the full size of the data frame you can use the `size()` method.
```python theme={null}
width, height = df.size()
```
To get an individual row index, pass in the offset to the `get_row` method.
```python theme={null}
# Get the Nth row of the data frame
row = df.get_row(42)
```
### Insert Rows
To add a row to the end of the dataset, use the `insert_row` function with a dictionary that contains the column names as keys, and the row data as values. This will return an internal `_oxen_id` that can be used to access the same row again.
```python theme={null}
# Add a row
row_id = df.insert_row({"category": "spam", "message": "CLICK HERE TO WIN INSTANTLY."})
```
The `_oxen_id` can be used to fetch the same row again.
```python theme={null}
# Get a row by the internal '_oxen_id'
row = df.get_row_by_id(row_id)
```
### Update Rows
To update a row, pass in the `_oxen_id` as well as the columns you want to update as a dictionary. Only the keys that are present will be updated, leaving the rest unchanged.
```python theme={null}
row = df.update_row(row_id, {"category": "new_category"})
```
### Delete Rows
To delete a row, pass in the `_oxen_id` to the `delete_row` method.
```python theme={null}
df.delete_row(row_id)
```
### Committing Changes
Finally, when you are happy with the dataset, and have reviewed the changes, you can commit this dataset to the repositories history with `commit` and a message.
```python theme={null}
df.commit("Update label")
```
To see the full set of APIs, check out the [Python Documentation](/python-api/data_frame).
Congratulations! You've just seen how easy it is to edit your datasets without downloading on Oxen.AI. For more examples of different uses, [click here](/use-cases/sentiment-analysis)!
## Using the Python Library
The web interface is built on top of [HTTP APIs](/http-api/data-frames/get-data-frame-slice) that are also exposed through Oxen.ai's [Python Library](/python-api/data_frame). This makes it easy to interact with data frames programatically and build your own custom labeling tools. Under the hood the dataset will be indexed into DuckDB within a Workspace to make it fast to query and update the data before fully committing it back to your repository.
### Indexing a Data Frame
When you instantiate a DataFrame object, the data will automatically get indexed into an Oxen Workspace in an uncommitted state. This gives you fast read/write access to the data frame without committing it.
```python theme={null}
from oxen import DataFrame
# Connect to the data frame with the repository name and file path
df = DataFrame("my-username/spam-or-ham", "data.tsv")
```
### Fetching Rows
To get the full size of the data frame you can use the `size()` method.
```python theme={null}
width, height = df.size()
```
To get an individual row index, pass in the offset to the `get_row` method.
```python theme={null}
# Get the Nth row of the data frame
row = df.get_row(42)
```
### Insert Rows
To add a row to the end of the dataset, use the `insert_row` function with a dictionary that contains the column names as keys, and the row data as values. This will return an internal `_oxen_id` that can be used to access the same row again.
```python theme={null}
# Add a row
row_id = df.insert_row({"category": "spam", "message": "CLICK HERE TO WIN INSTANTLY."})
```
The `_oxen_id` can be used to fetch the same row again.
```python theme={null}
# Get a row by the internal '_oxen_id'
row = df.get_row_by_id(row_id)
```
### Update Rows
To update a row, pass in the `_oxen_id` as well as the columns you want to update as a dictionary. Only the keys that are present will be updated, leaving the rest unchanged.
```python theme={null}
row = df.update_row(row_id, {"category": "new_category"})
```
### Delete Rows
To delete a row, pass in the `_oxen_id` to the `delete_row` method.
```python theme={null}
df.delete_row(row_id)
```
### Committing Changes
Finally, when you are happy with the dataset, and have reviewed the changes, you can commit this dataset to the repositories history with `commit` and a message.
```python theme={null}
df.commit("Update label")
```
To see the full set of APIs, check out the [Python Documentation](/python-api/data_frame).