Oxen.ai makes fine-tuning easy, but if you are struggling to fine-tune your model or want us to fine-tune for you, we’d be happy to set up a consultation with our ML experts!
1. Test Different Base Models
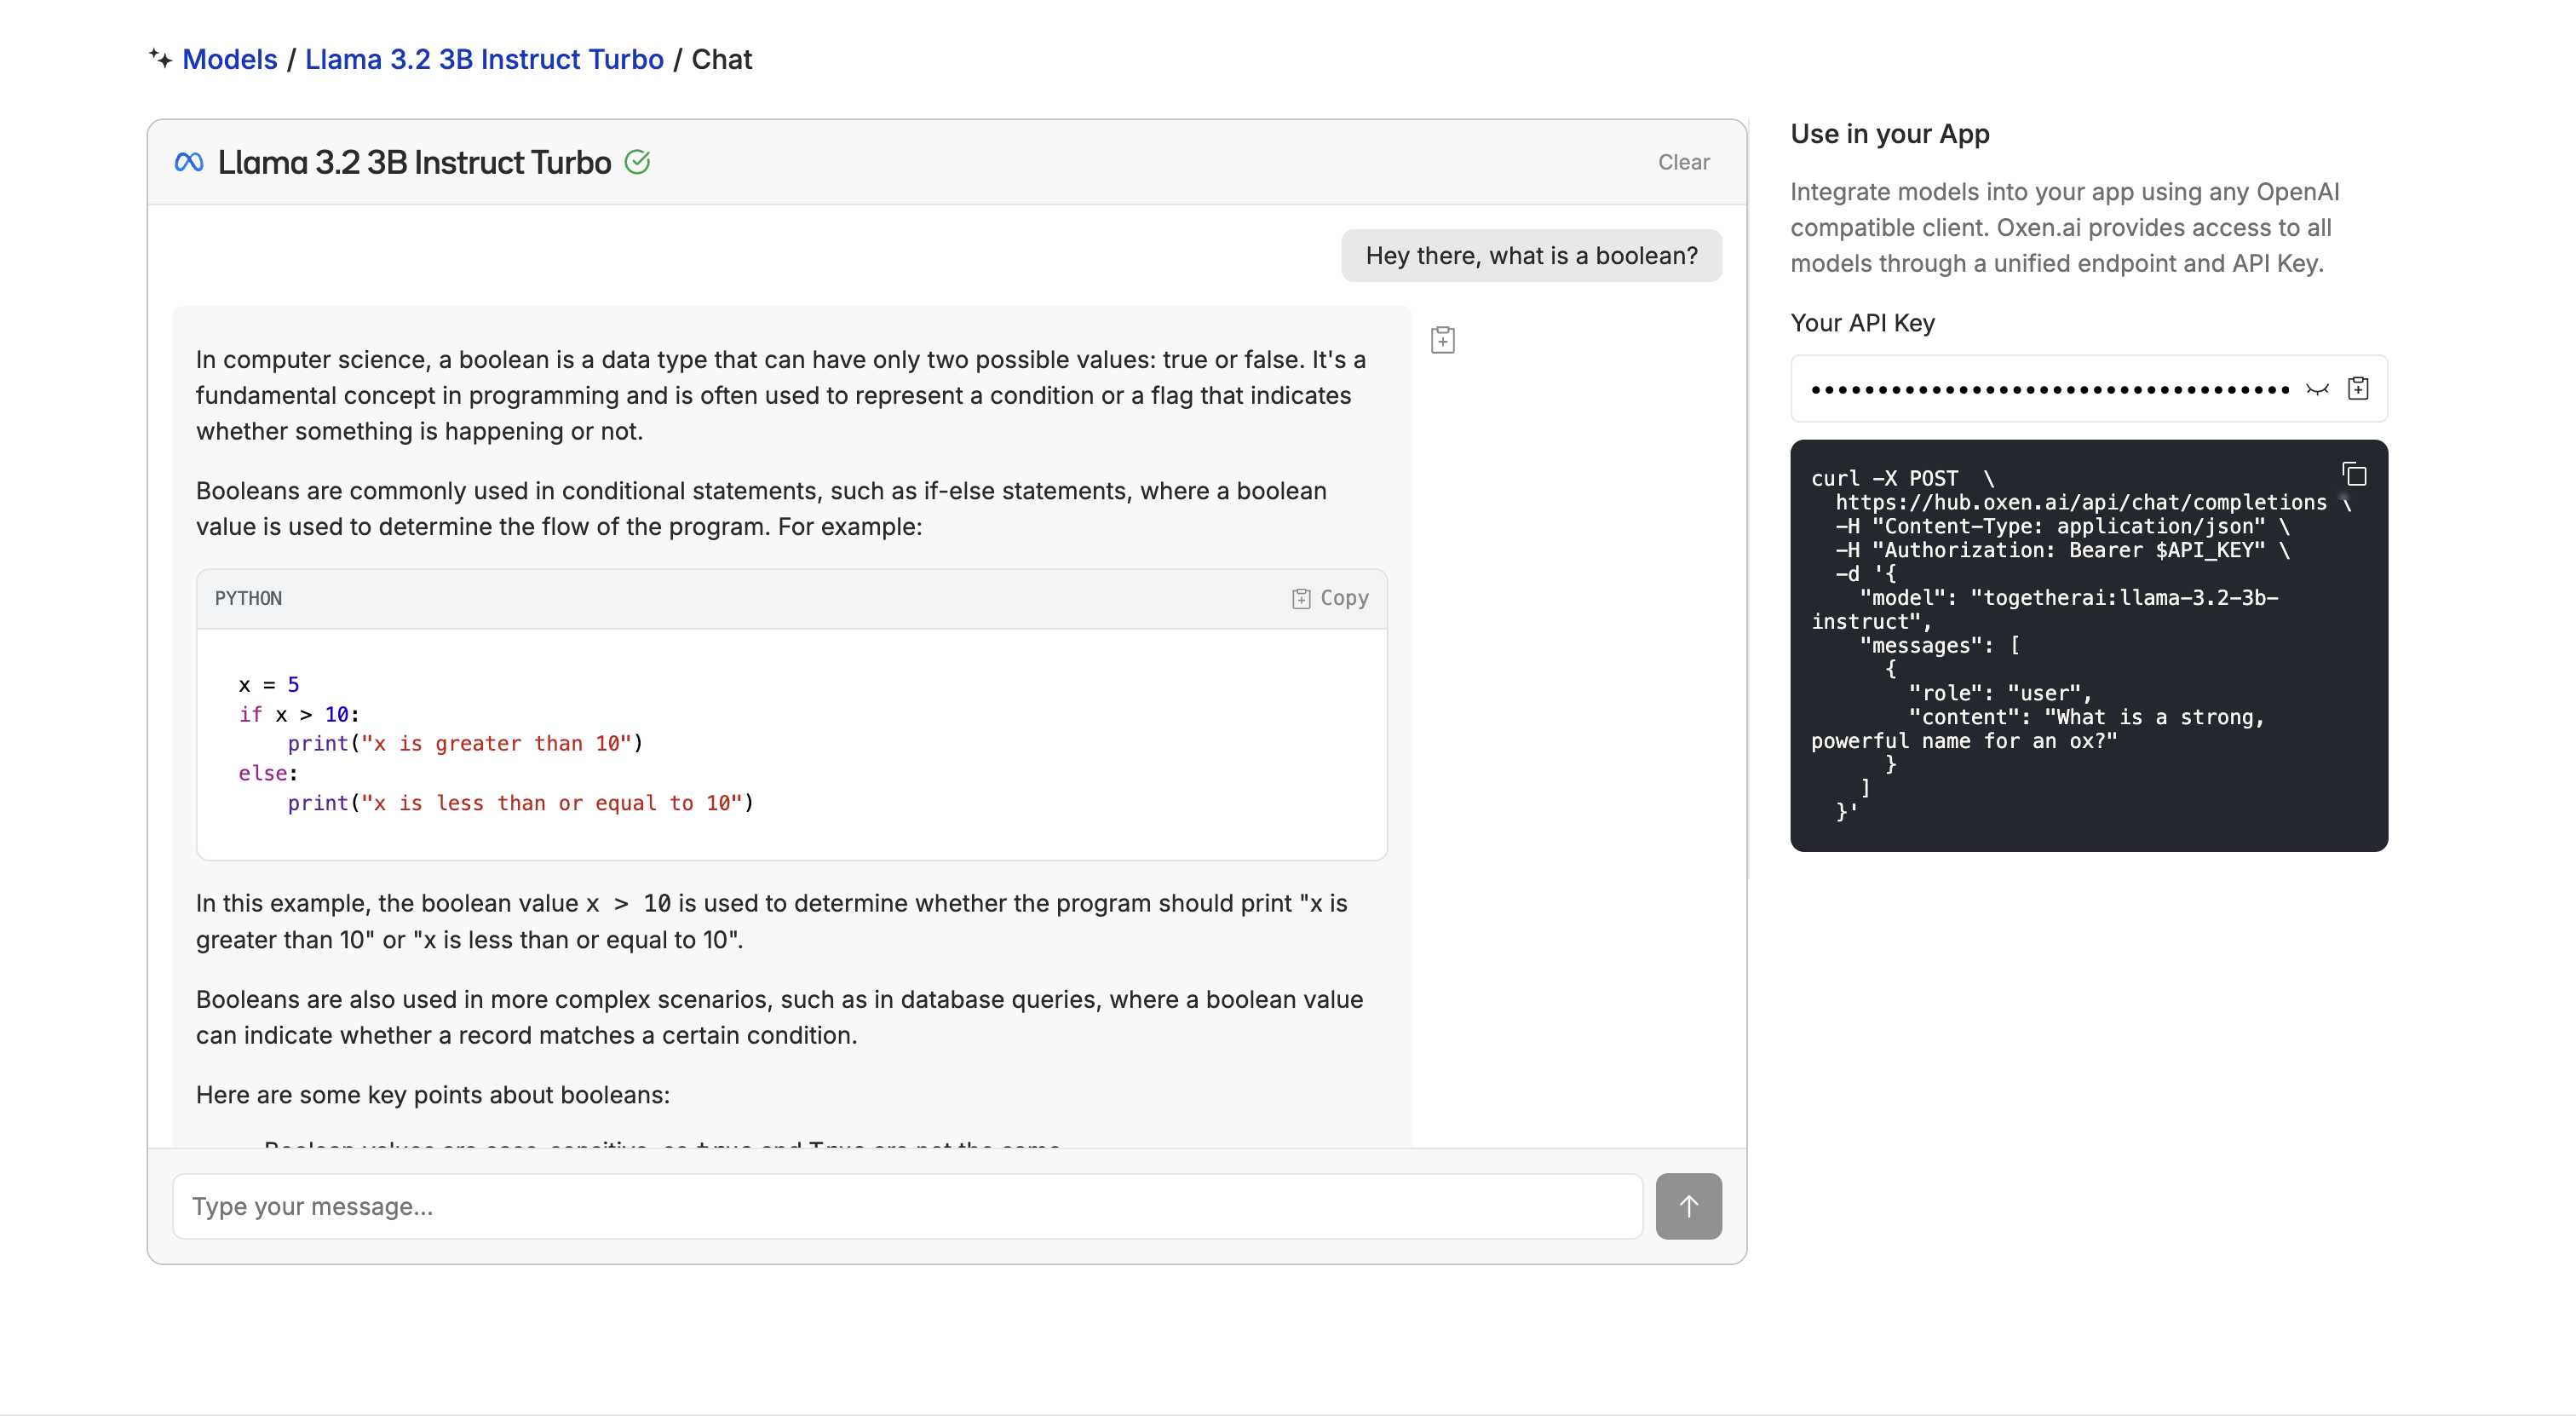
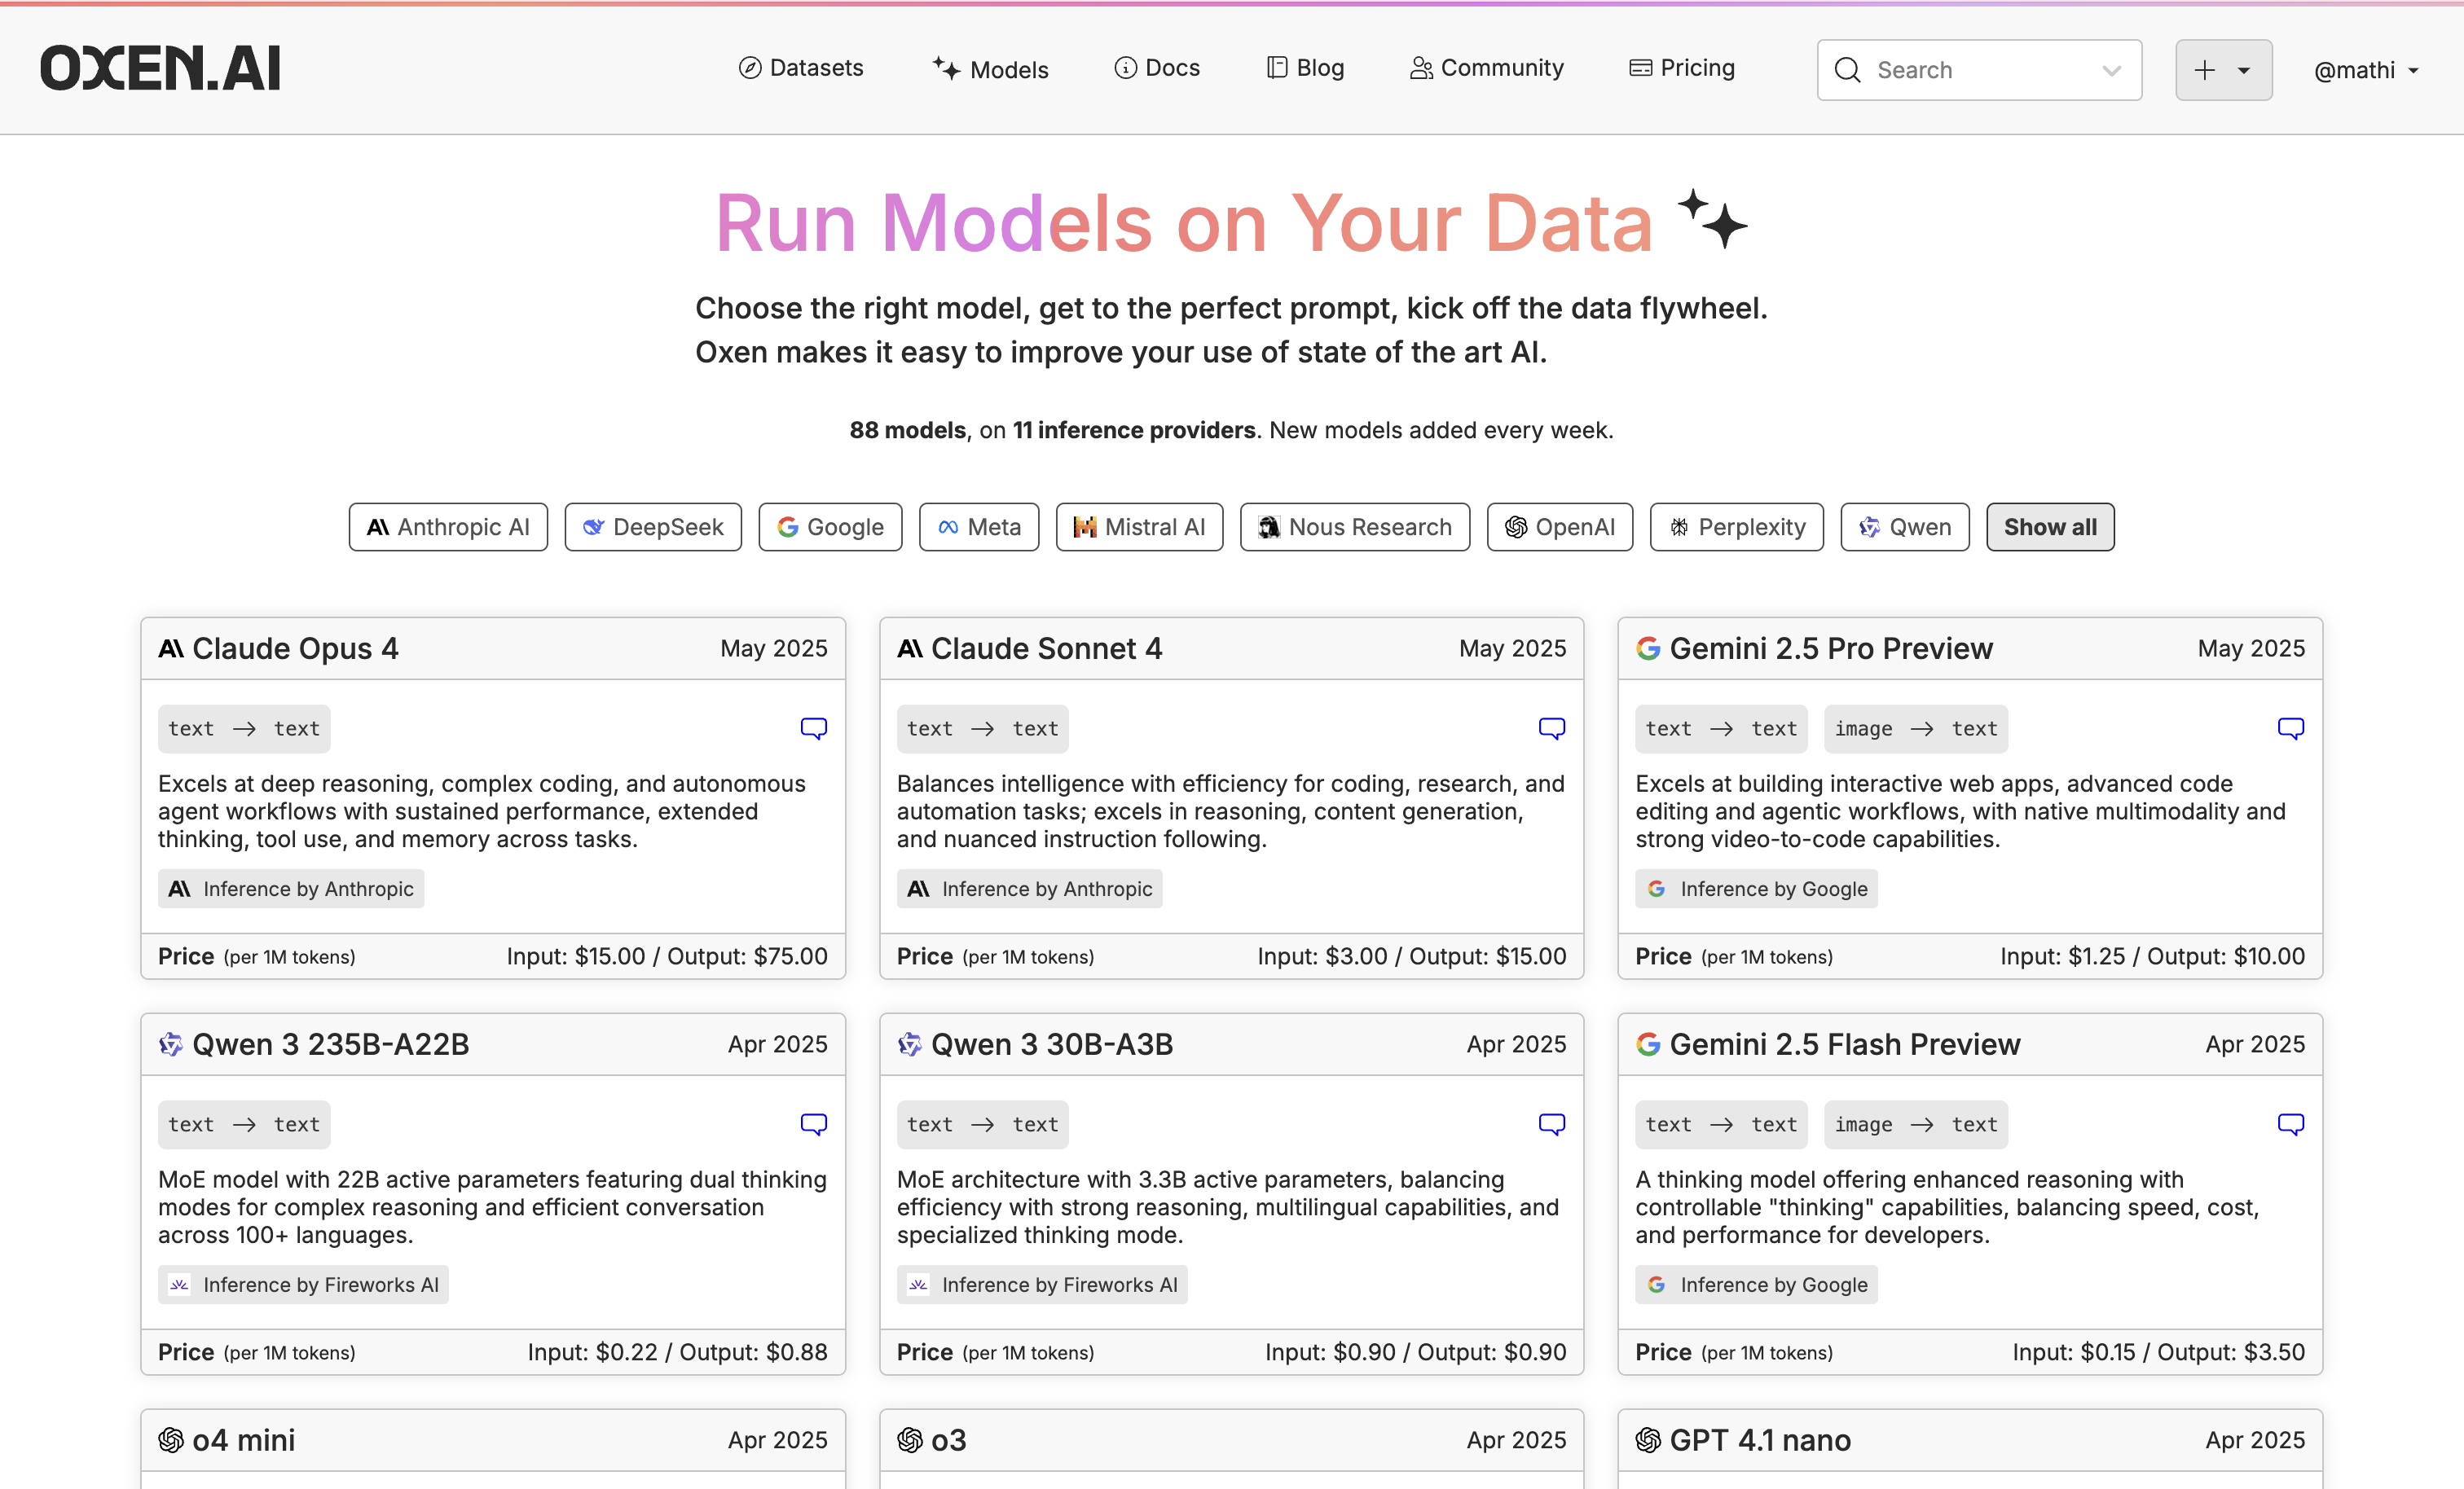 While we will be using Llama 3.2 3B for this example, go through our available models and click the little chat icon on the top right of the model name to chat with it.
Even if a chatbot is perfect in some areas but not all (e.g., it’s fast and you like the style, but it’s not accurate), fine-tuning is perfect for honing in on the areas you want improved.
While we will be using Llama 3.2 3B for this example, go through our available models and click the little chat icon on the top right of the model name to chat with it.
Even if a chatbot is perfect in some areas but not all (e.g., it’s fast and you like the style, but it’s not accurate), fine-tuning is perfect for honing in on the areas you want improved.
 If you don’t see the model you need, let us know in Discord or email us at hello@oxen.ai and we’ll add it.
2. Upload or Create Your Dataset
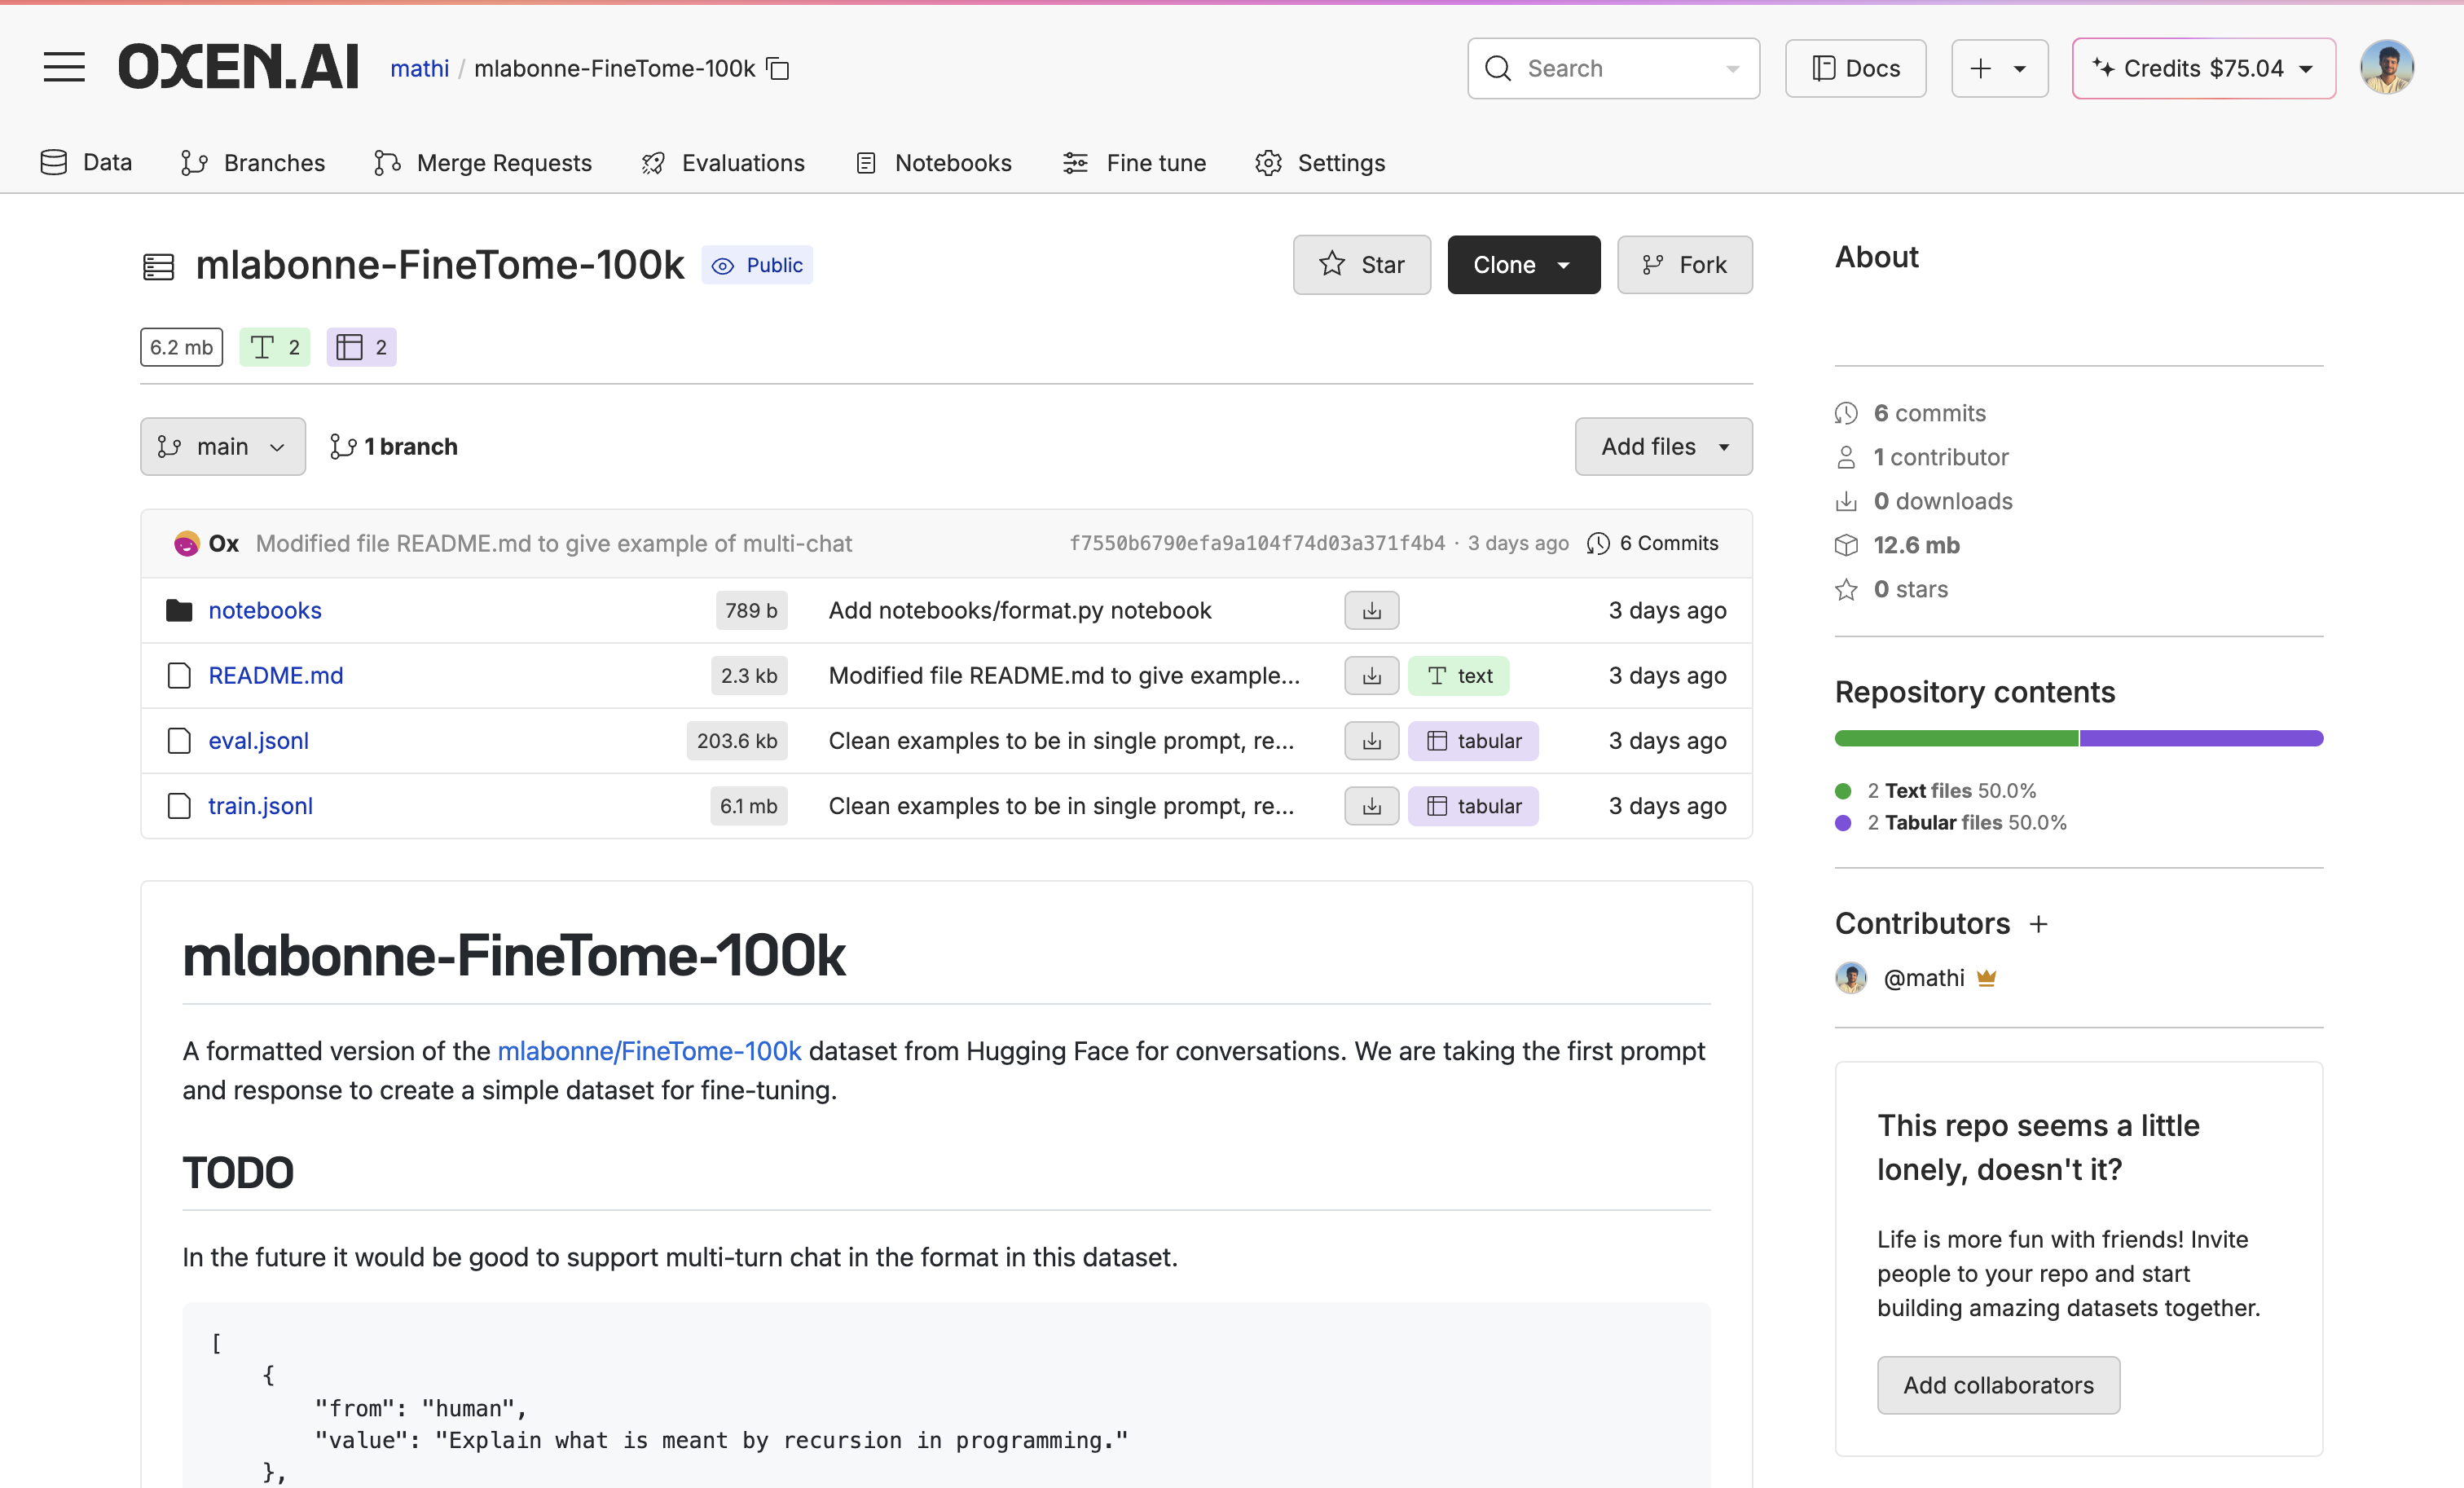
Once you have found the right model, upload or create a dataset to fine-tune the model on. If you do not already have a dataset, you can explore new datasets and augment the data with our Model Inference tool. You can also use our Model Inference tool to generate synthetic data from scratch. If you already have a dataset, you can upload it easily with Oxen.ai’s CLI commands.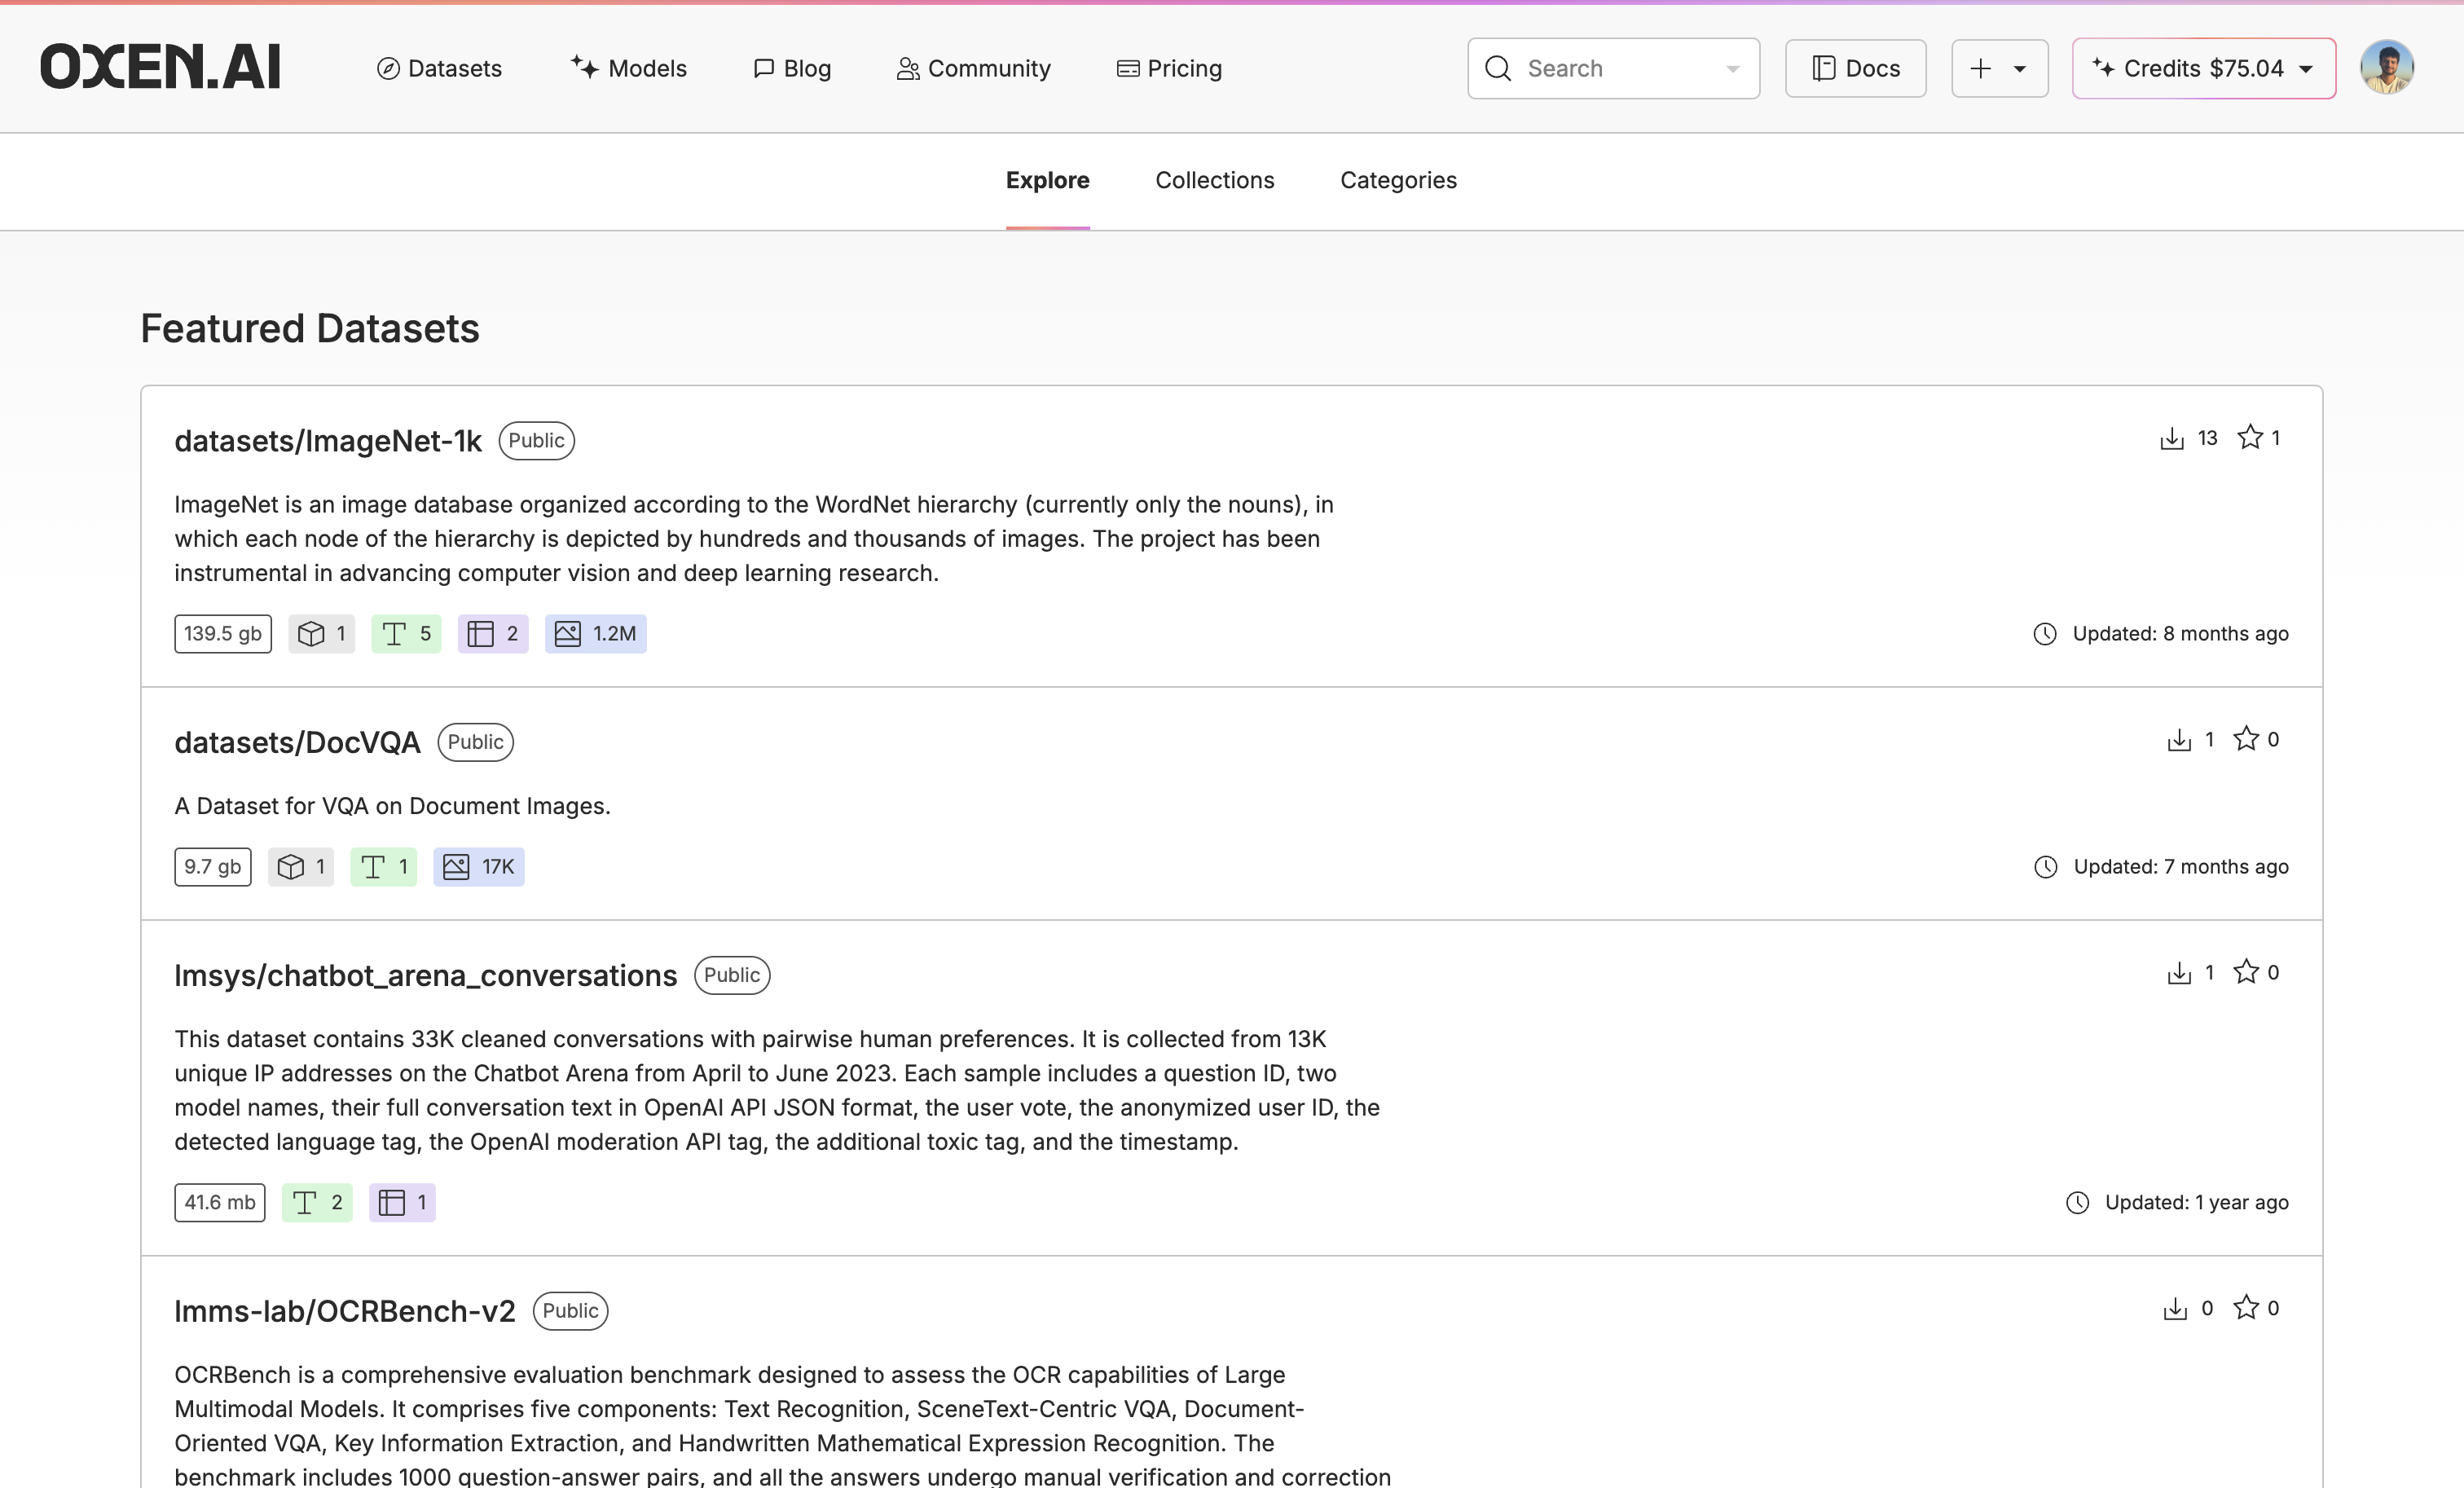 For this example, we are using a formatted version of the mlabonne/FineTome-100k dataset from Hugging Face filtered to only educational content and limited to the first 3,000 rows.
3. Run The Base Model Through the Dataset
Before fine-tuning, it is crucial to evaluate your base model to see if the model is actually improving. We can do this with our Model Inference tool. First, go to your dataset, click “Actions” and select “Run Inference”.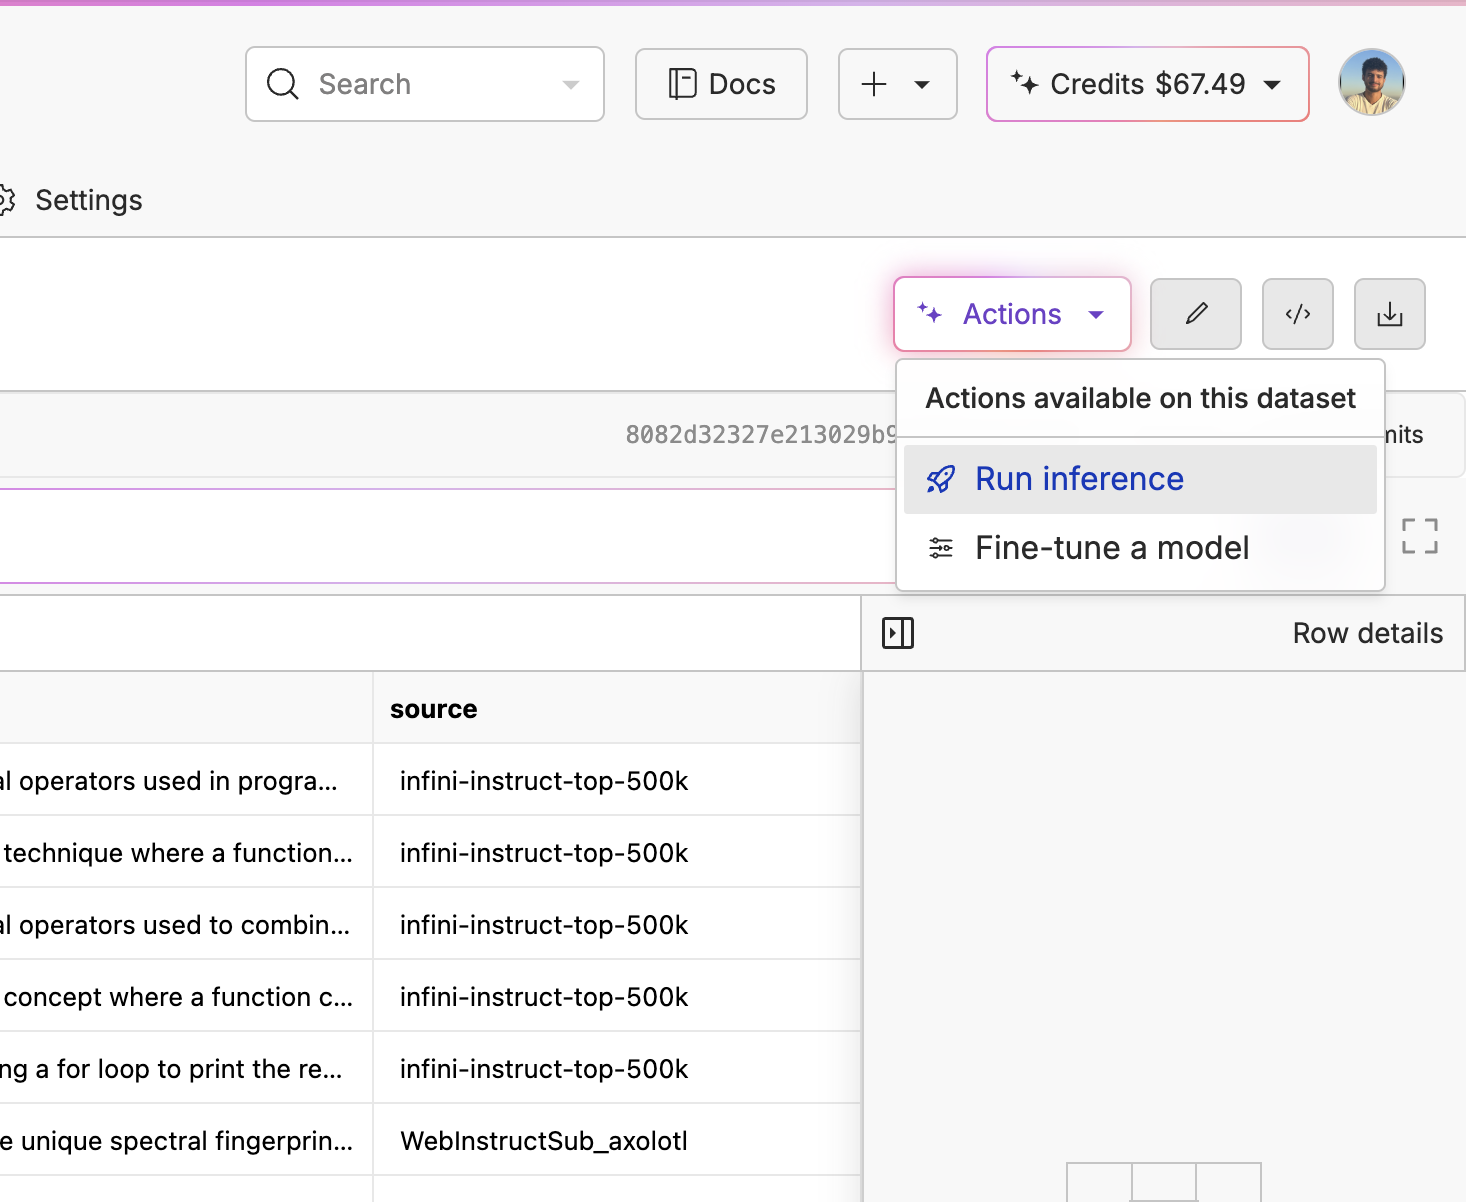 From there, select your base model, choose your column name, and only pass in your prompt column with no extra context so we actually see how well the base model does.
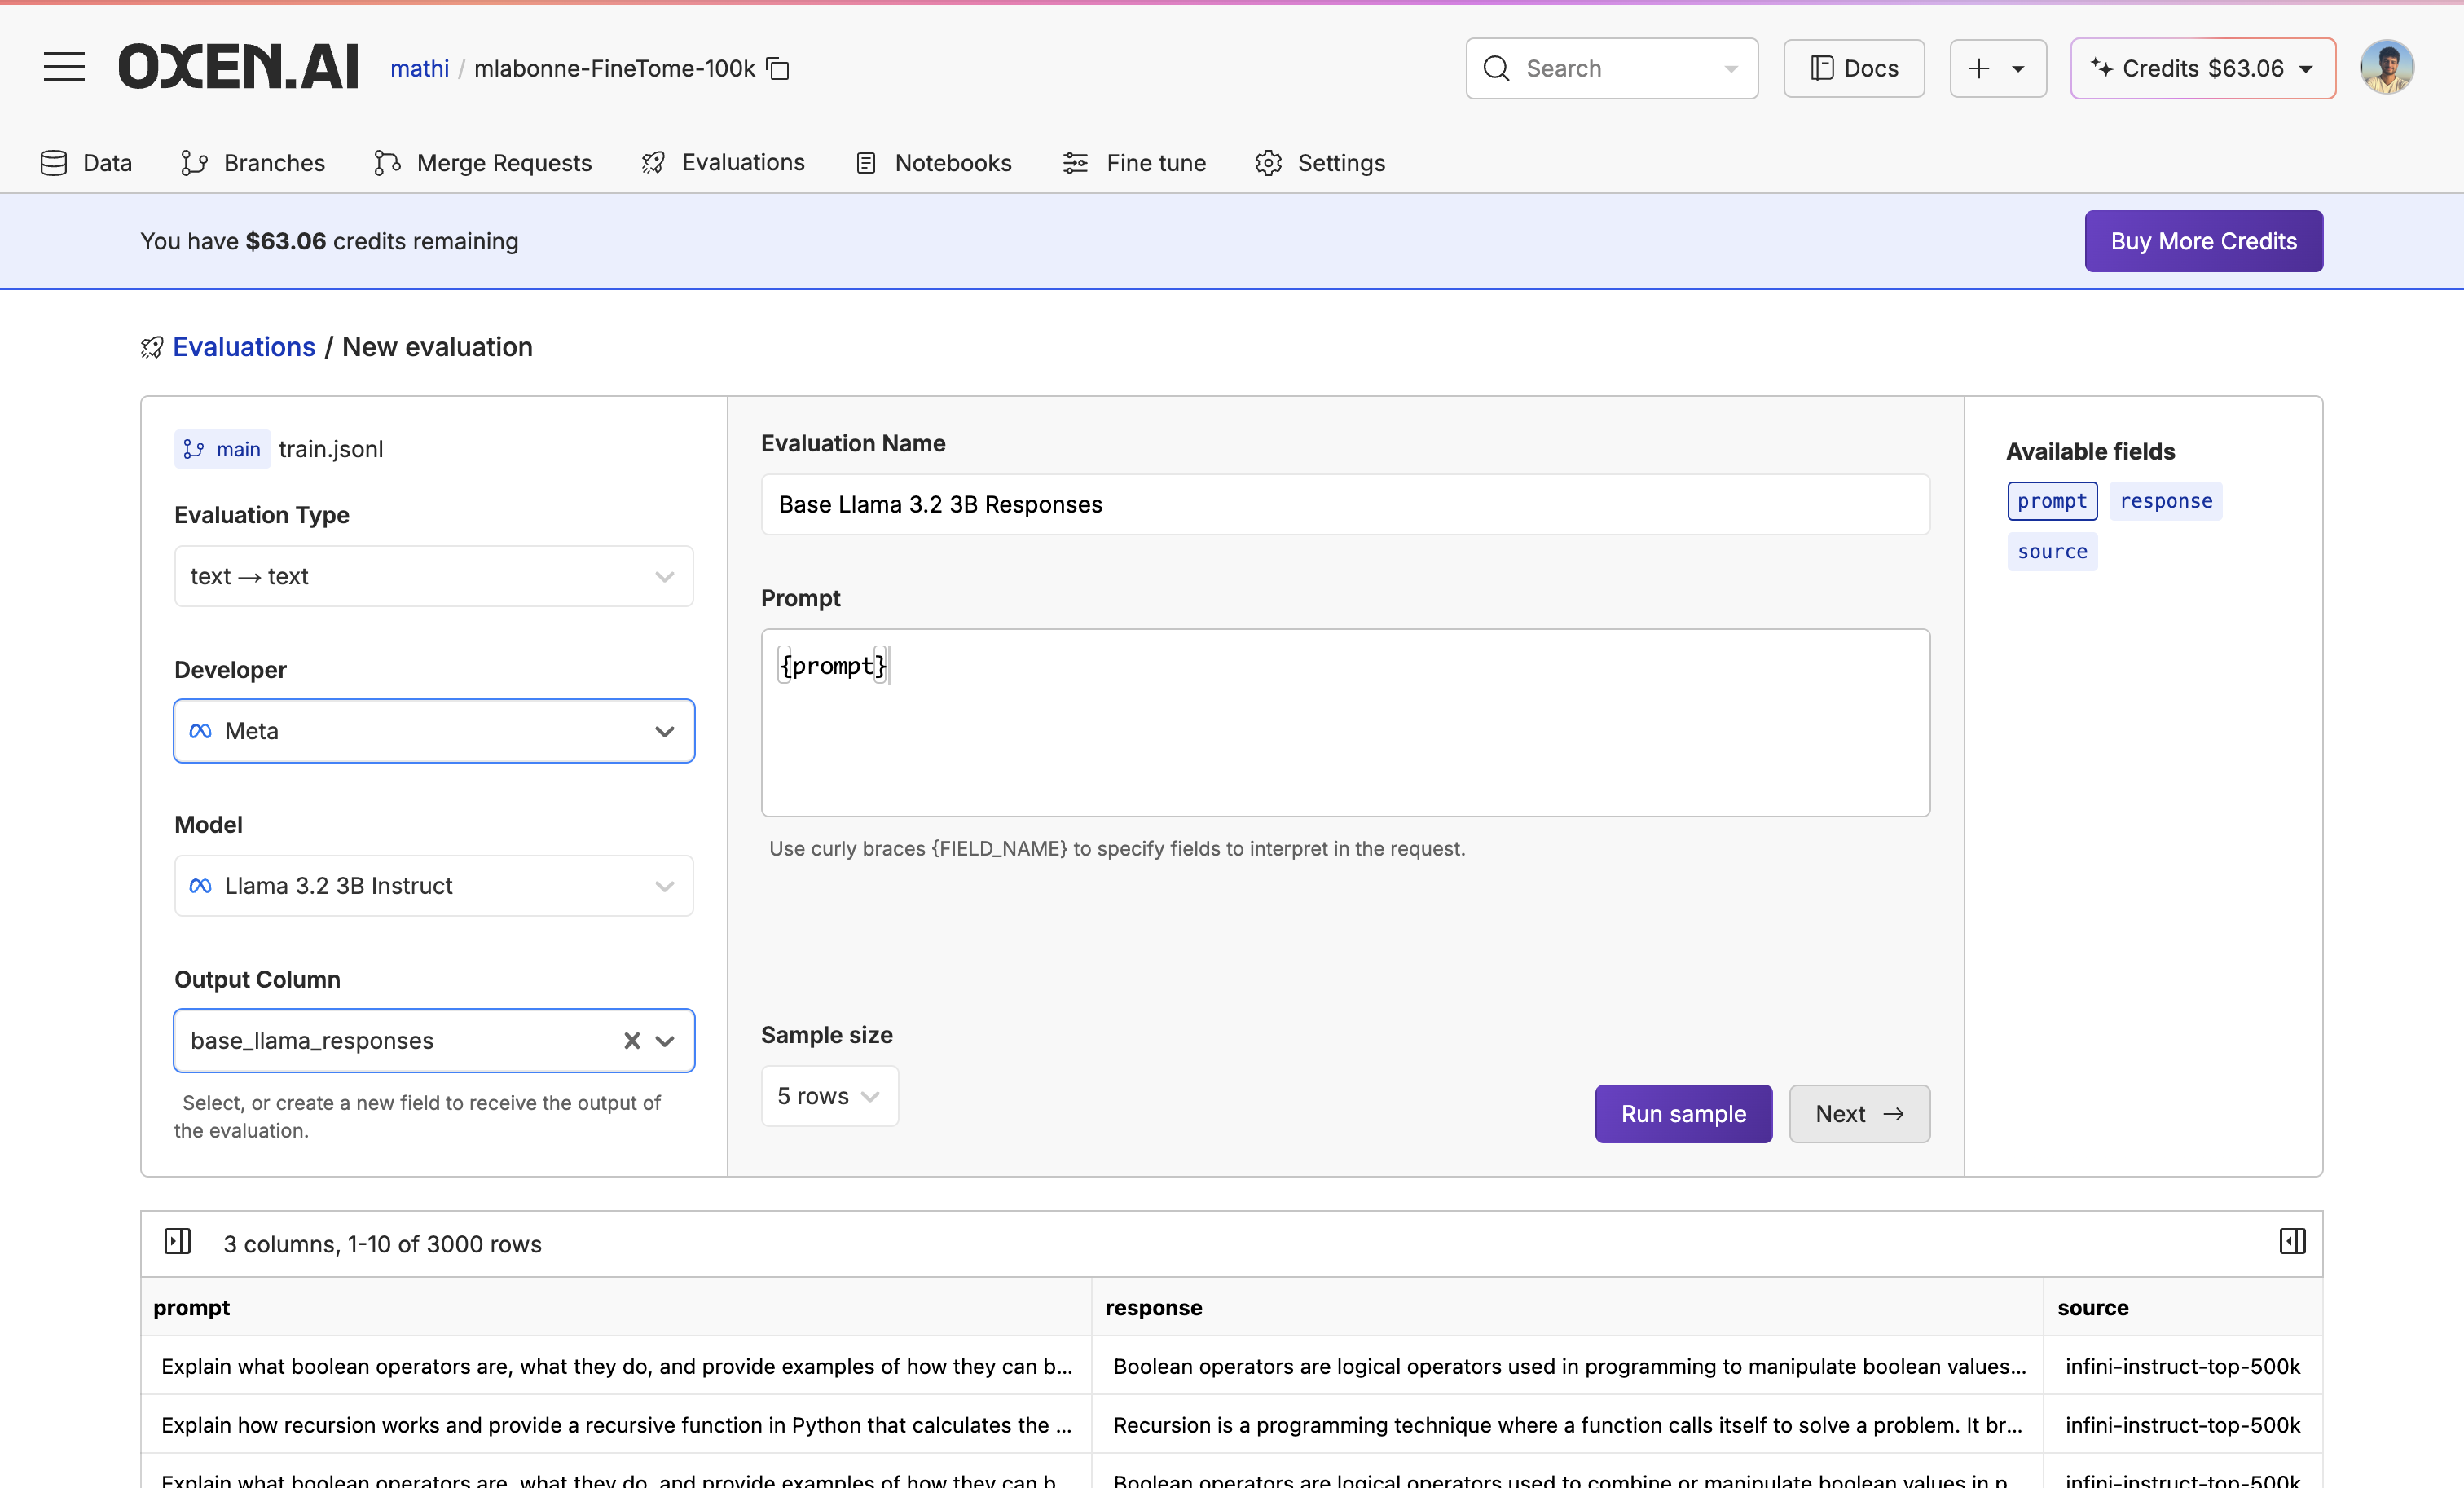 You can quickly run samples by clicking the “Run Samples” button to see if your base model is answering the questions.
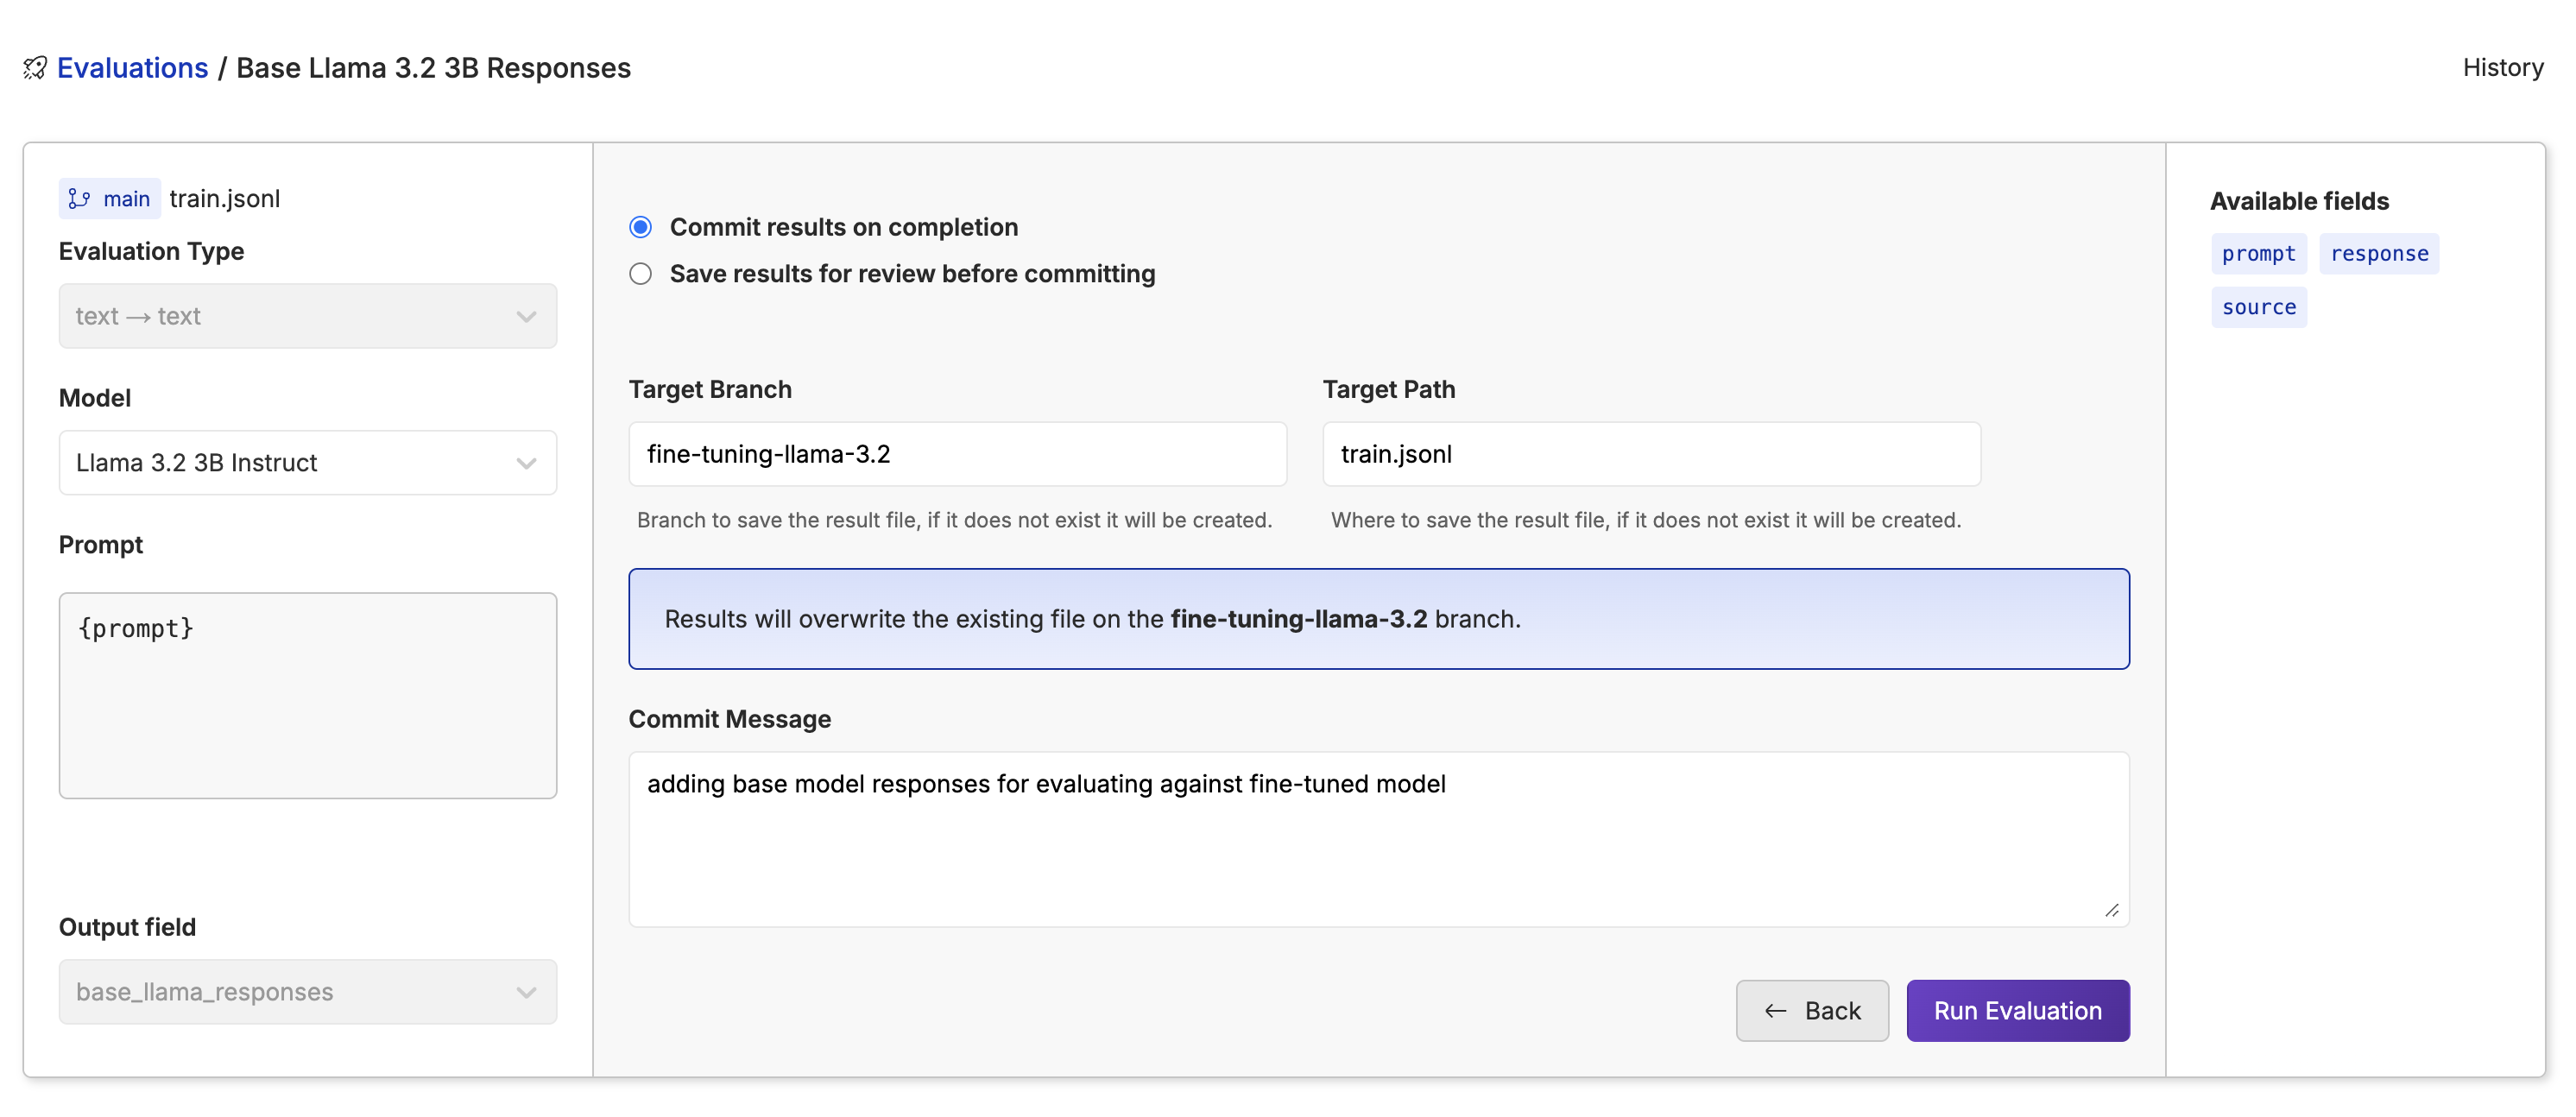
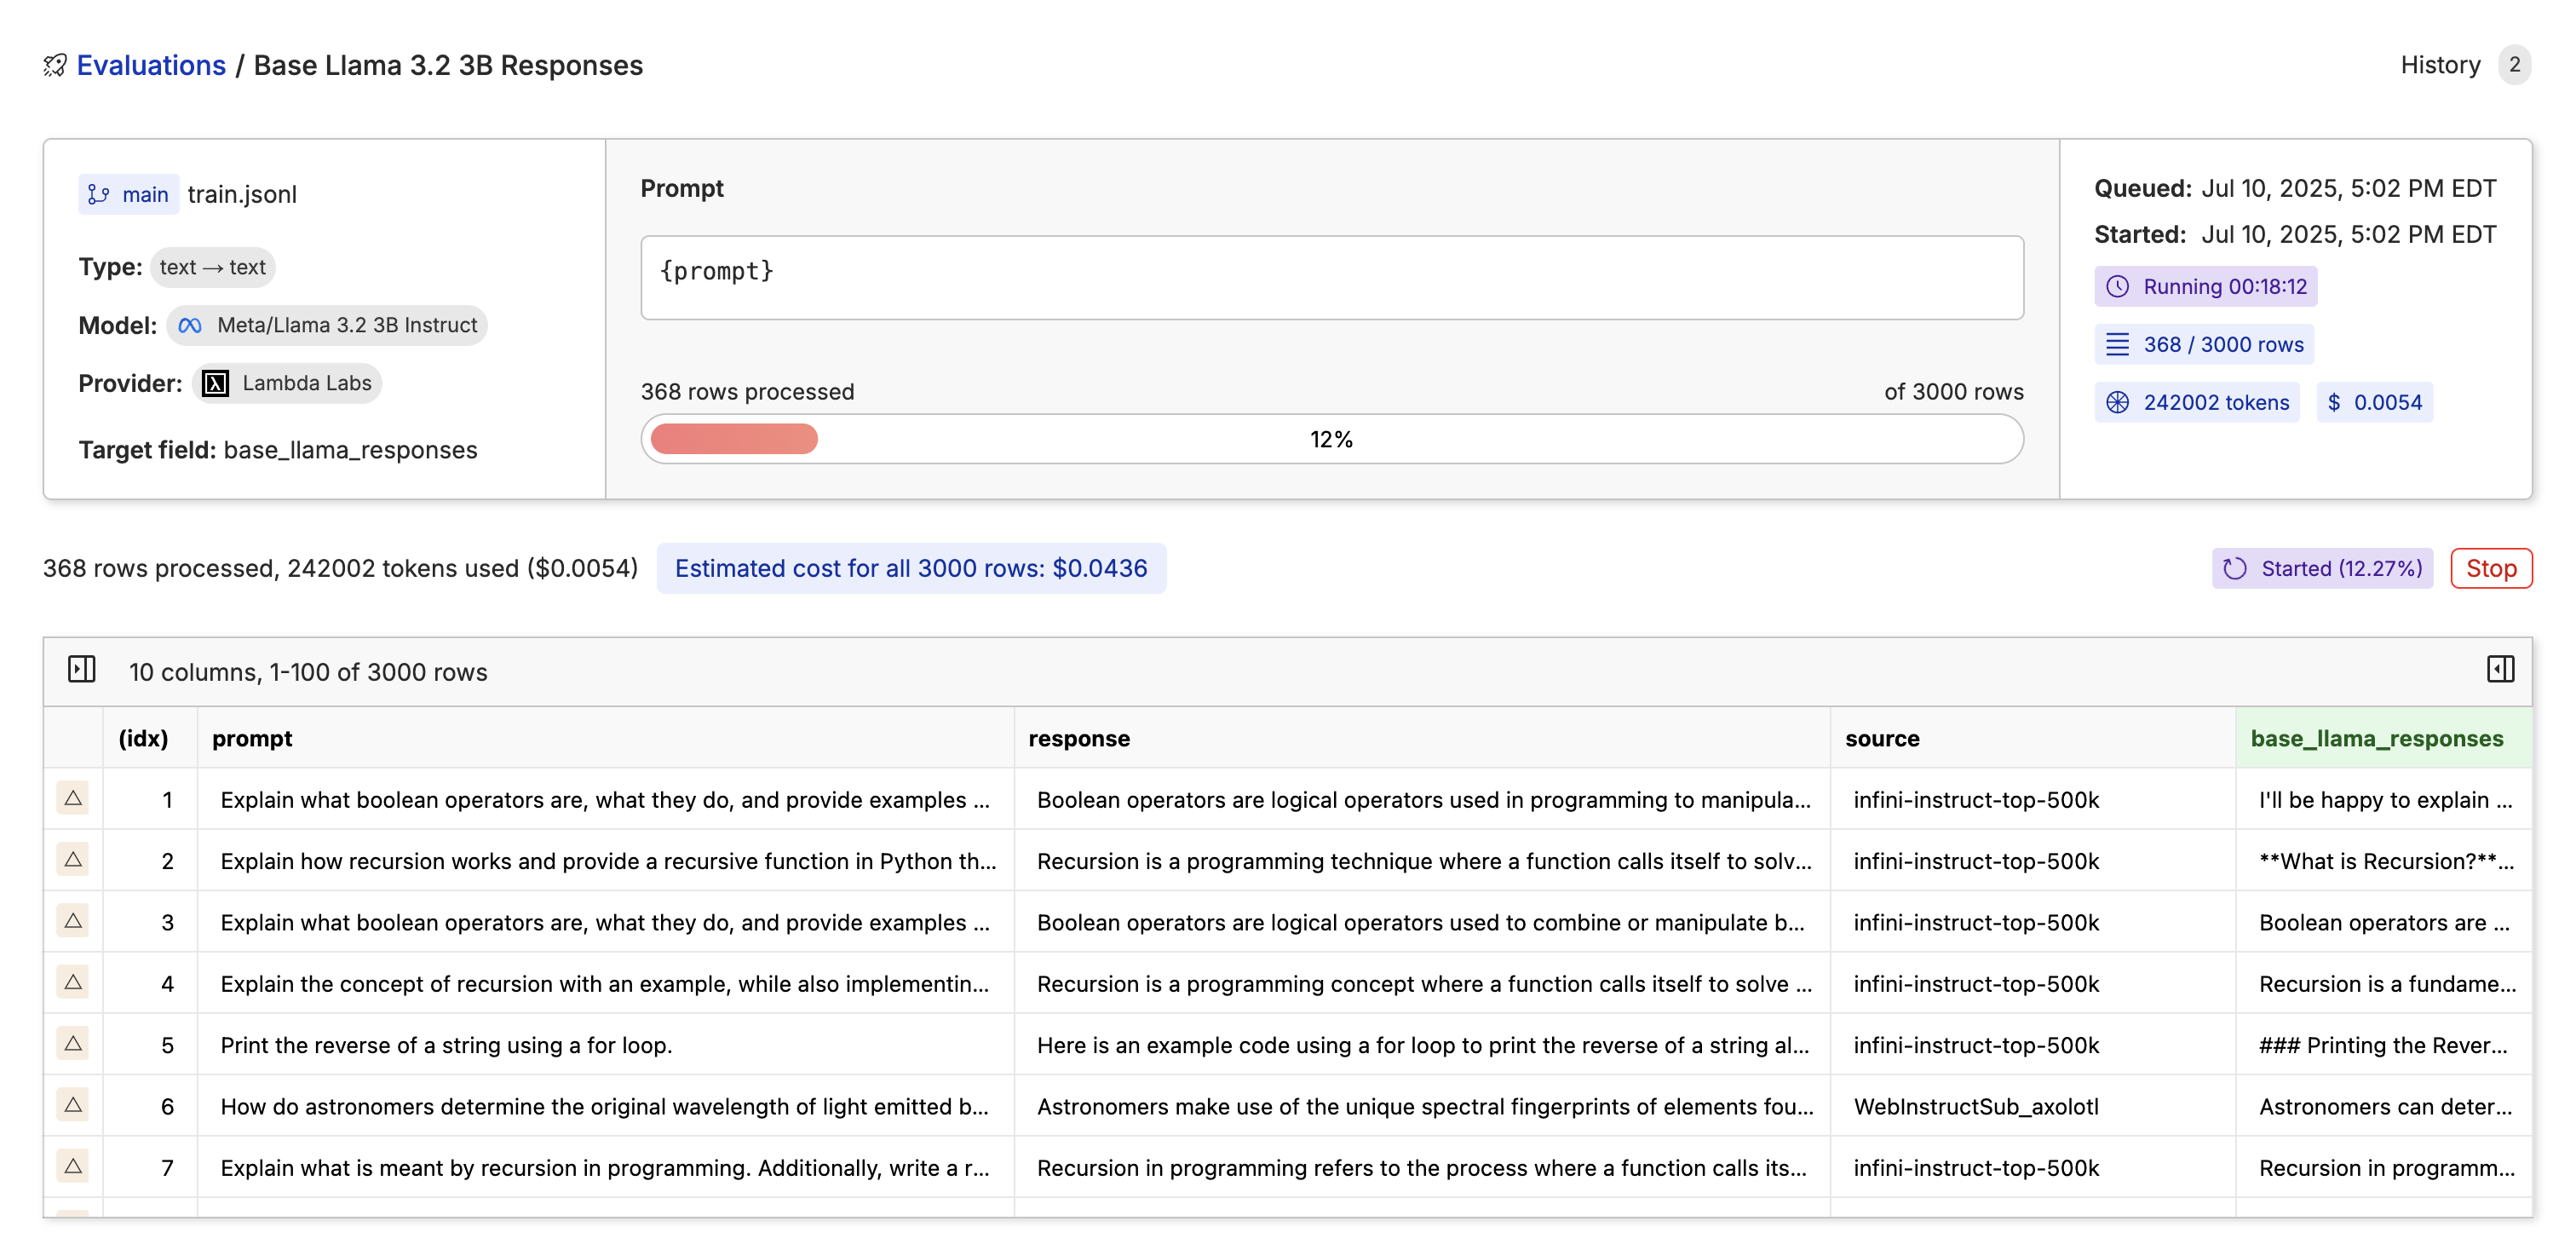
 Now we click “Next”, write our commit message, name a new branch, name the file, and click “Run Evaluation” to run the base Llama 3.2 3B on the whole dataset.
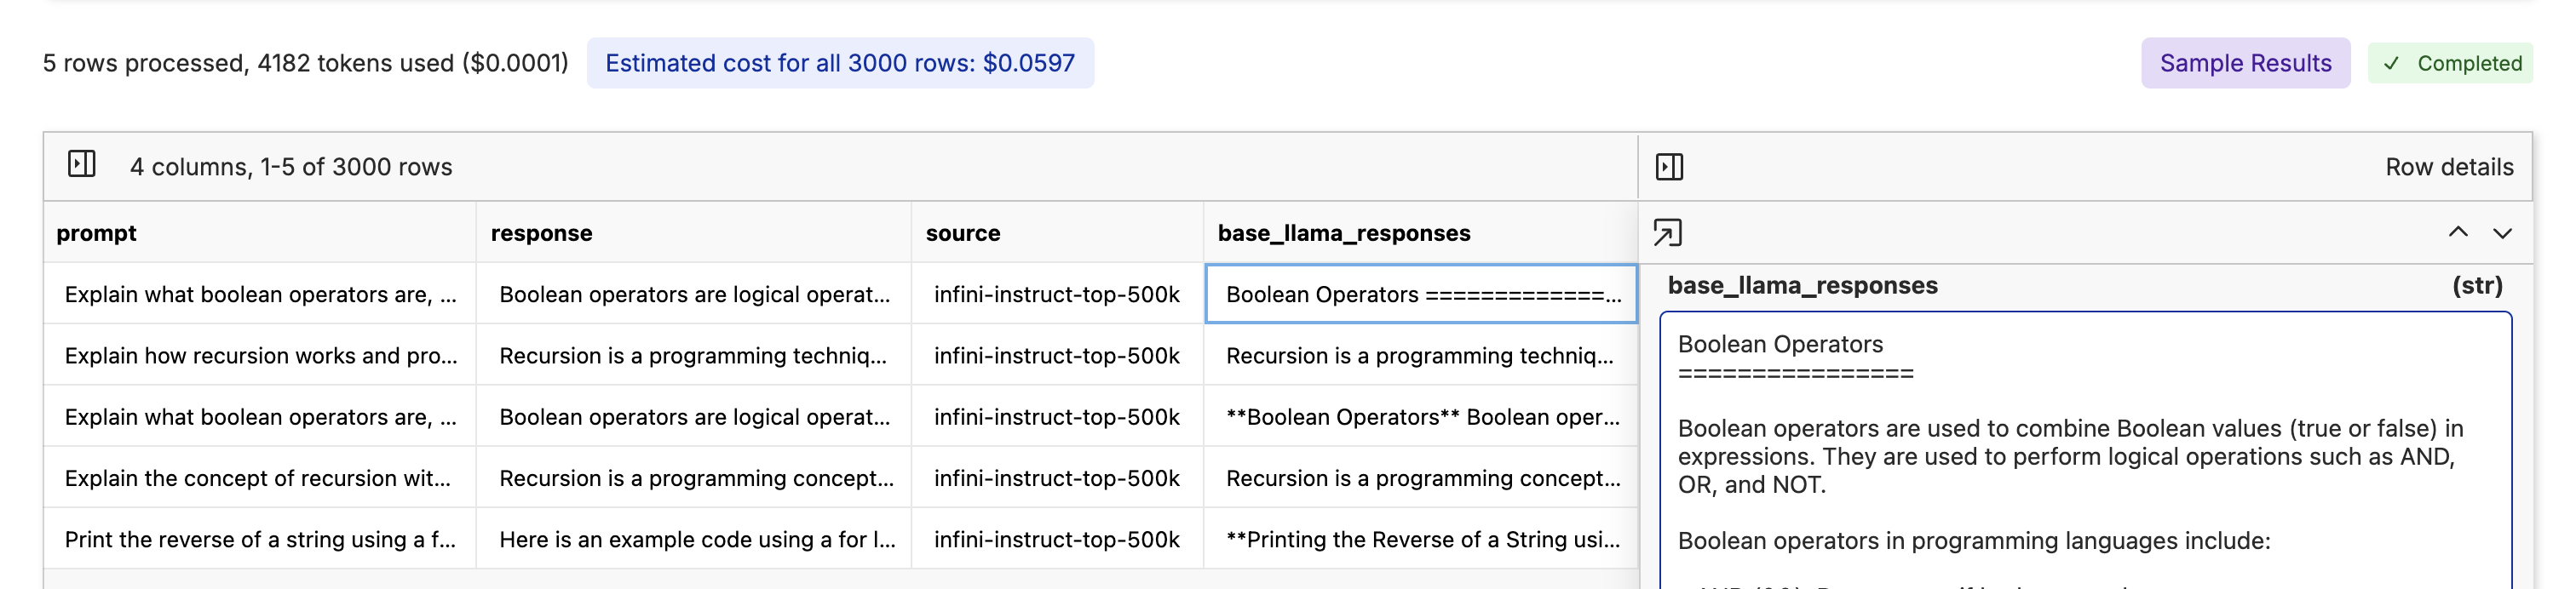
 While the model is running through the dataset, you will see the progress bar, tokens, cost, rows, and time taken to go through the dataset.
4. Evaluate The Base Model
After we have the base model results, we now need to evaluate the quality of the base model’s responses to compare them with the fine-tuned responses. Using an LLM as a judge is a great option for a quick evaluation though nothing beats looking through the data yourself.We would use the Model Evals tool again. Go through the same process of opening the dataset and clicking the “Model Inference” button. This time, choose a different model, write a prompt explaining it’s judging the quality of the responses, and pass in the prompt and response column. We’re going to be using GPT-4o mini with the prompt:
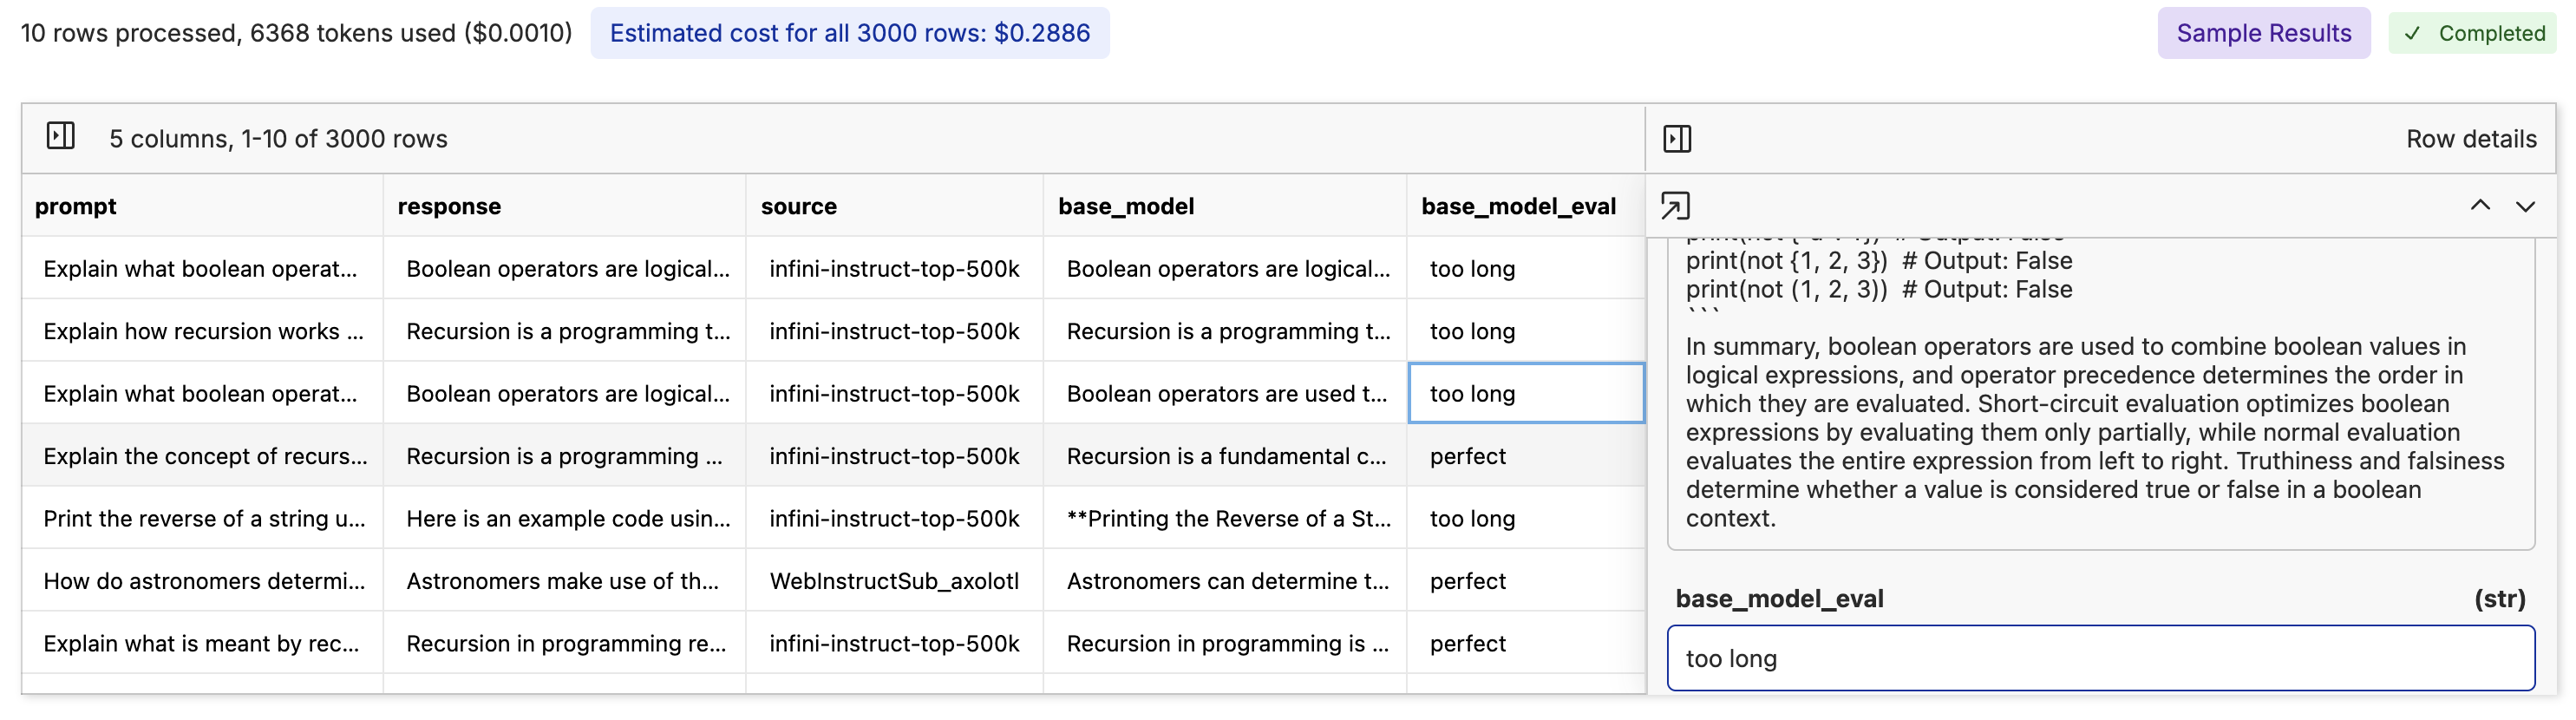
Taking time to specify what you are looking for is important. Telling the model the exact criteria for what is good or bad will give you more accurate evaluations and control over the model accuracy. It’s also best practice to use a model from a different provider to evaluate the quality of the base model’s responses, since LLMs have been found to prefer their own responses even if the responses aren’t the best.
5. Fine-Tuning The Model
Now that we have our base model evaluated, go back to our training file, click “Actions” again, but this time click “Fine-tune a model”.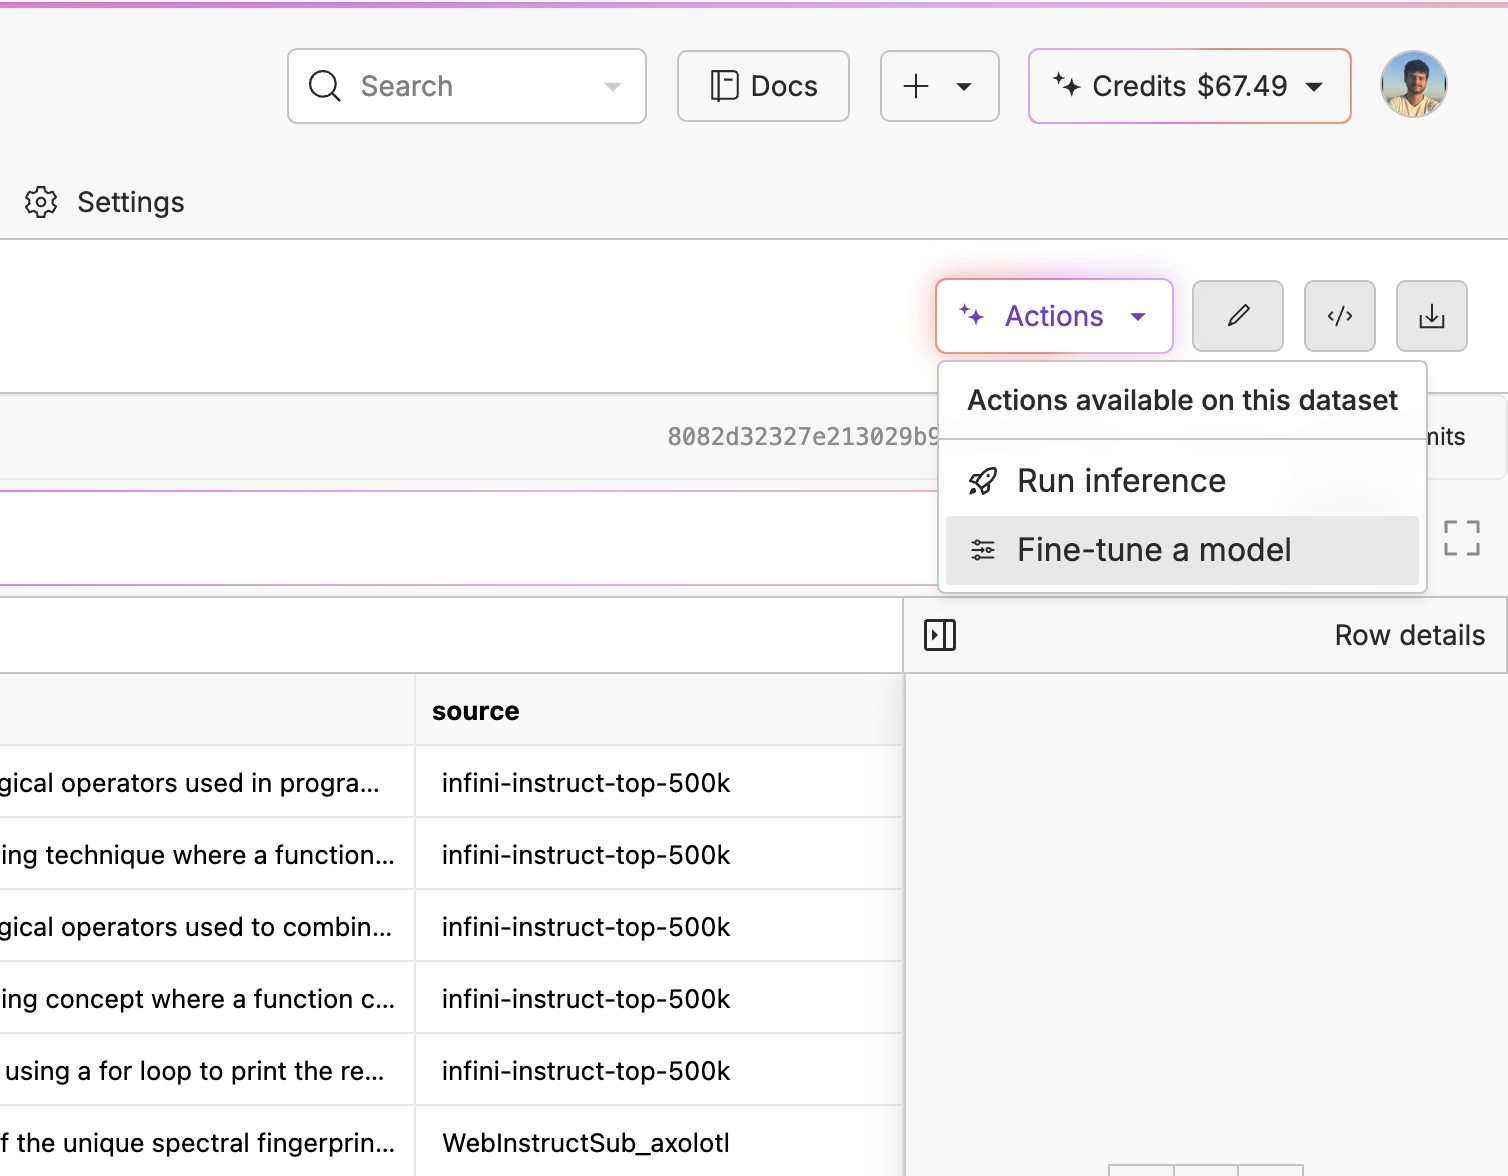 On the first page, you will be able to select your base model, the prompt source, the response source, whether you’d like to use LoRA or not, and if you want advanced control over the fine-tune. We wrote a blog post on how LoRA fine-tuning works if you’d like to learn what’s going on under the hood.
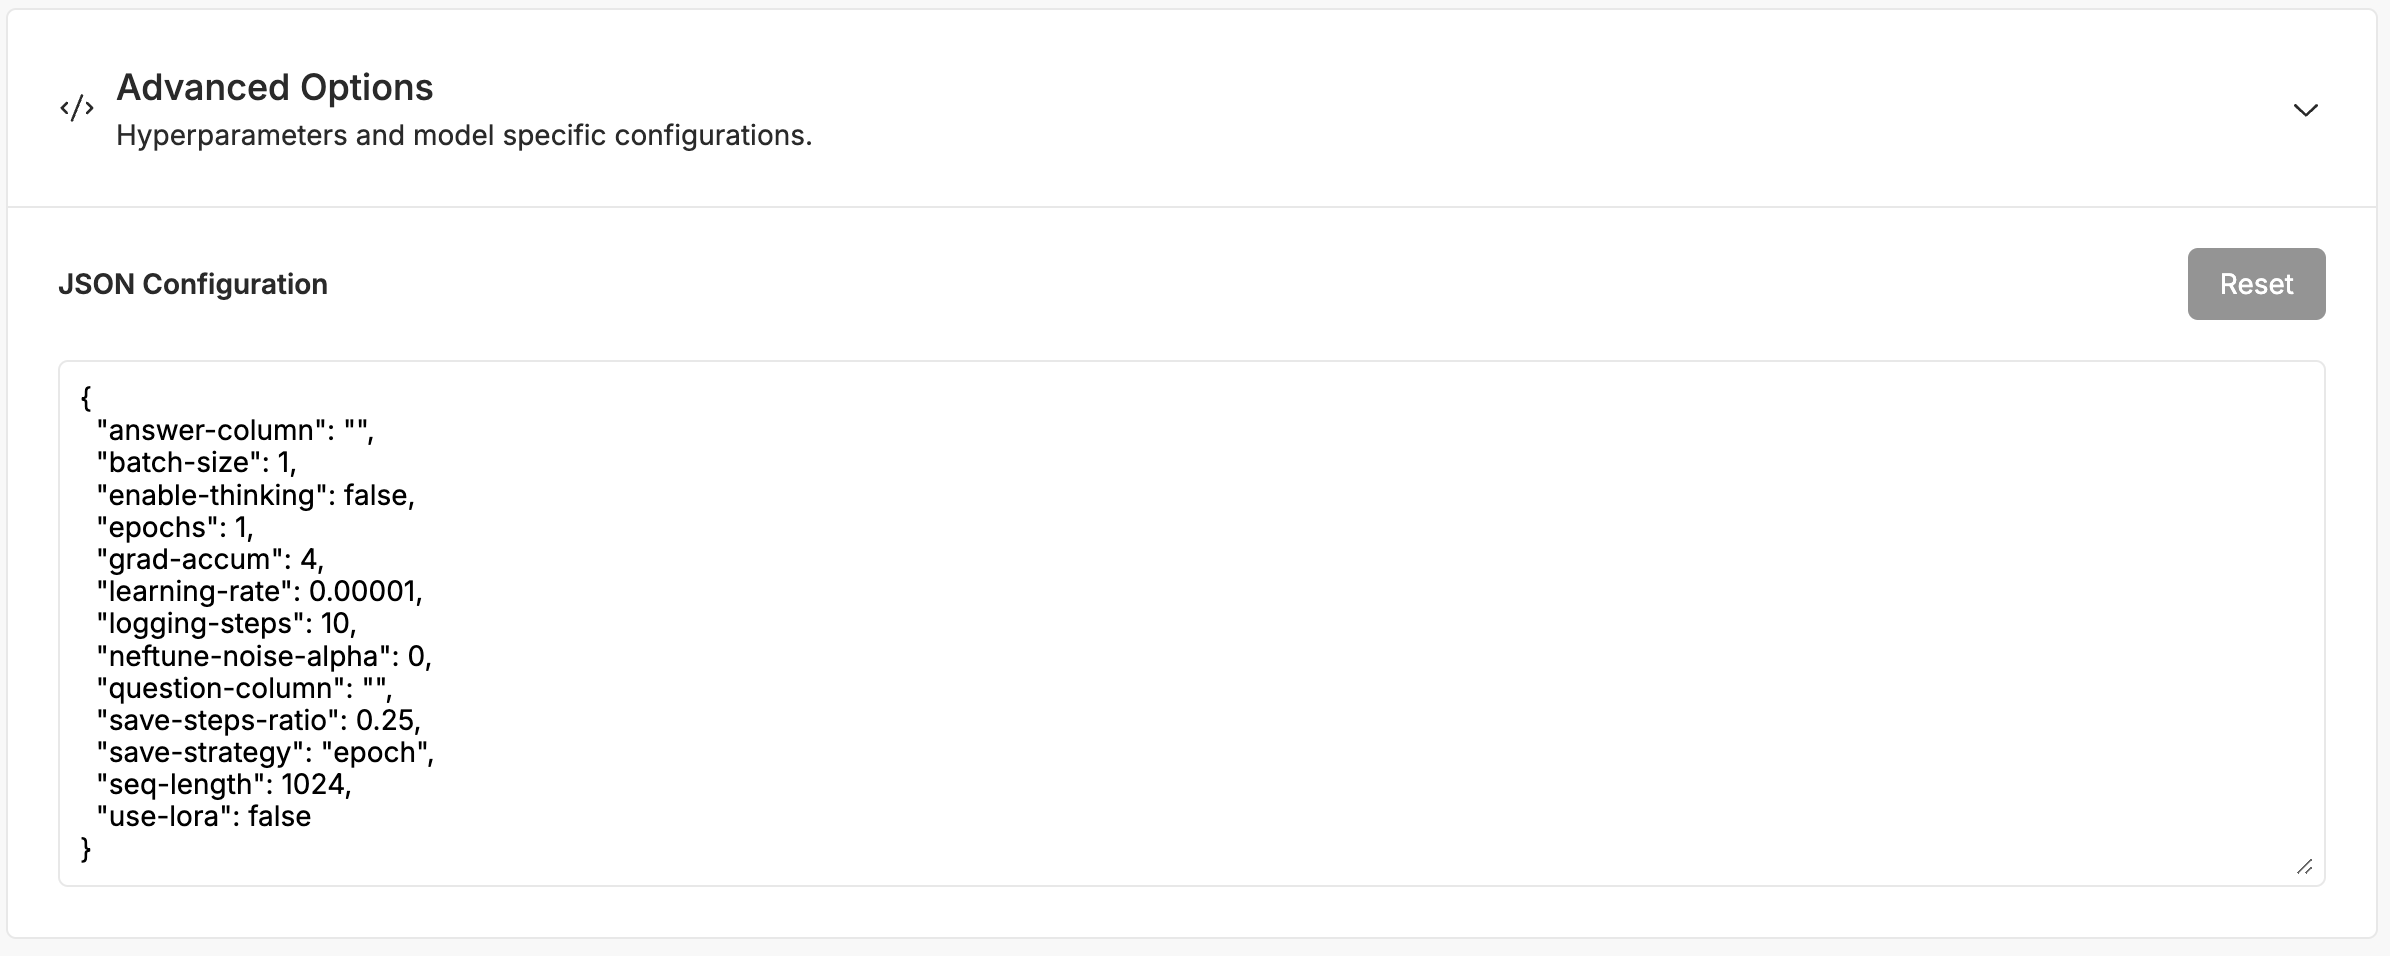
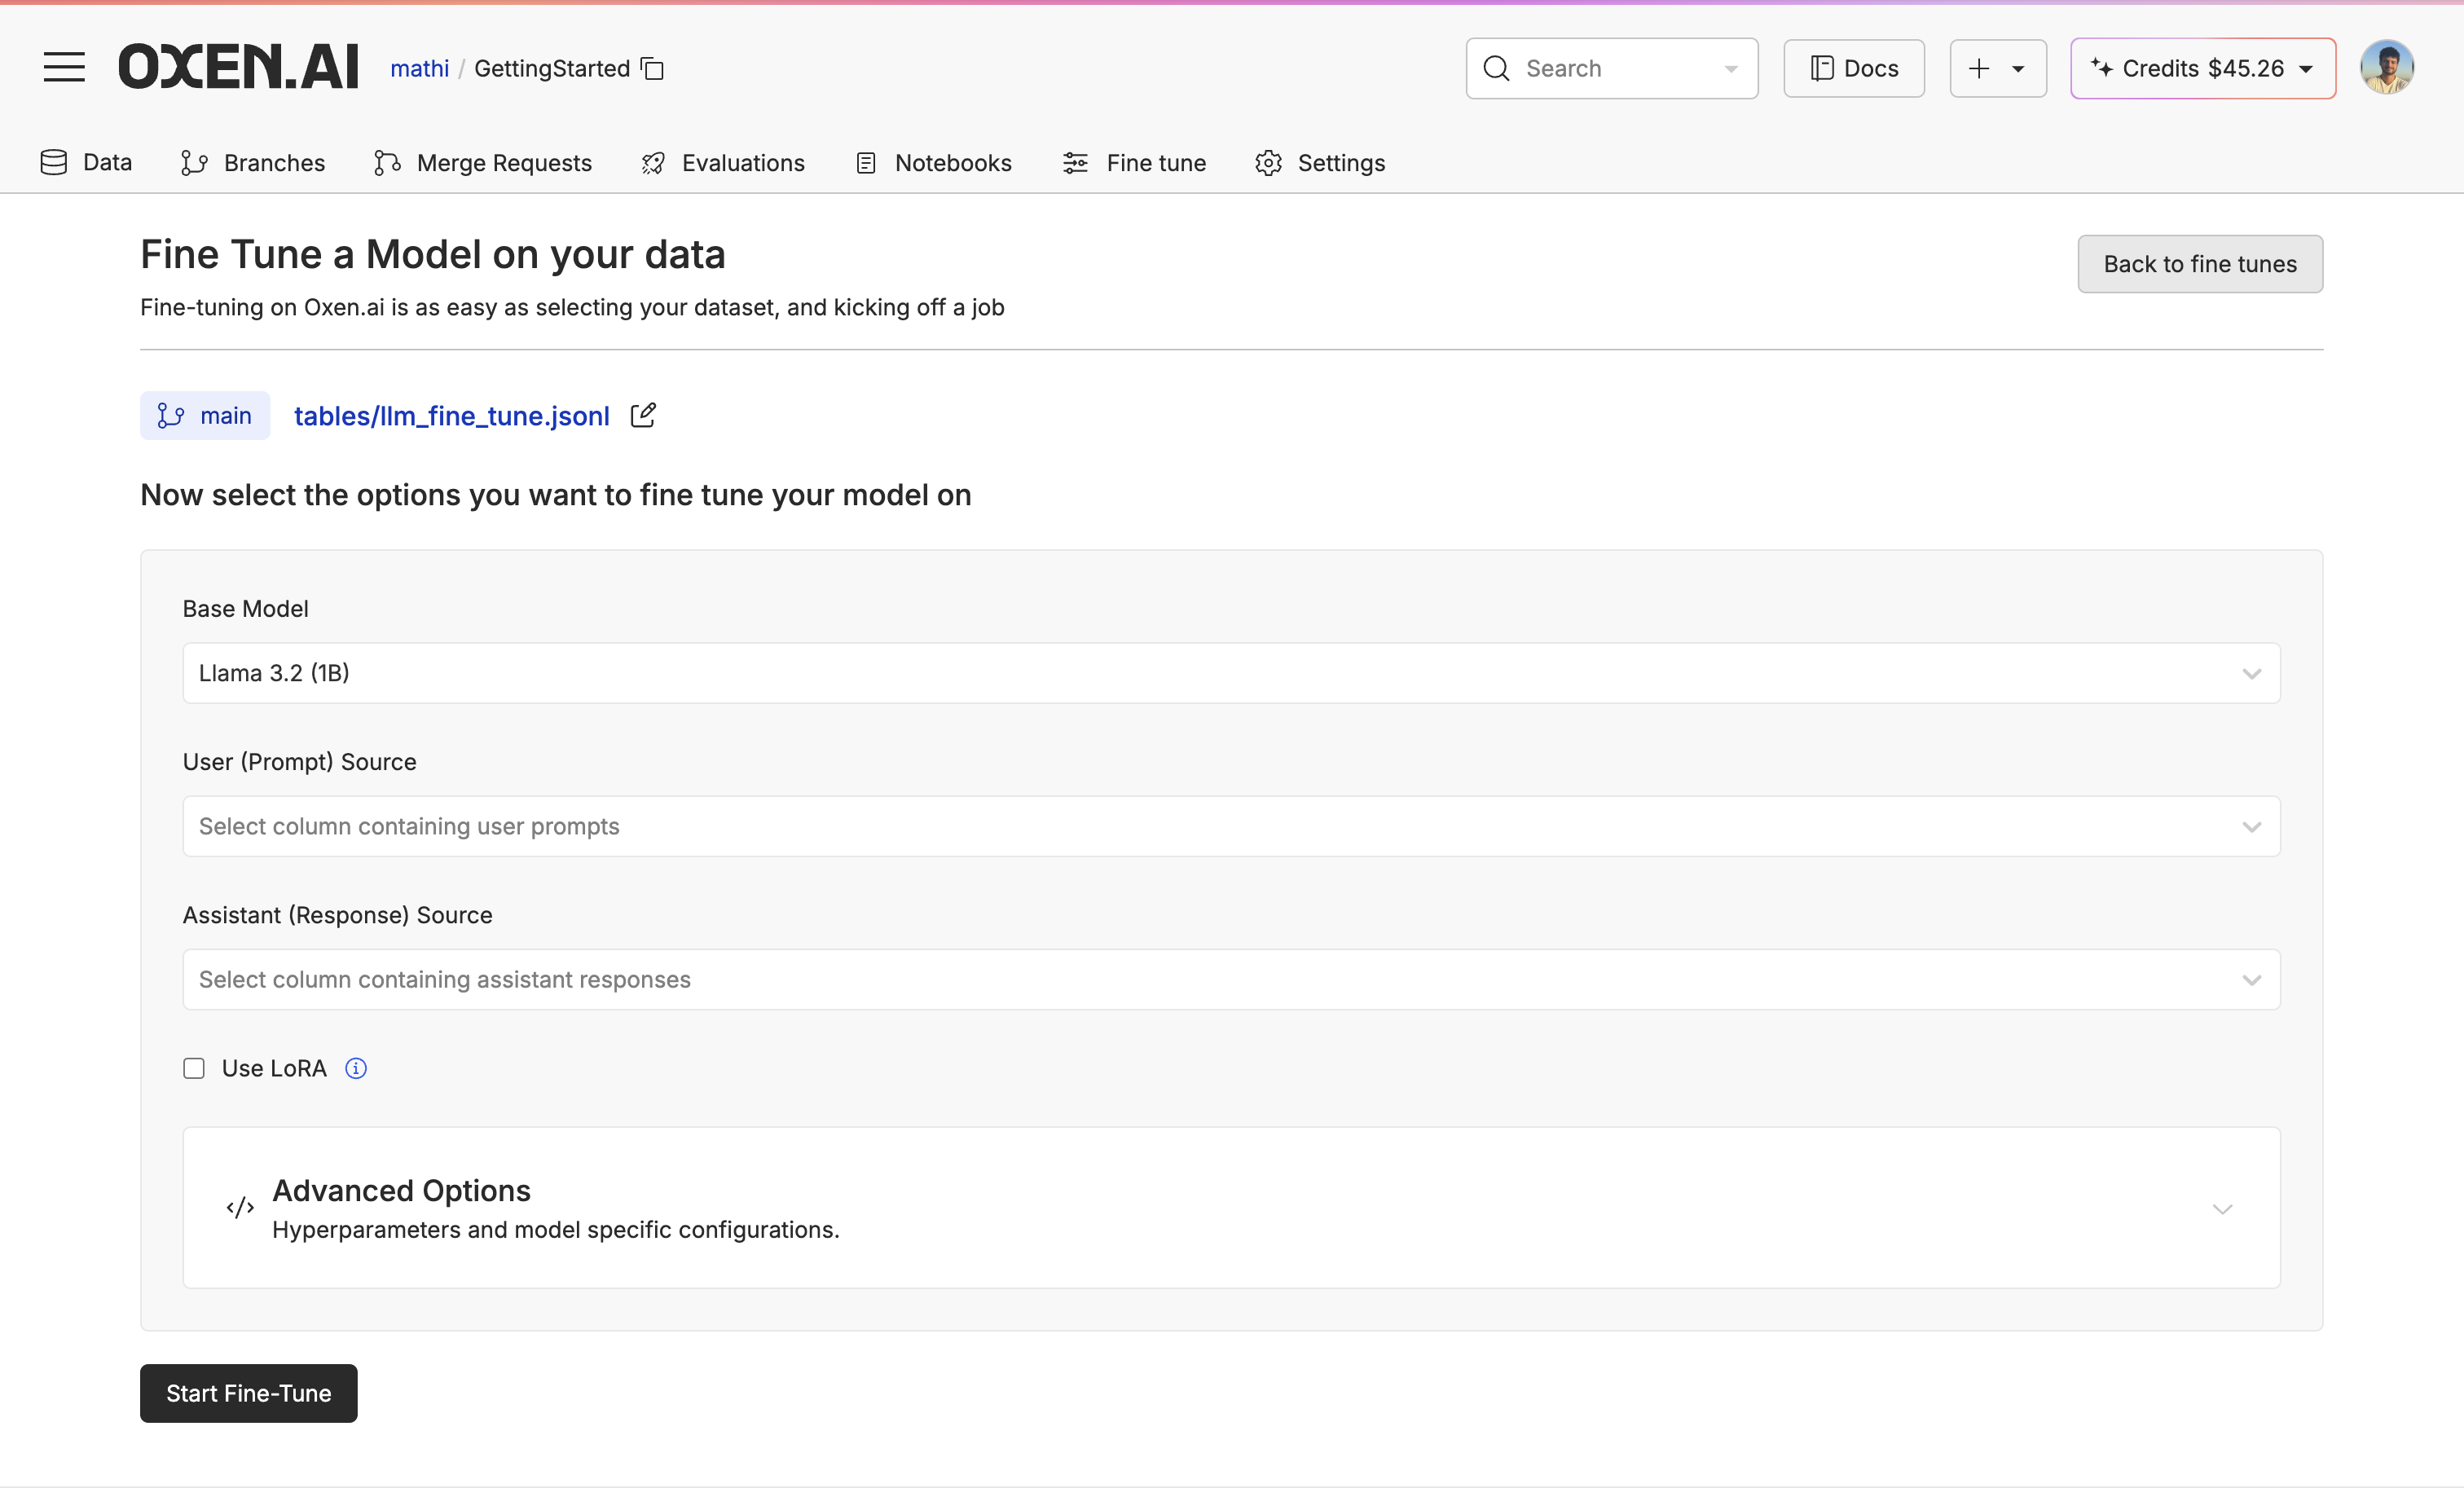 For our Advance Options, you can have control over hyperparameters and model specificationslike learning rate, batch size, and number of epochs.
 While we’re fine-tuning your model, you’ll be able to see the configuration, logs, and metrics of the fine-tuning.
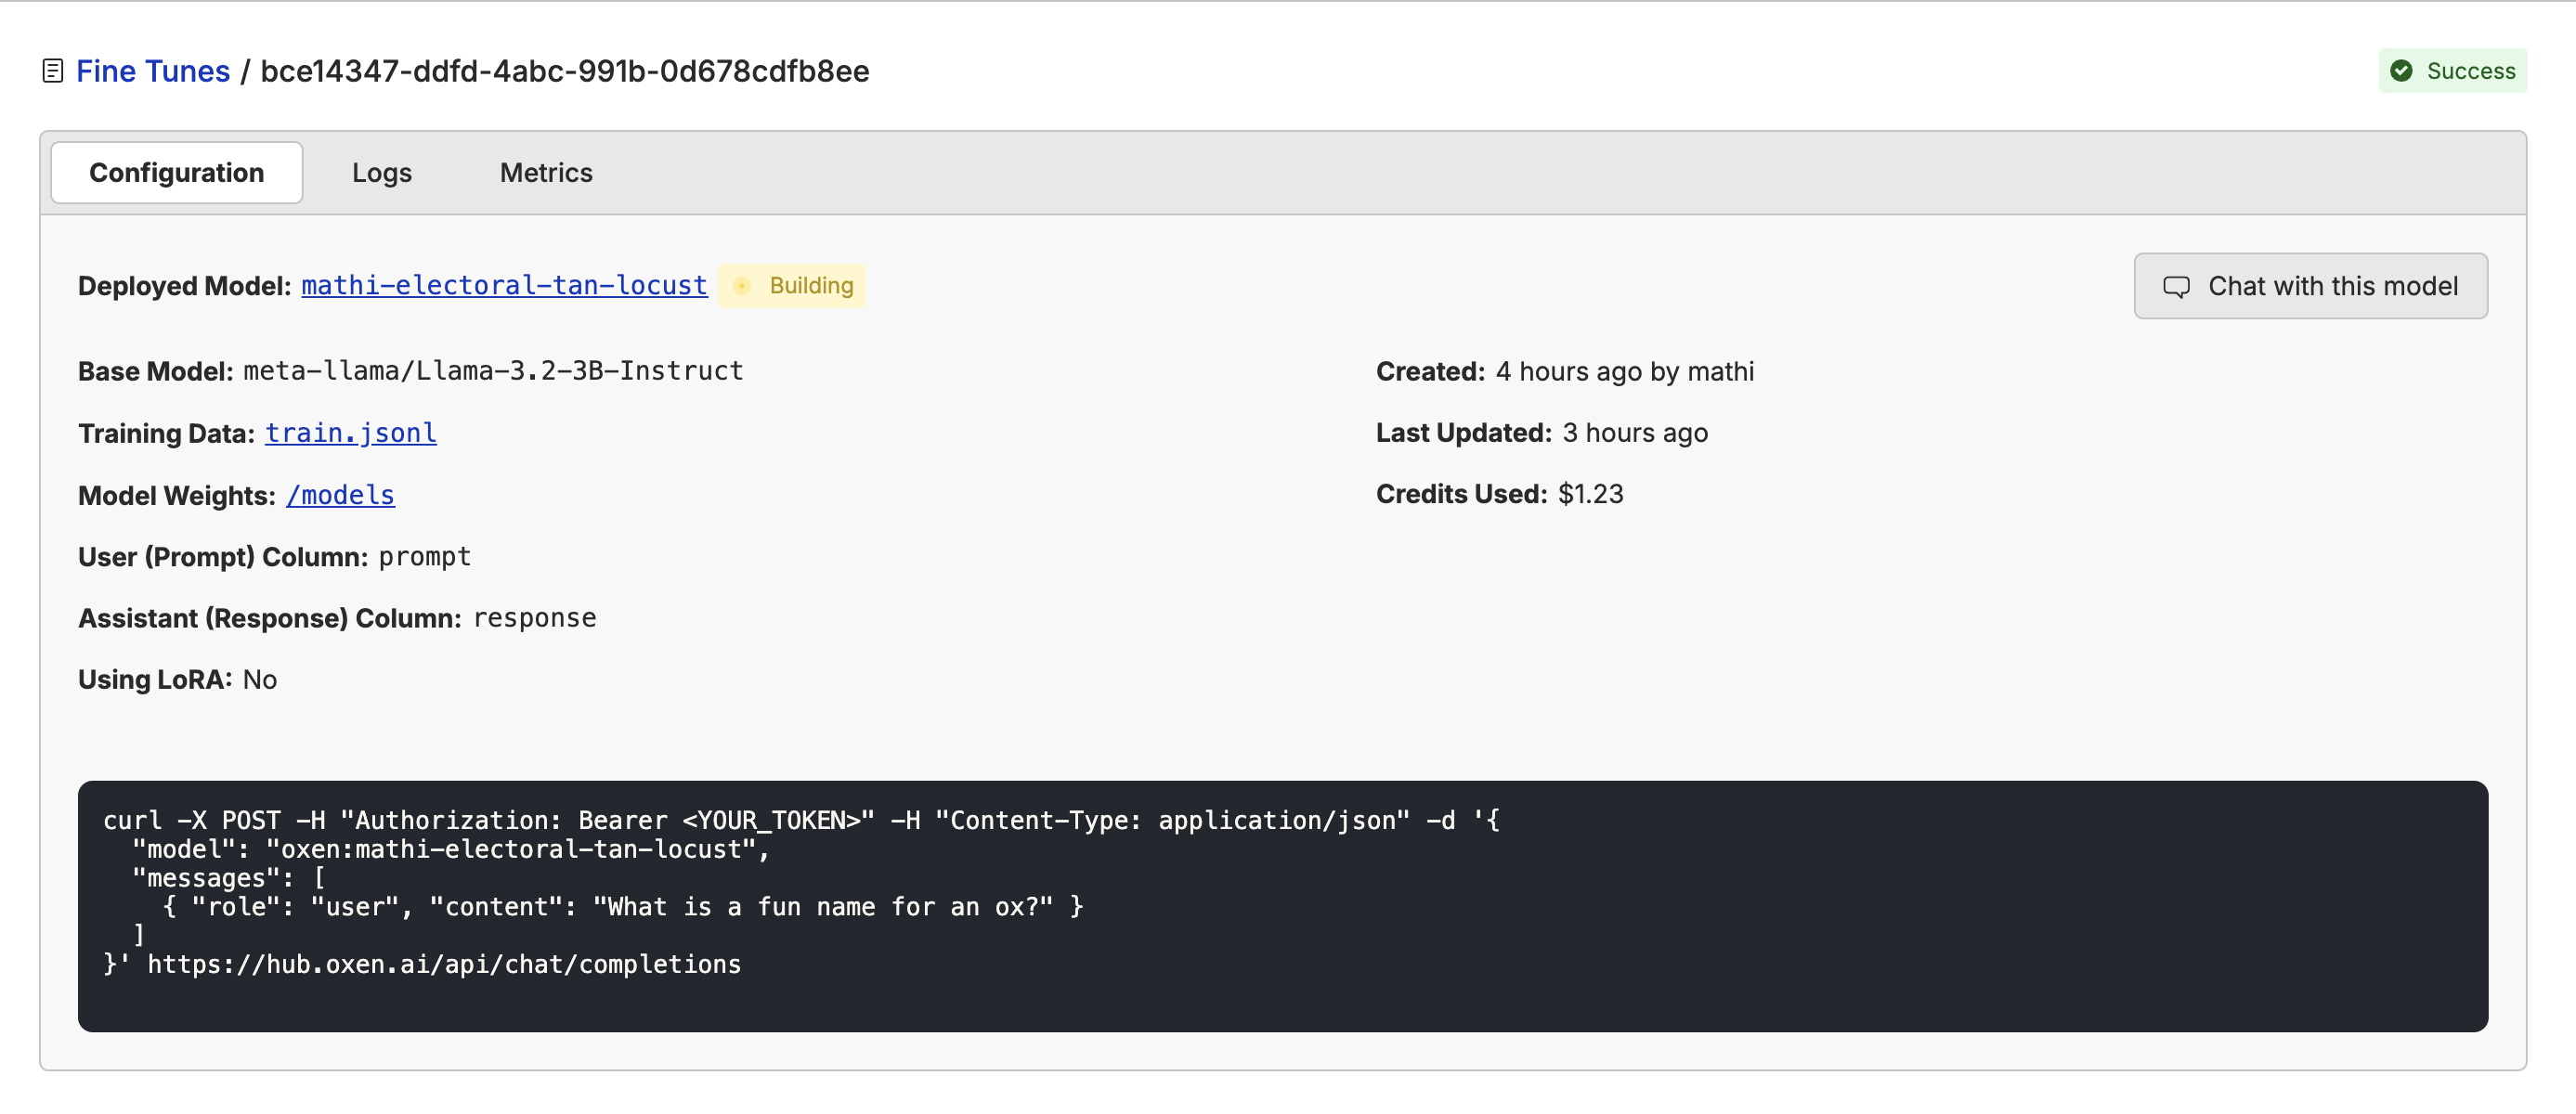
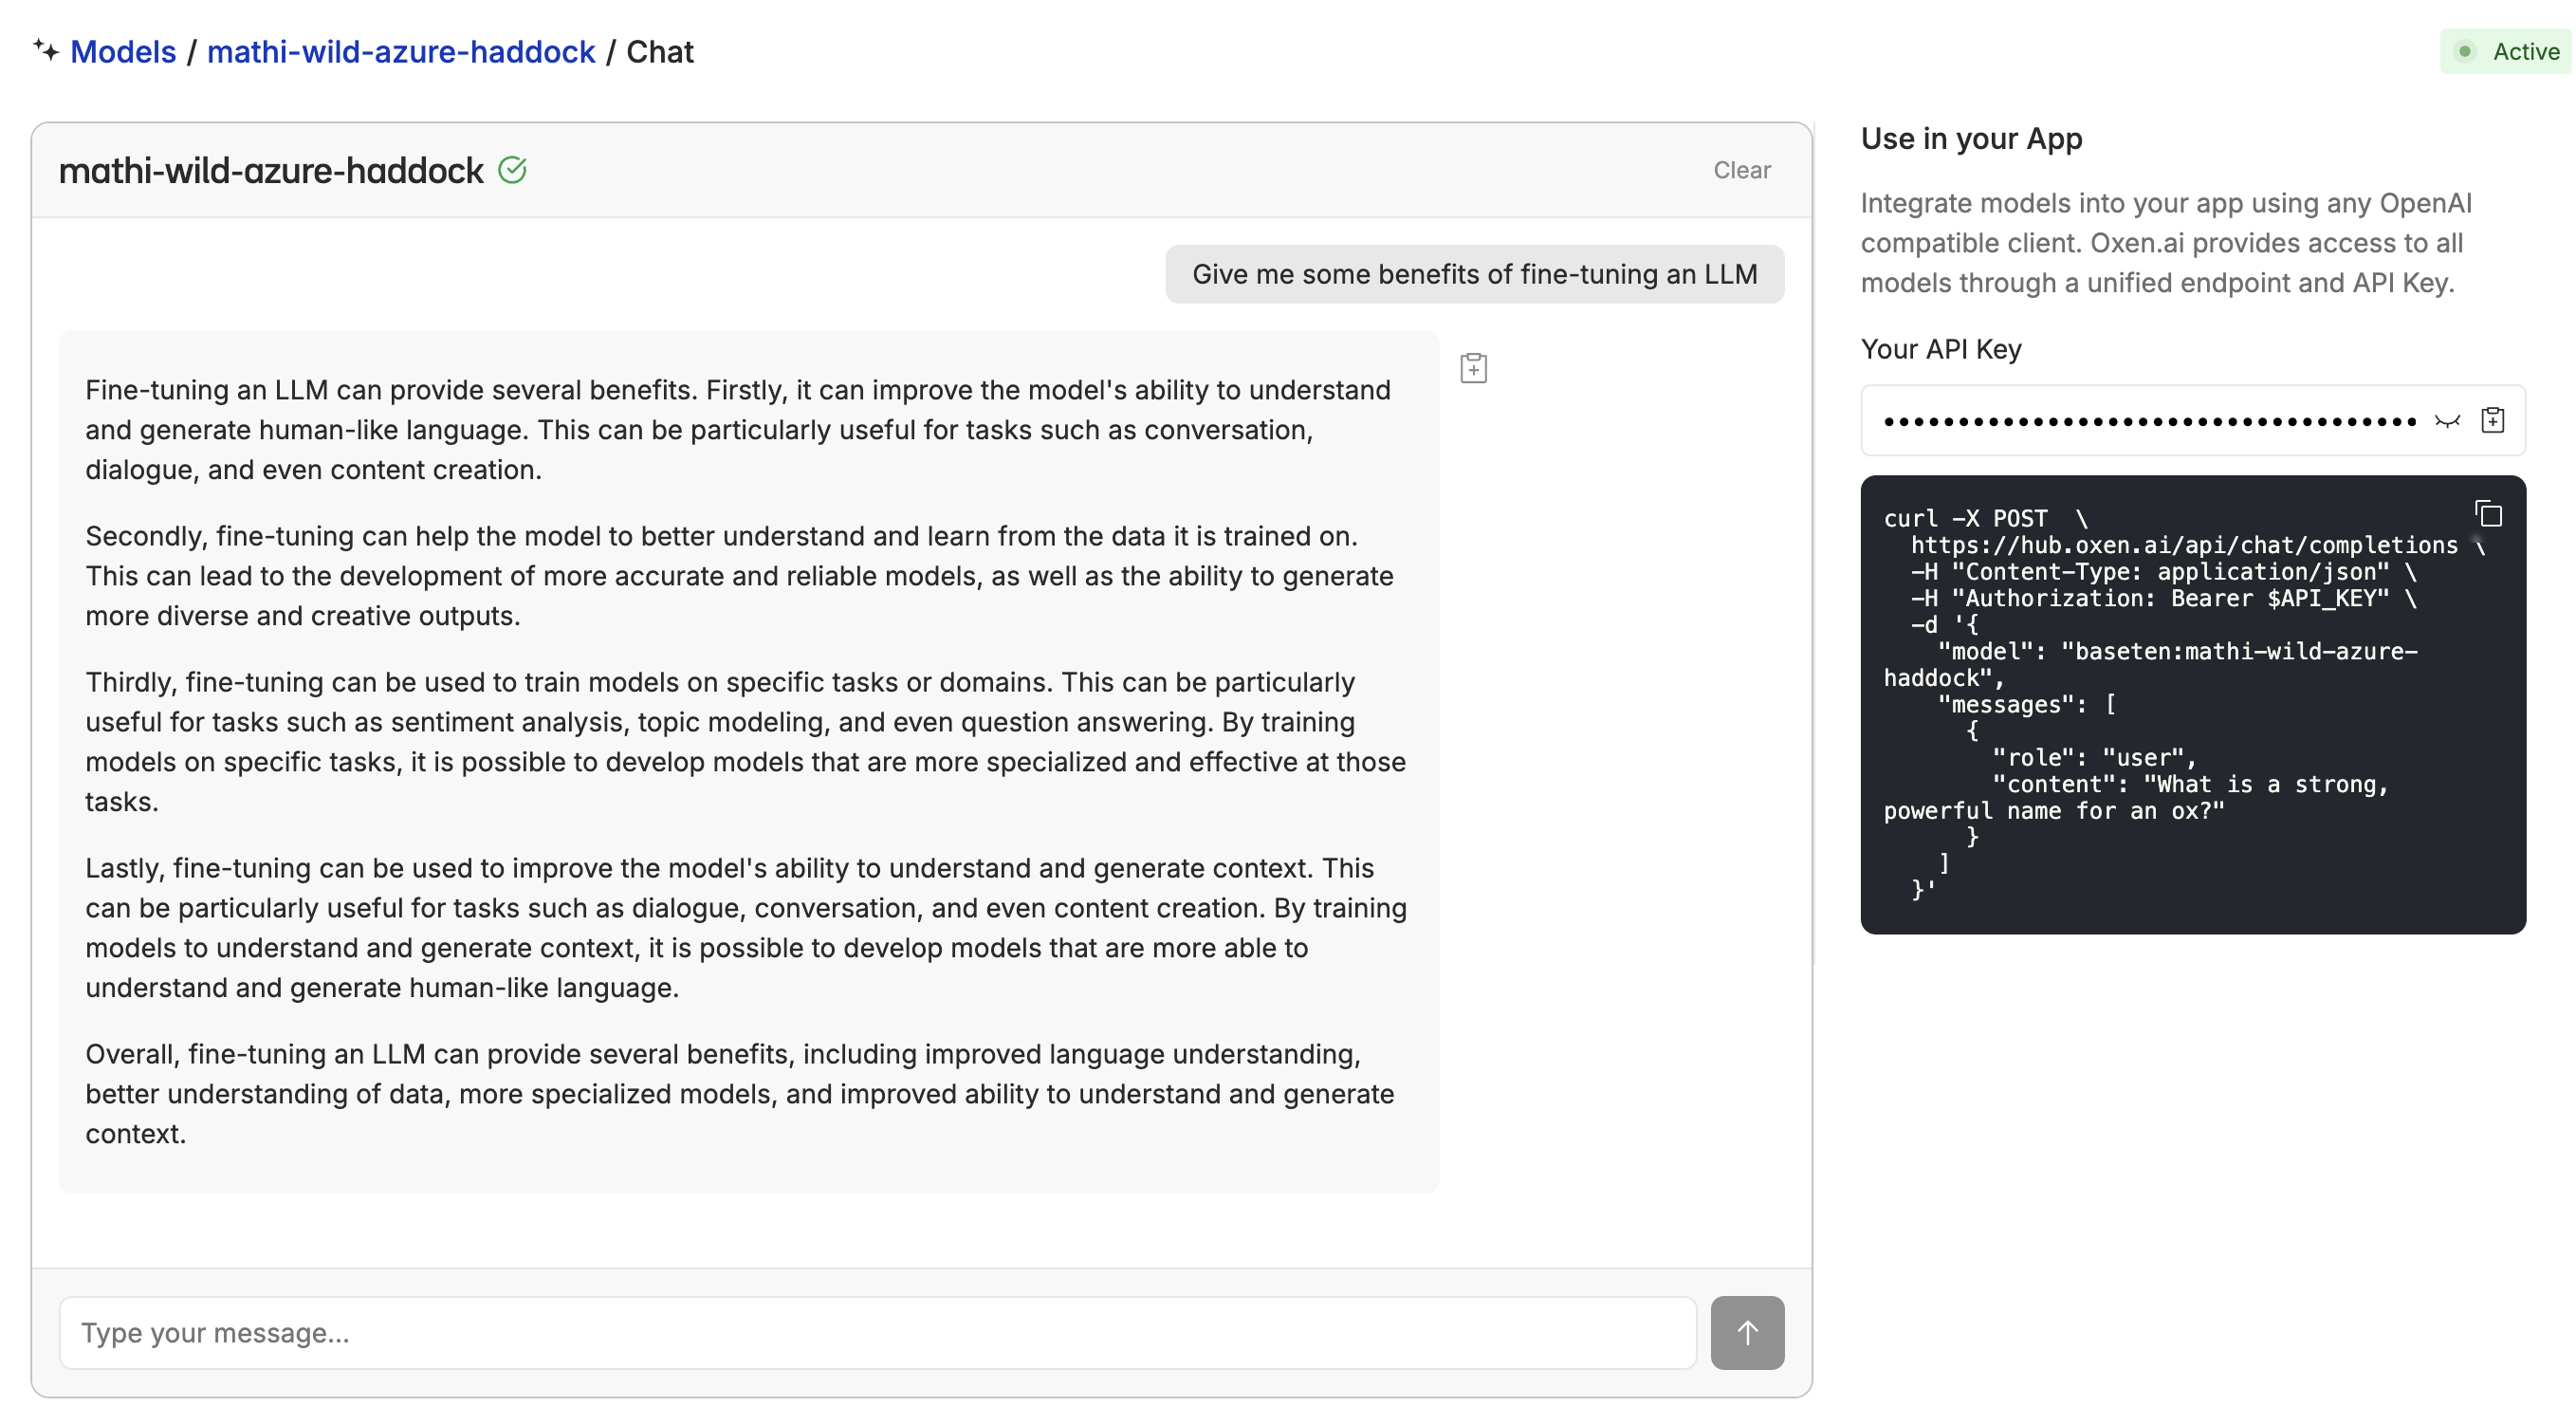
 Once your fine-tuning is complete, go to the configuration page and click “Deploy”. From there, you will not only have an API endpoint to use, but you will also be able to chat with your fine-tuned model to get a sense of how it’s doing.
6. Next Steps
Now you have a finished fine-tuned model you can not only call via API, but you can chat directly to get a sense of how it’s doing! Next, you can use Notebooks to run your model through your data, save the results, and compare it to the base model to see how it’s improved. You can also:- Store your users questions and the model responses to create a ‘data flywheel’ and continuously improve your model.
- Keep fine-tuning different models to see which works best for your use case and data.
- Fine-tune on different datasets to see if another works better.
- Tweak your evaluation prompts to see if they are accurately evaluating the quality of your model.
Oxen.ai makes fine-tuning easy, but if you are struggling to fine-tune your model or want us to fine-tune for you, we’d be happy to set up a consultation with our ML experts!