In addition to simplifying your fine-tuning pipeline, Oxen.ai offers fine-tuning consultations and services if you are struggling with training a production-ready model. Sign up here to set up a meeting with our ML experts.

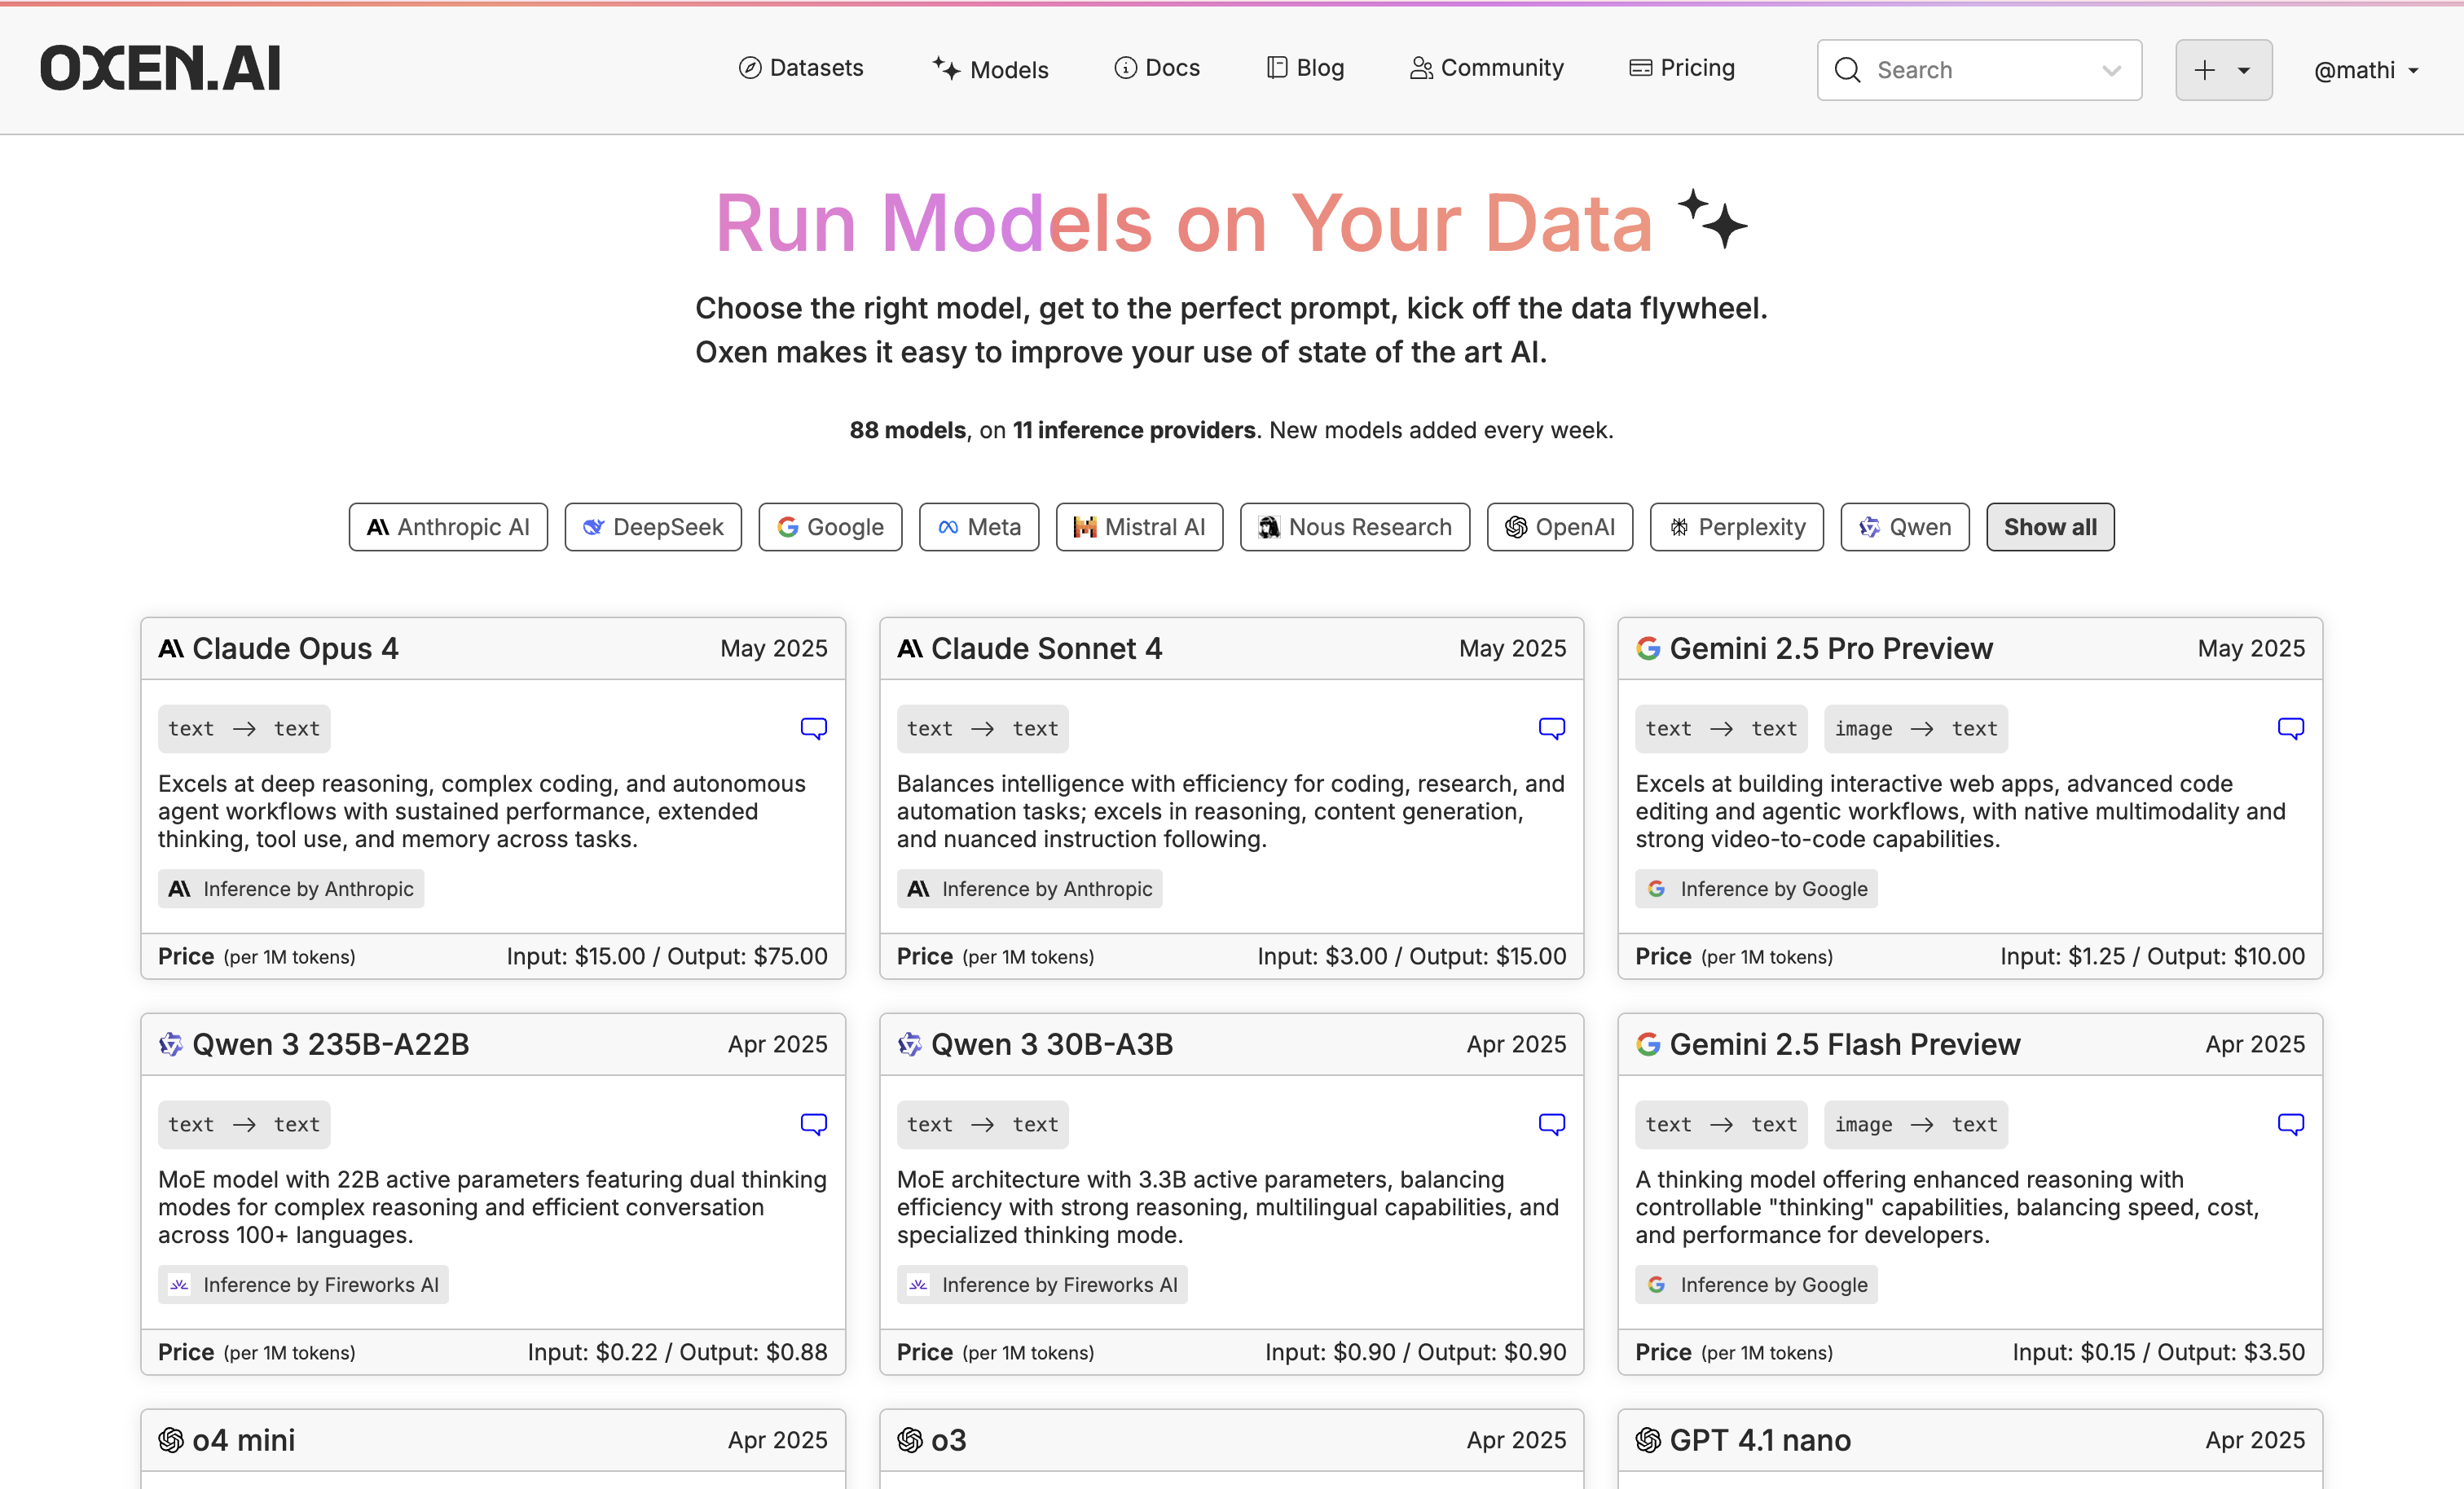
1. Test Different Small Models

models-page While we use Llama 3.2 3B for this example, go through our available models and click the little chat icon on the top right of the model name to chat with it. chat-icon If you don’t see the model you need, let us know in Discord or email us at hello@oxen.ai and we’ll add it.

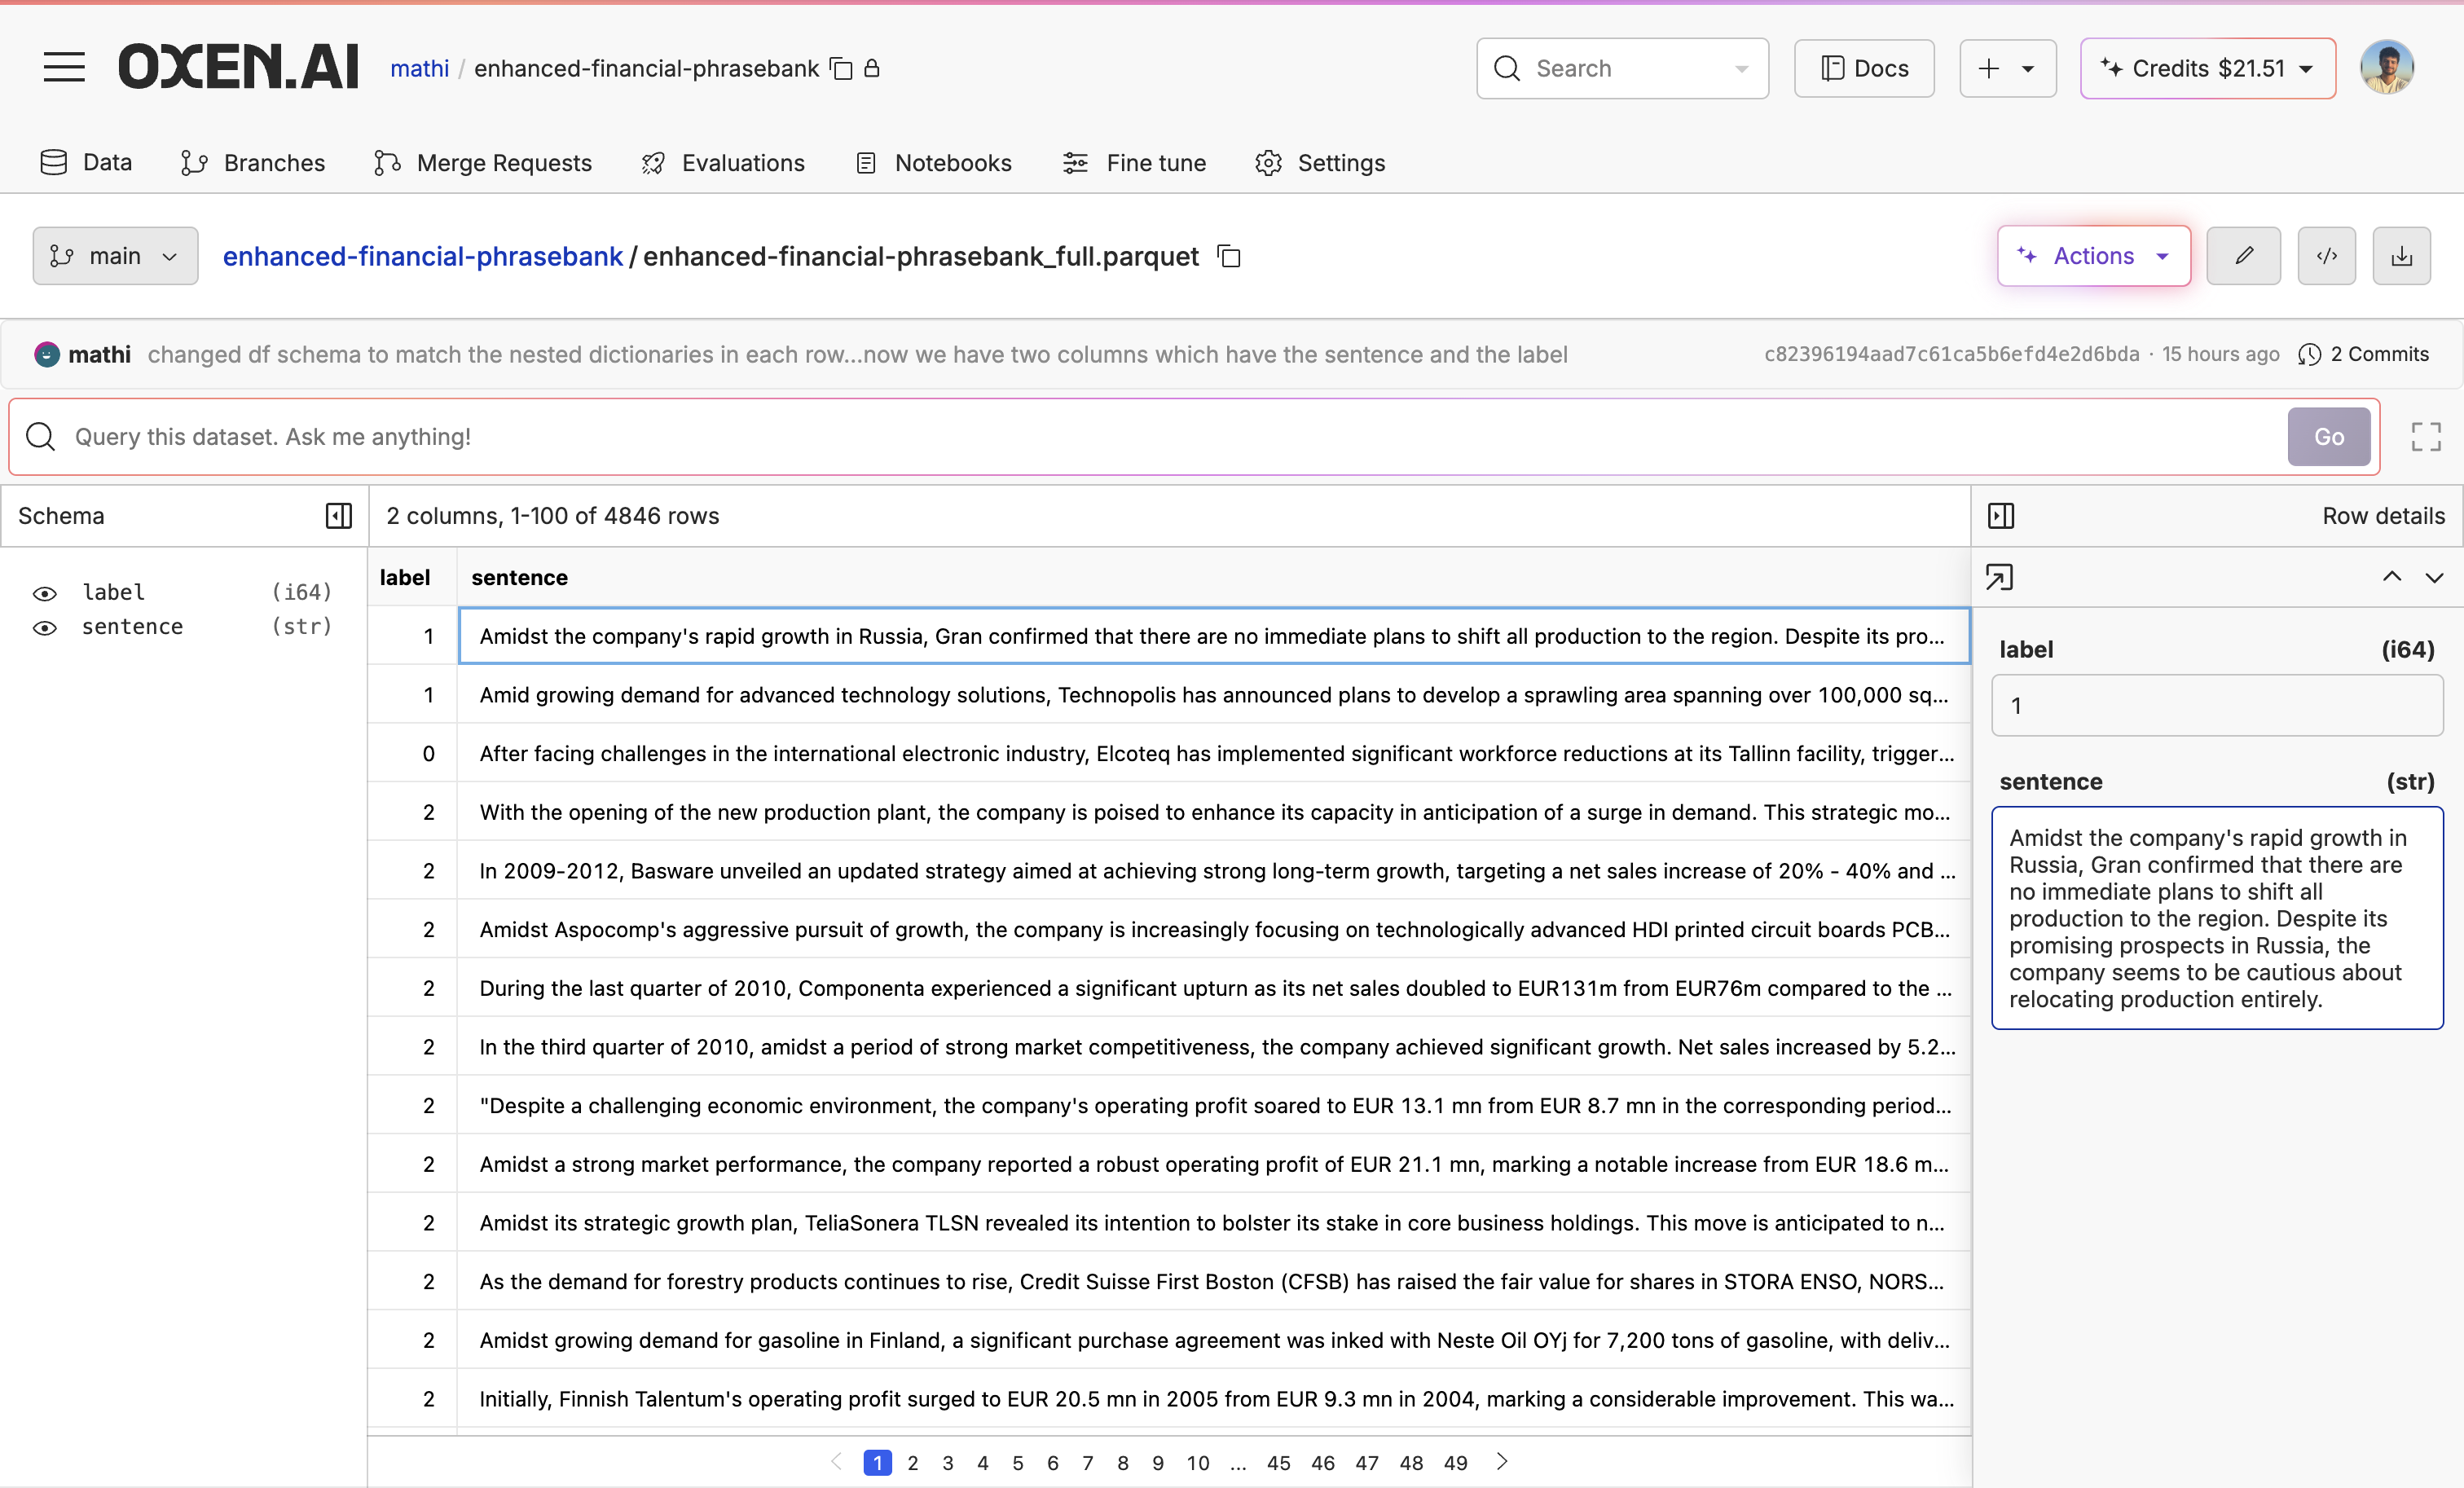
2. Upload or Create Your Dataset

Once you have found a model you like, upload or create a dataset to fine-tune the model on. If you do not already have a dataset, you can explore new datasets and augment the data with our Model Inference tool. You can also use our Model Inference tool to generate synthetic data from scratch. If you already have a dataset, you can upload it easily with Oxen.ai’s CLI commands. datasets-page For this example, I used the enhanced-financial-phrasebank dataset. First I flattened the dataset to use the nested label and sentence keys as columns and split the main dataset into train and test datasets for training and evaluating, respectively. datasets-page

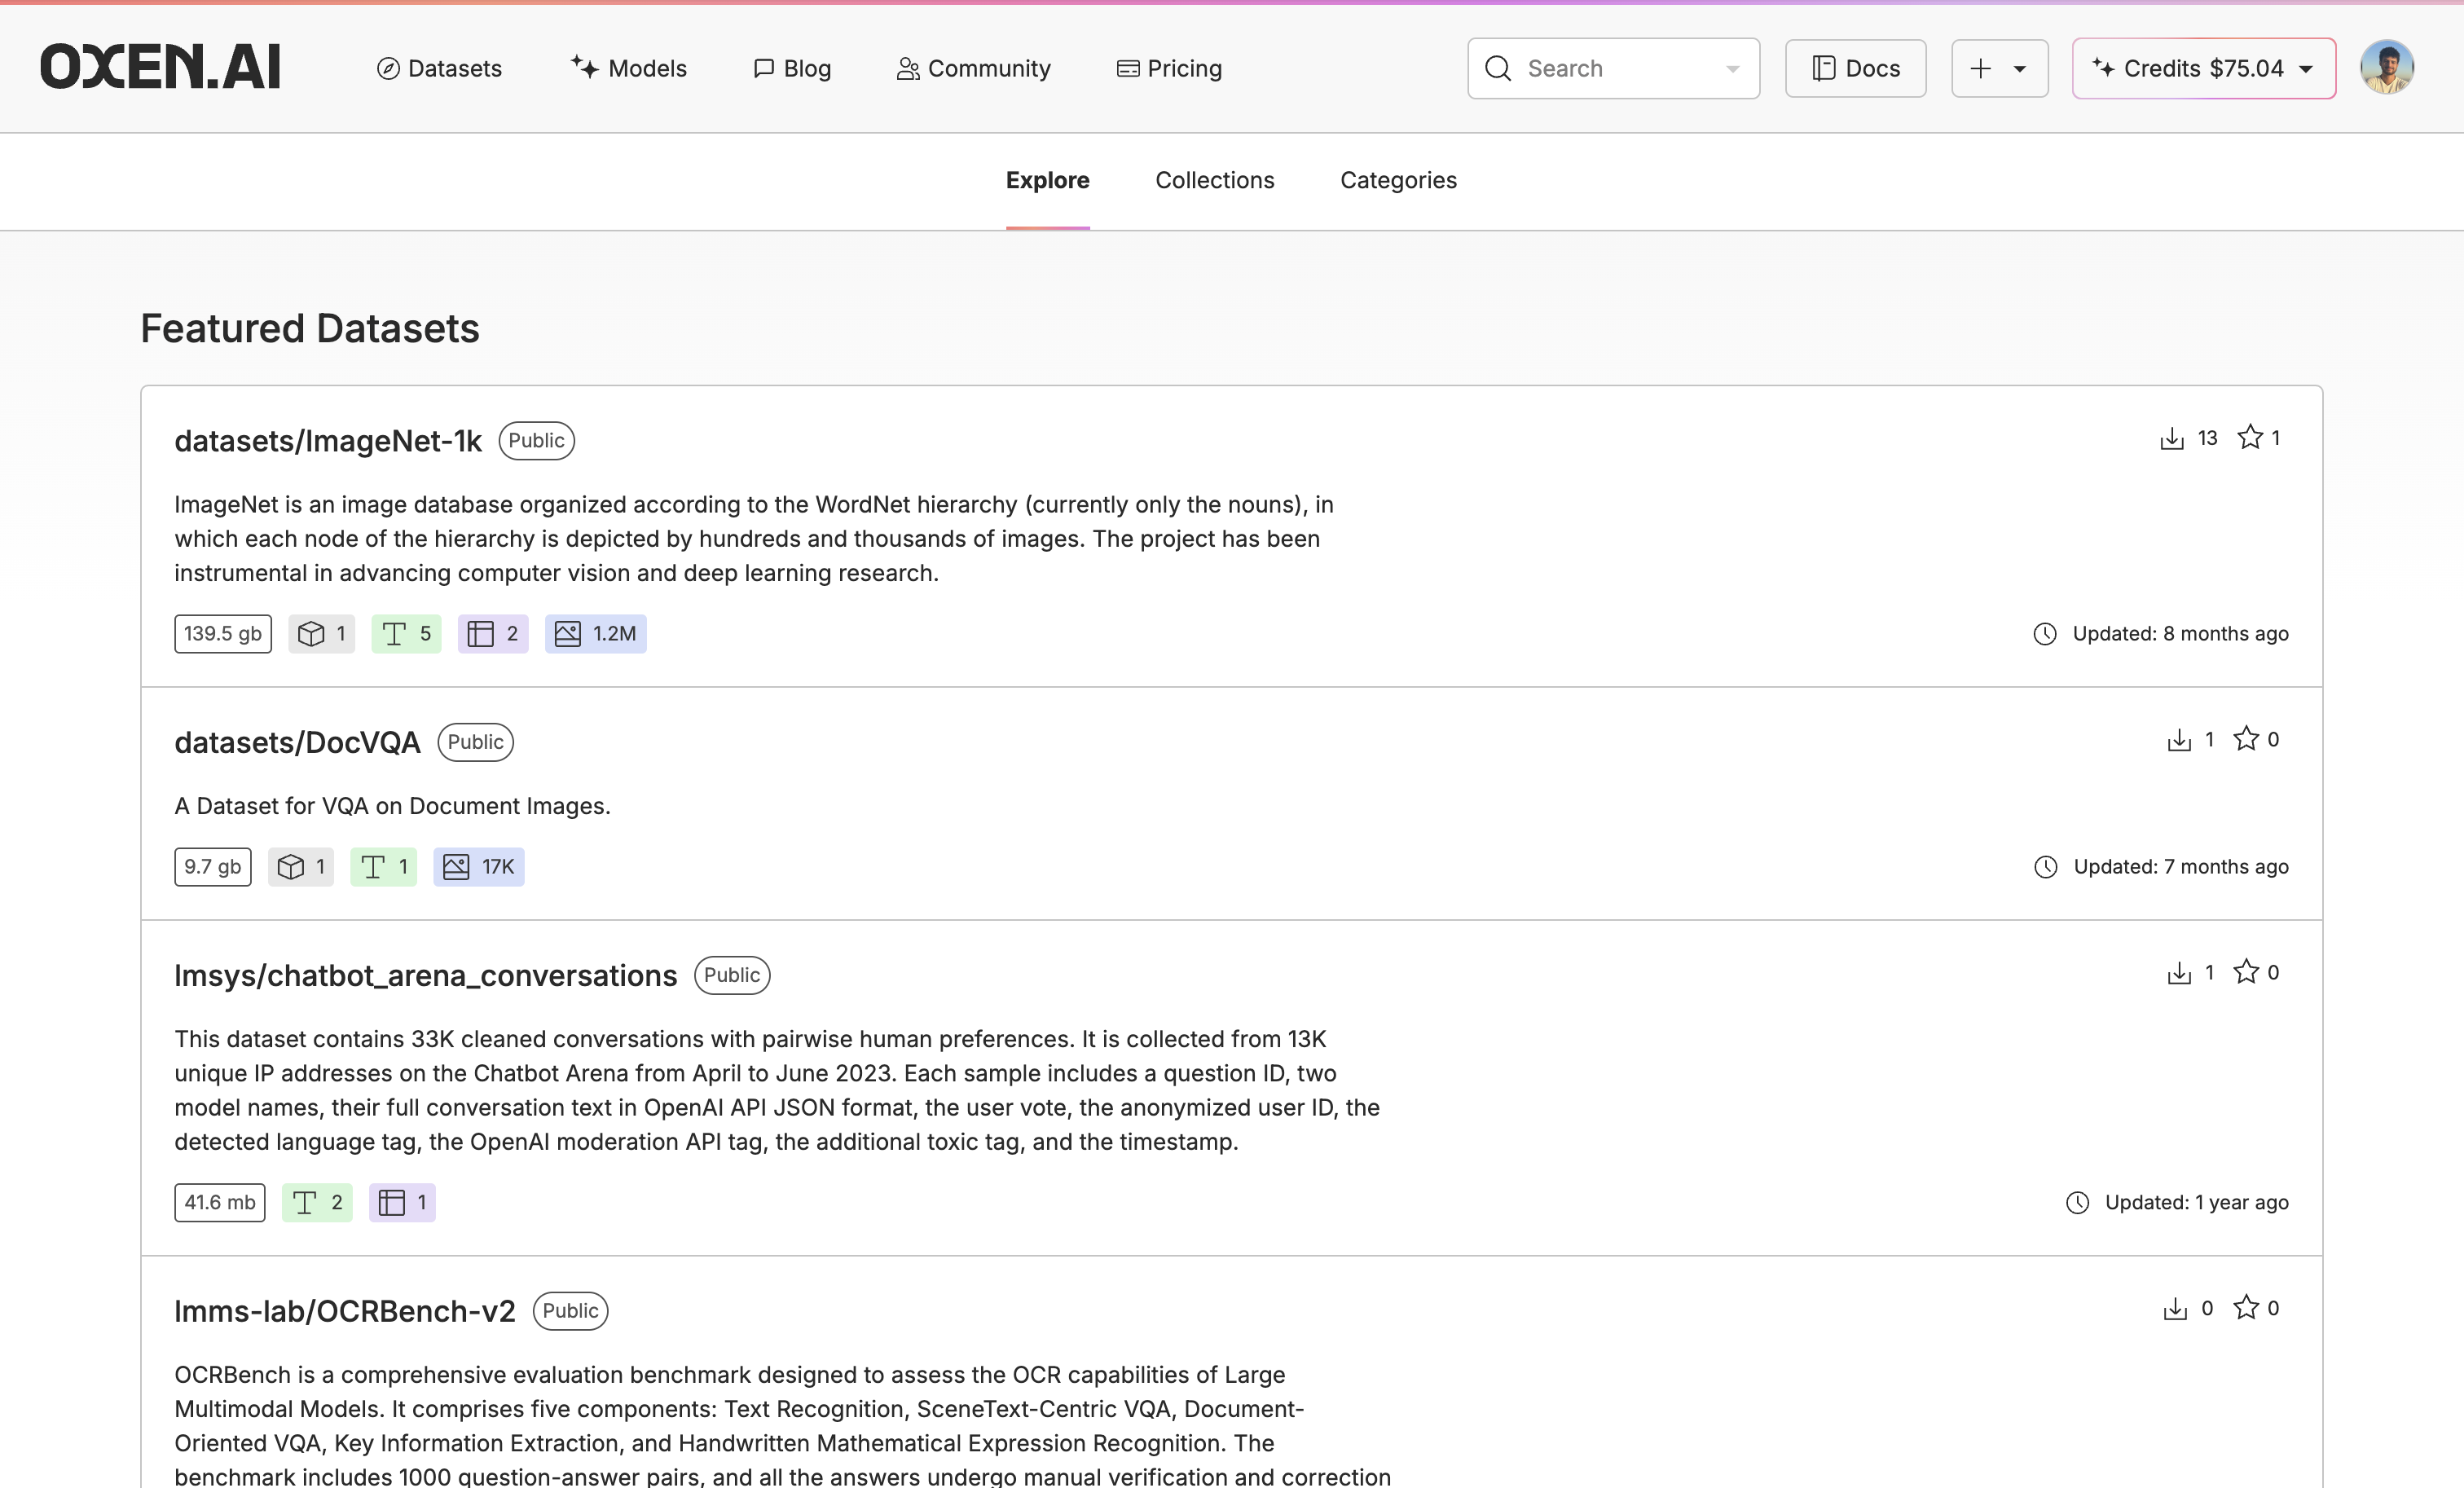
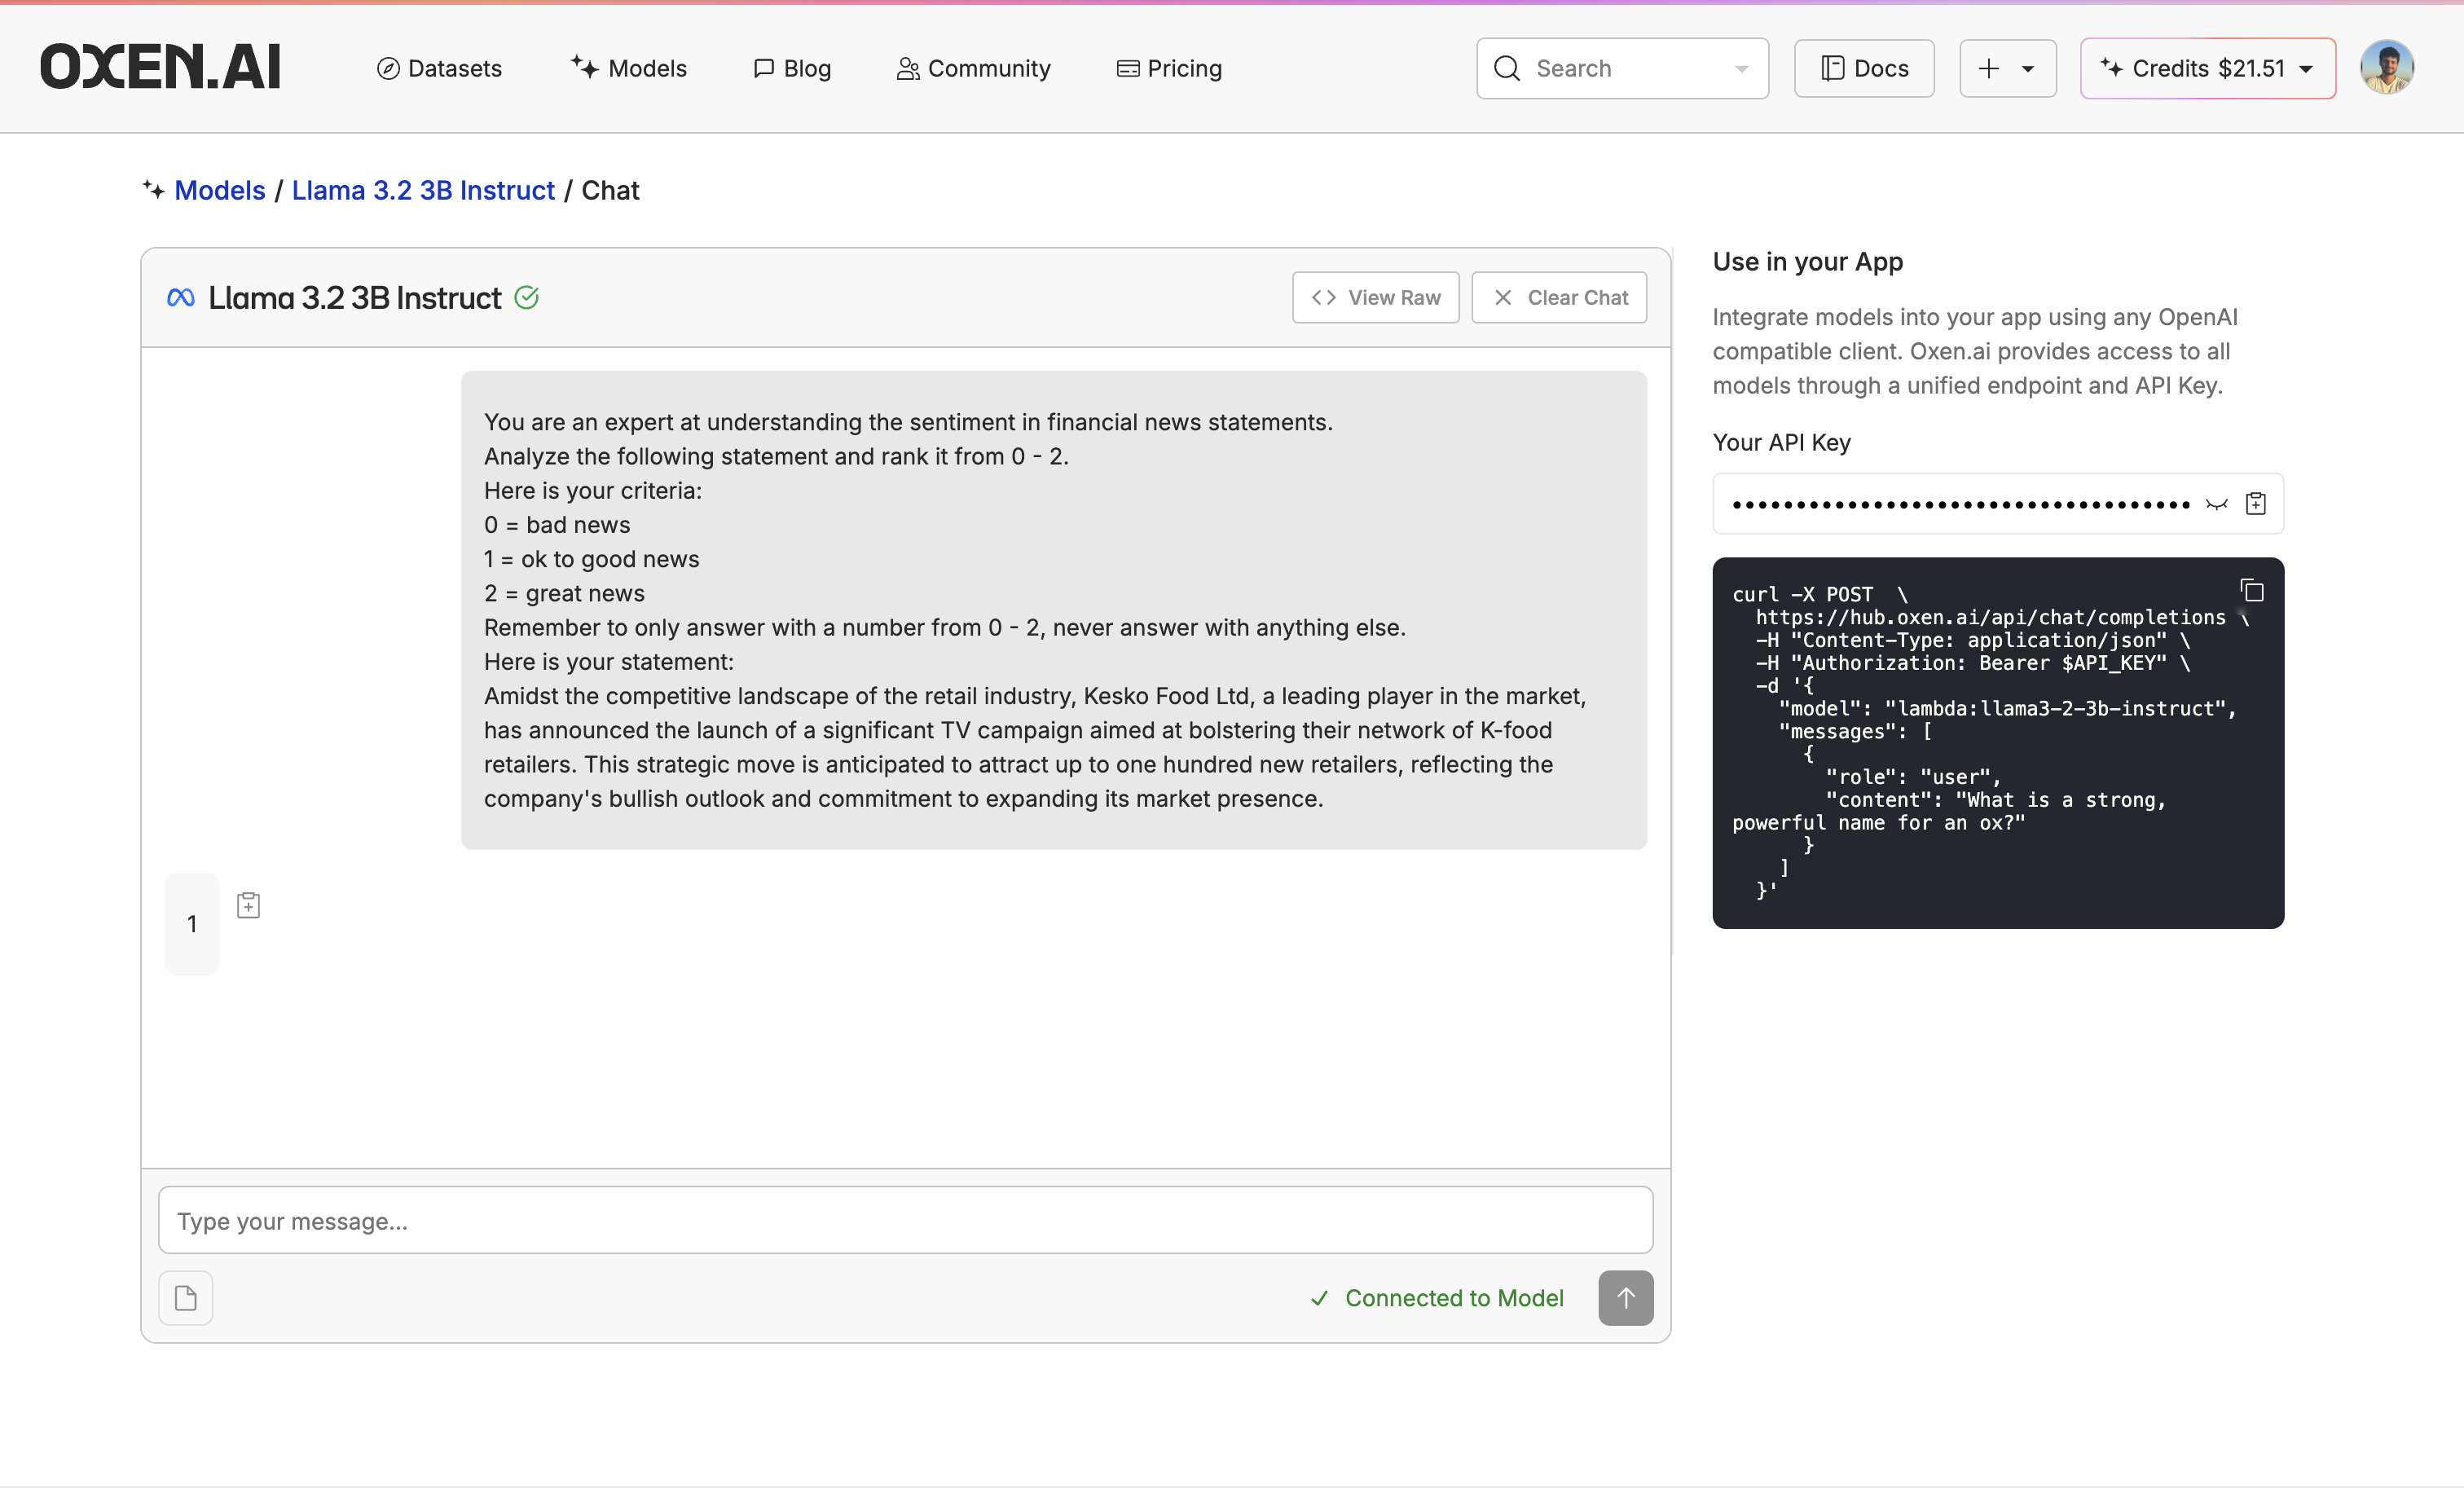
3. Evaluate the Base Model

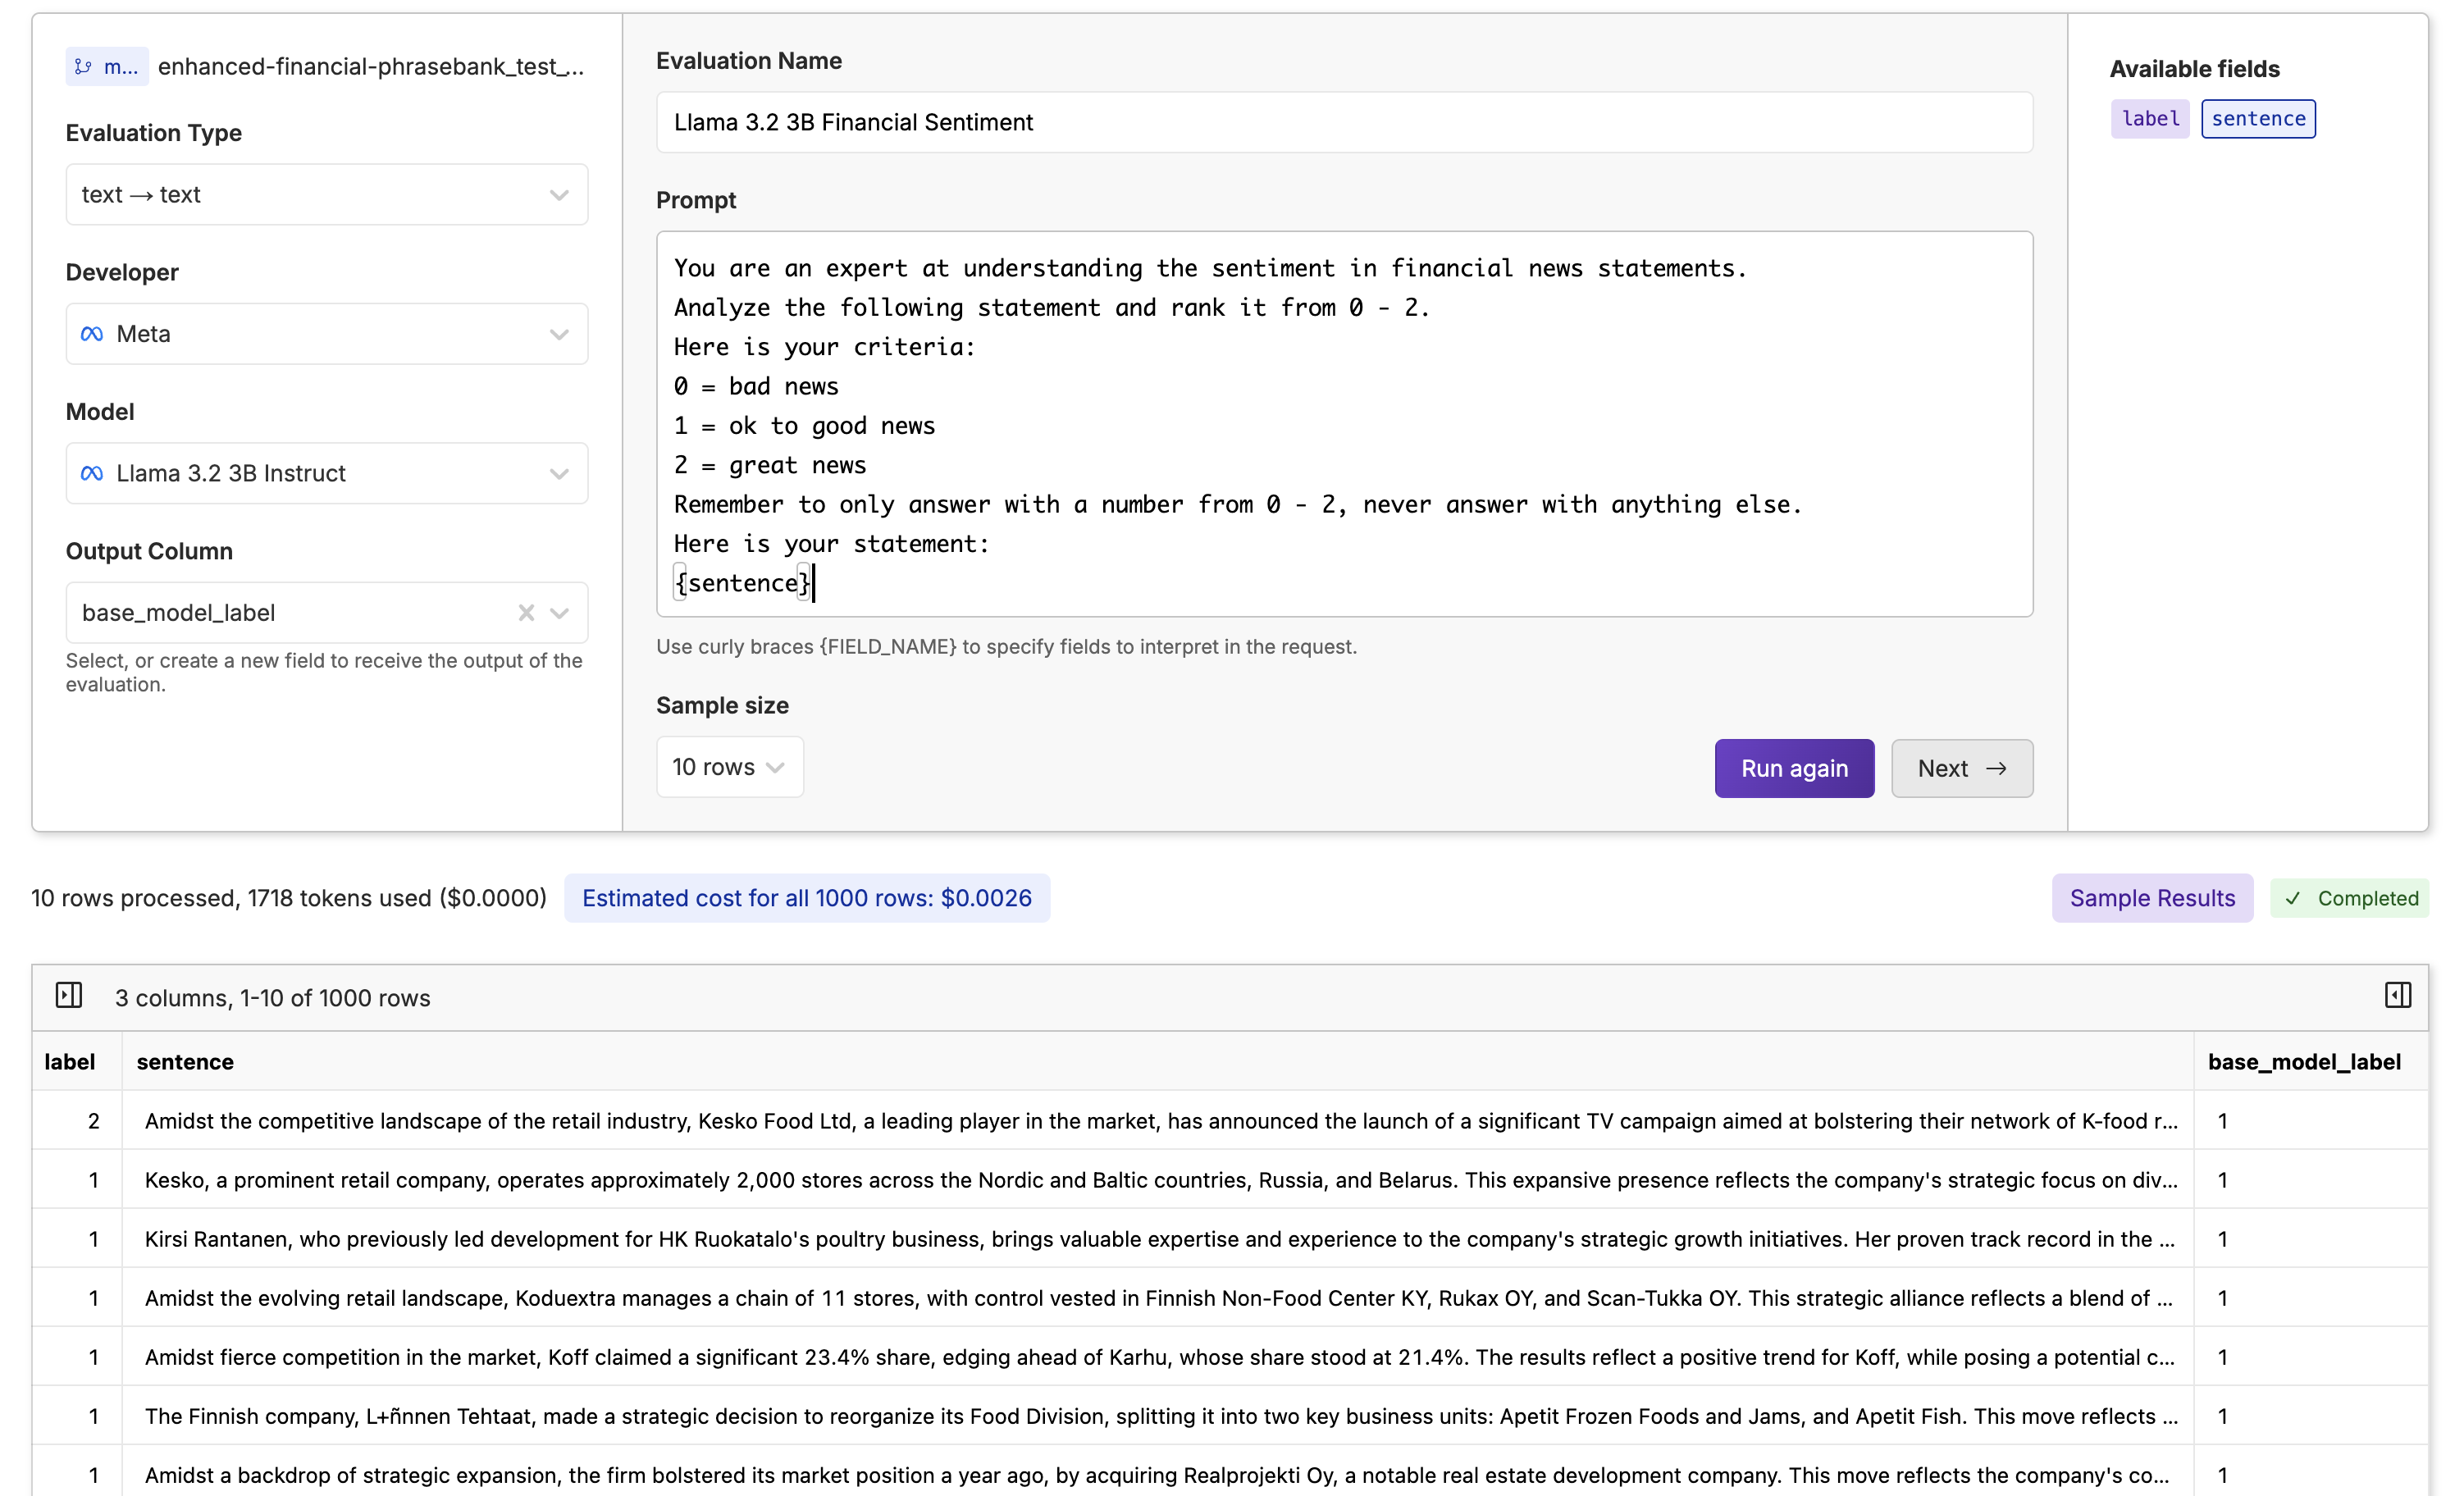
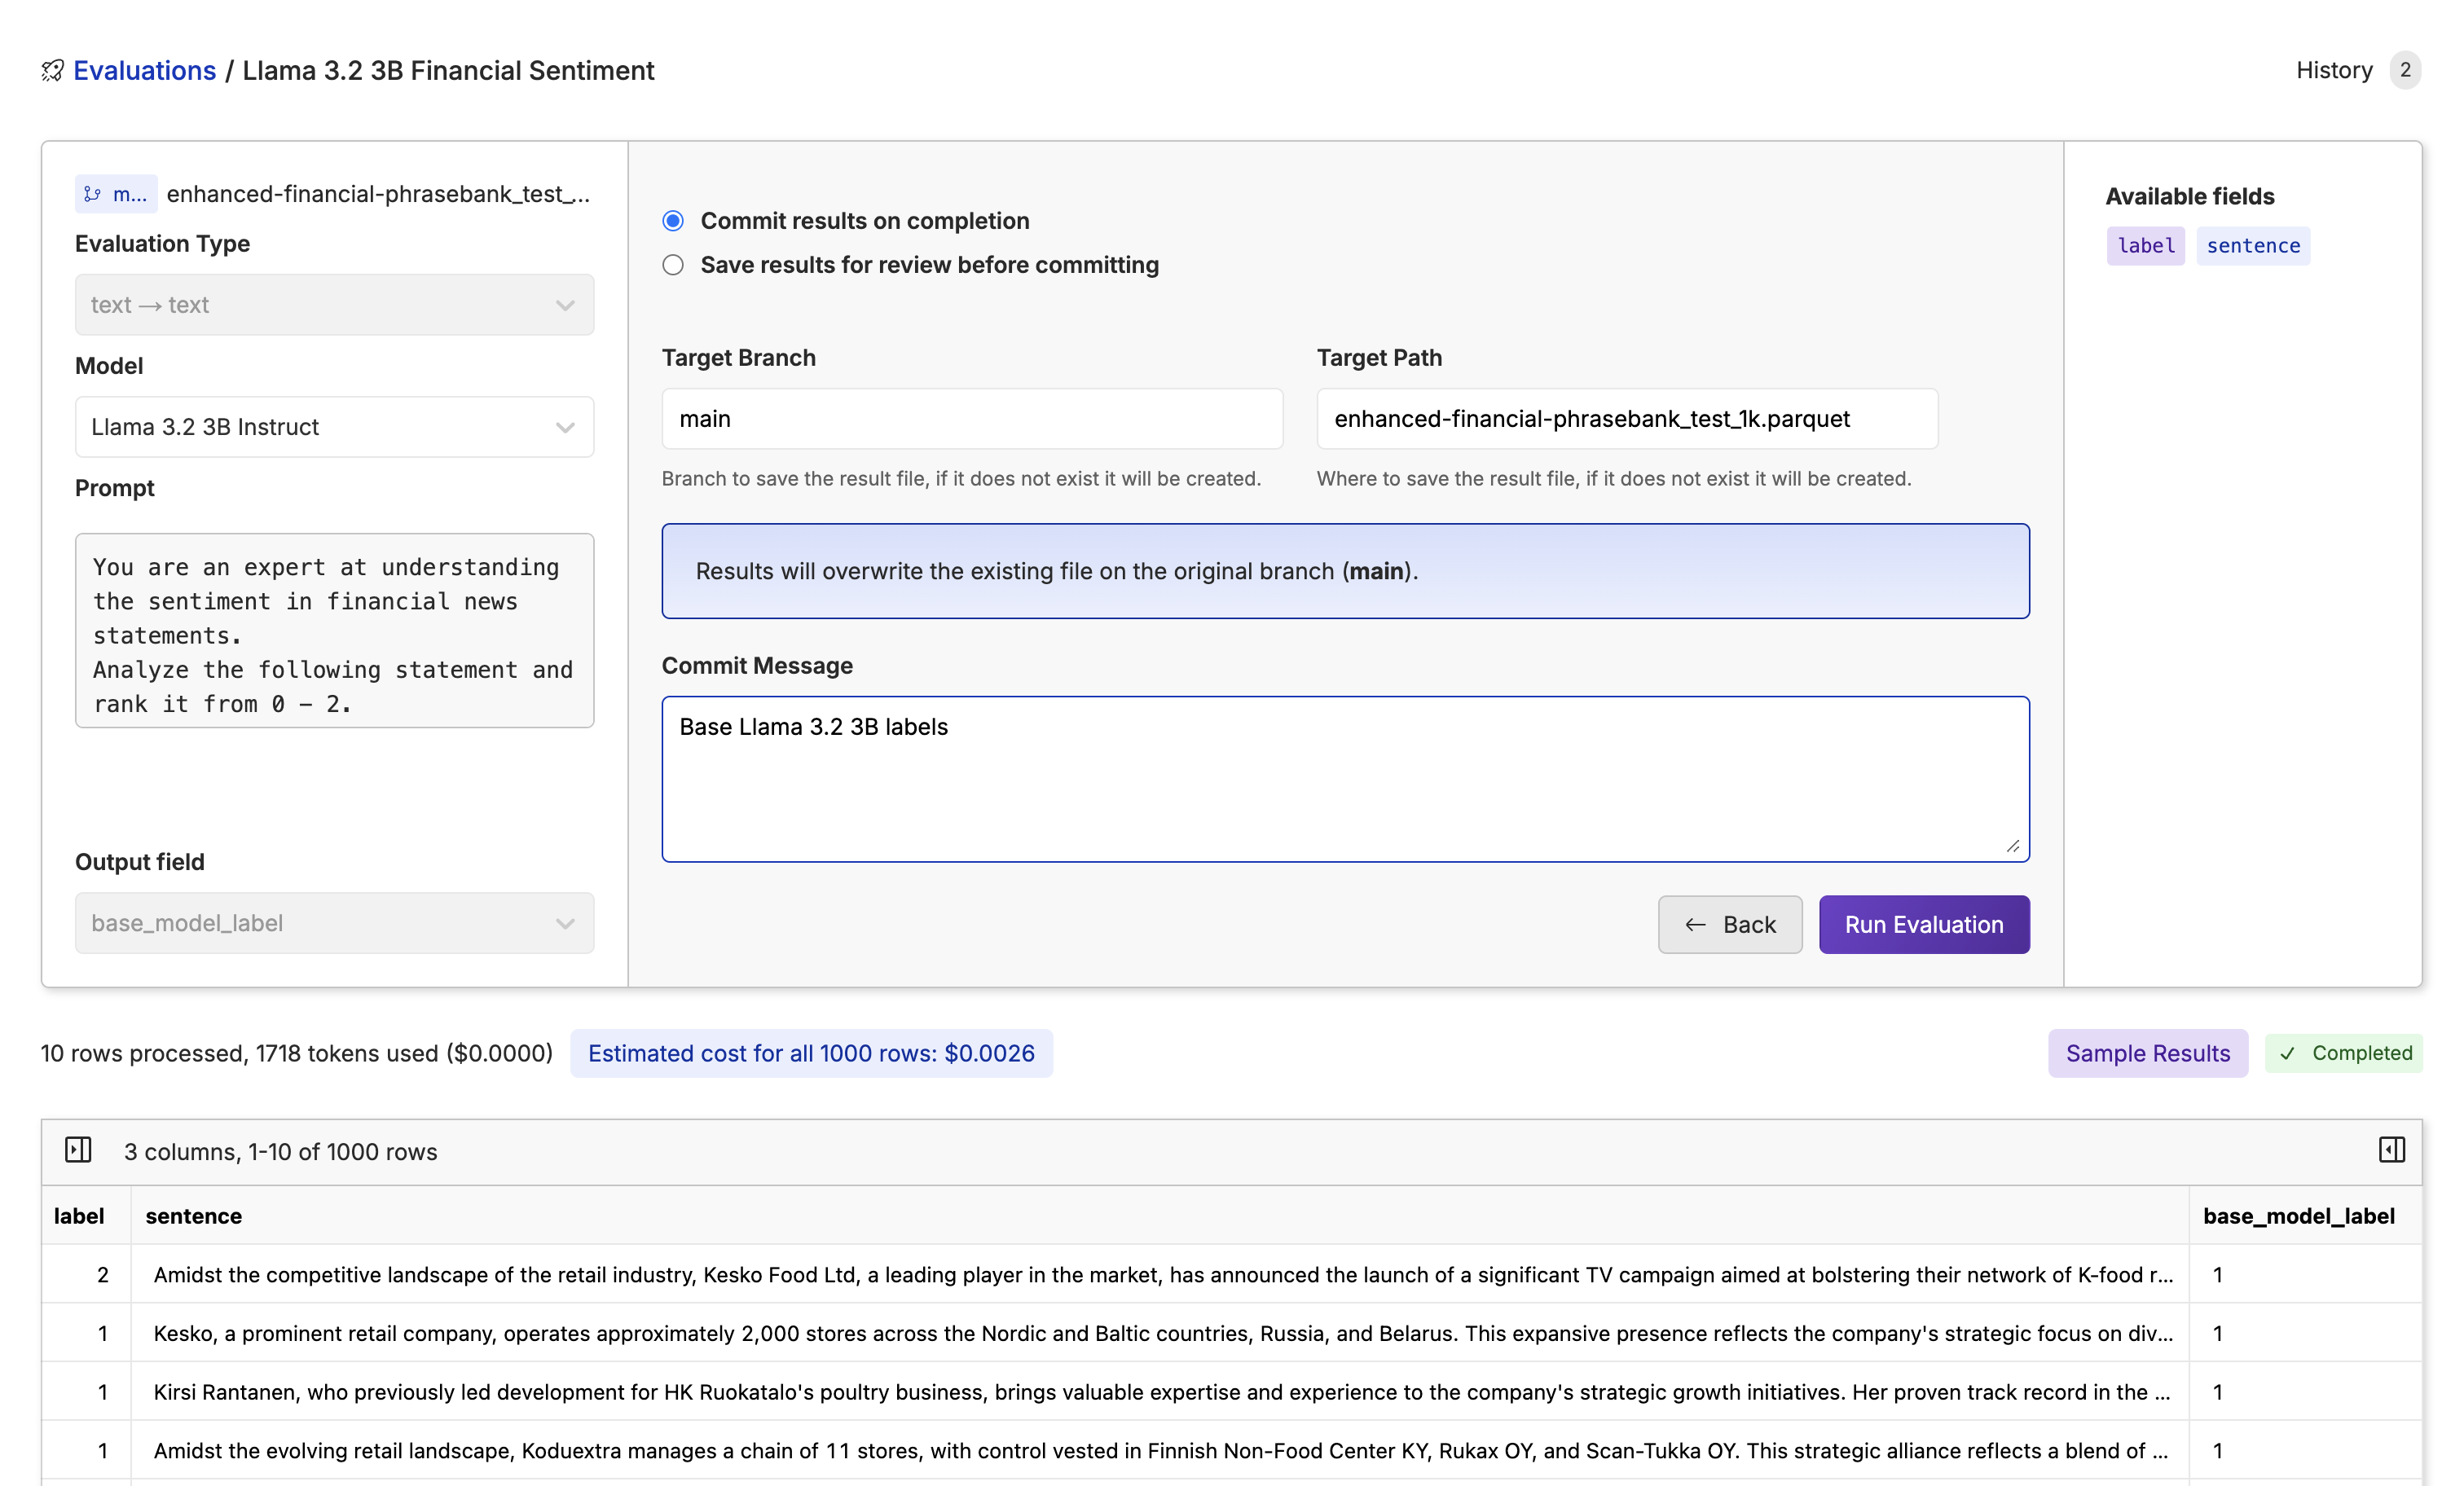
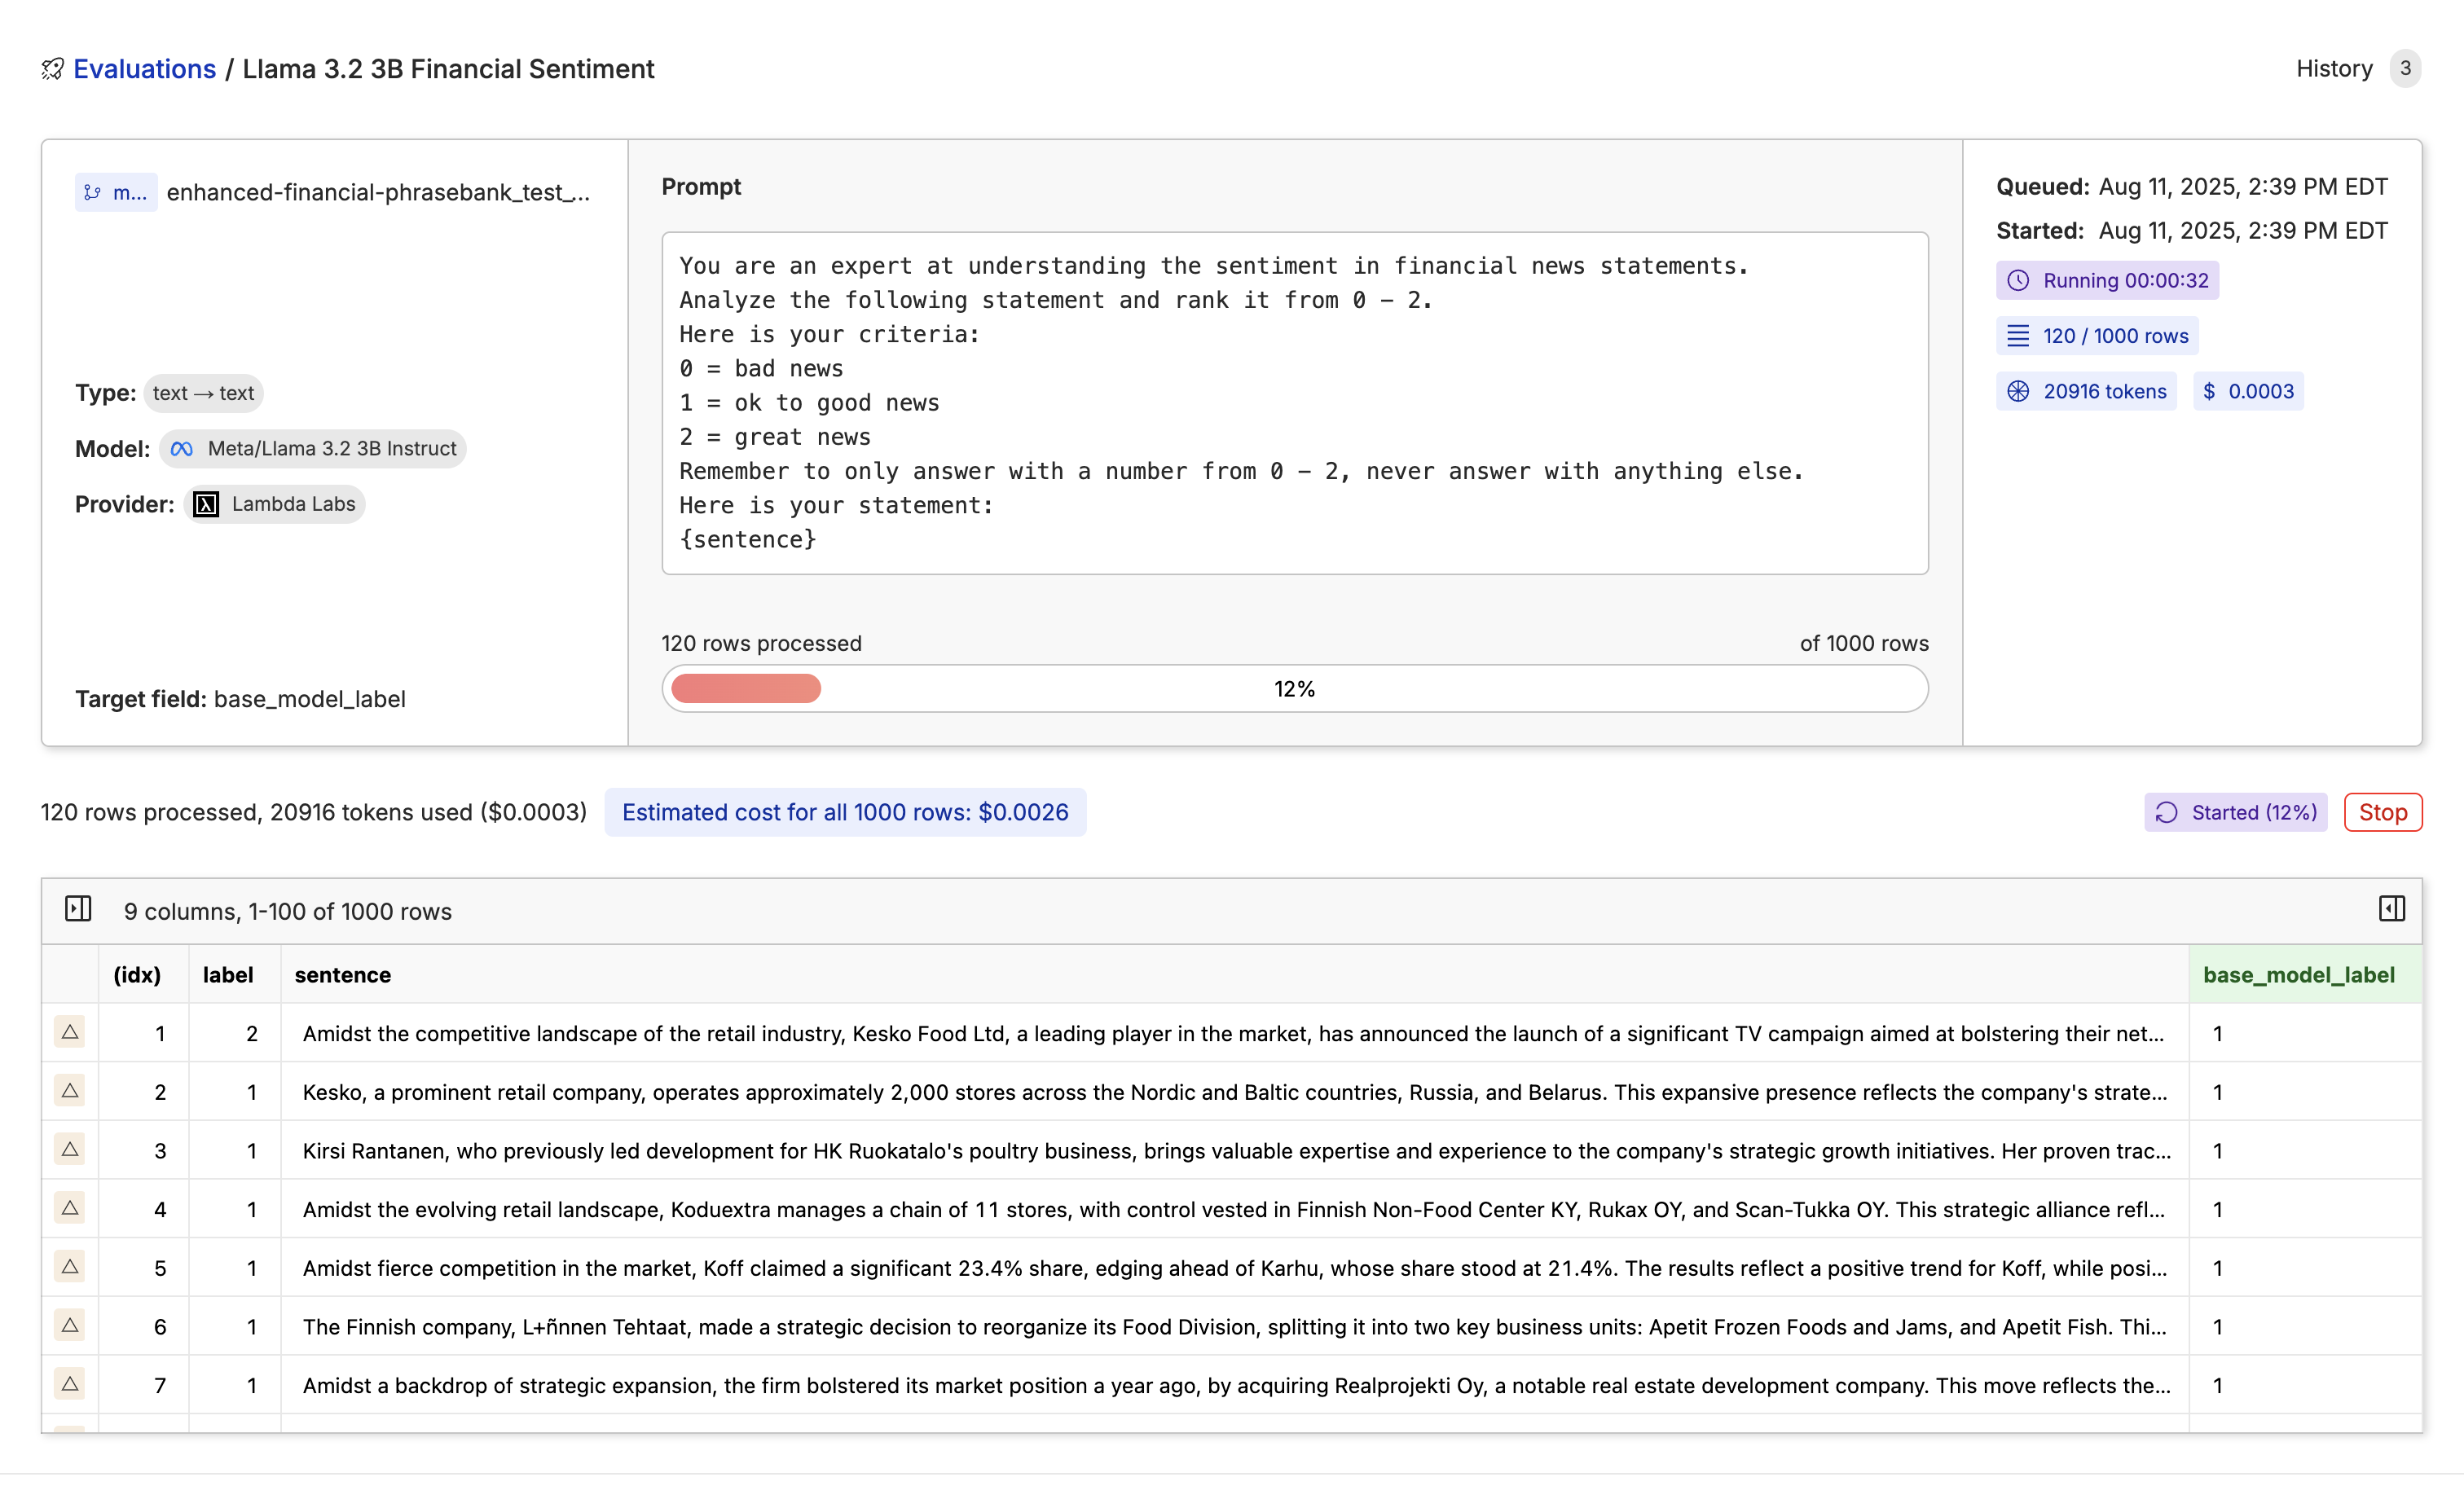
Before fine-tuning, let’s evaluate Llama 3.2 3B to see if fine-tuning improves it. We can do this with our Model Inference tool. First, go to your test dataset (not your training dataset, as you would be evaluating your fine-tuned model on the test dataset), click ā€œActionsā€ and select ā€œRun Inferenceā€. Evaluating the base model From there, select your base model, choose your new column name, write your prompt while passing in the sentence column, and quickly run samples by clicking the ā€œRun Samplesā€ button to see how well your prompt works. Evaluating the base model Now we click ā€œNextā€, write our commit message, name the file, and click ā€œRun Evaluationā€ to run the base Llama 3.2 3B on the whole dataset (you can also name a new branch if you want to track different experiments with different models). chatbot commit evals While the model is running through the dataset, you will see the progress bar, tokens, cost, rows, and time taken to go through the dataset. chatbot commit evals Once we have the results, let’s get an accuracy score. We can go to our text-to-SQL engine available at every table. Then simply ask for the rows where the columns ā€œlabelsā€ and ā€œbase_model_labelsā€ are different. chat-icon As we can see, we have 216 incorrect rows out of 1,000. So our base model has an accuracy score of 78.4%, let’s see if we’re able to improve that with fine-tuning.

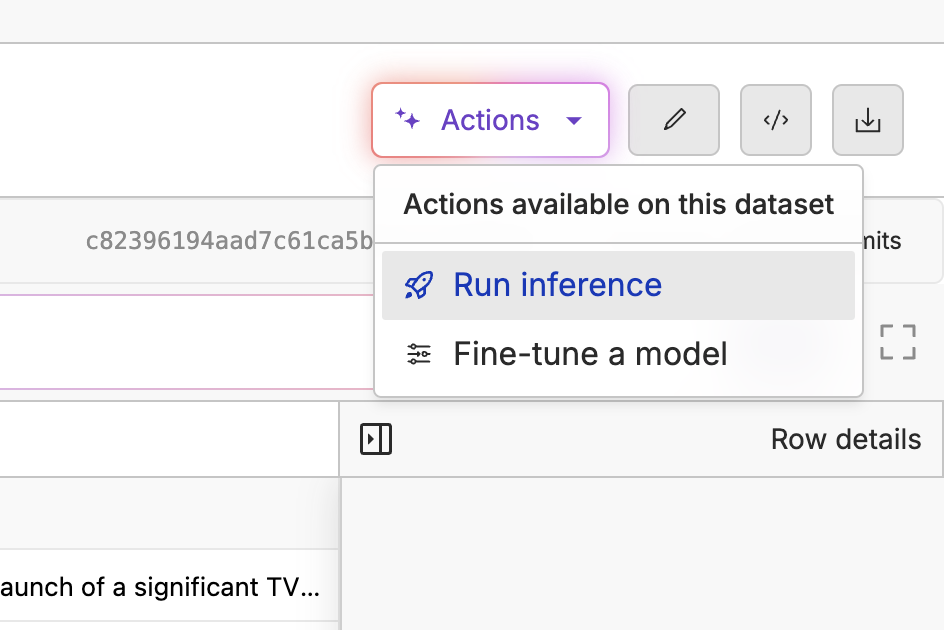
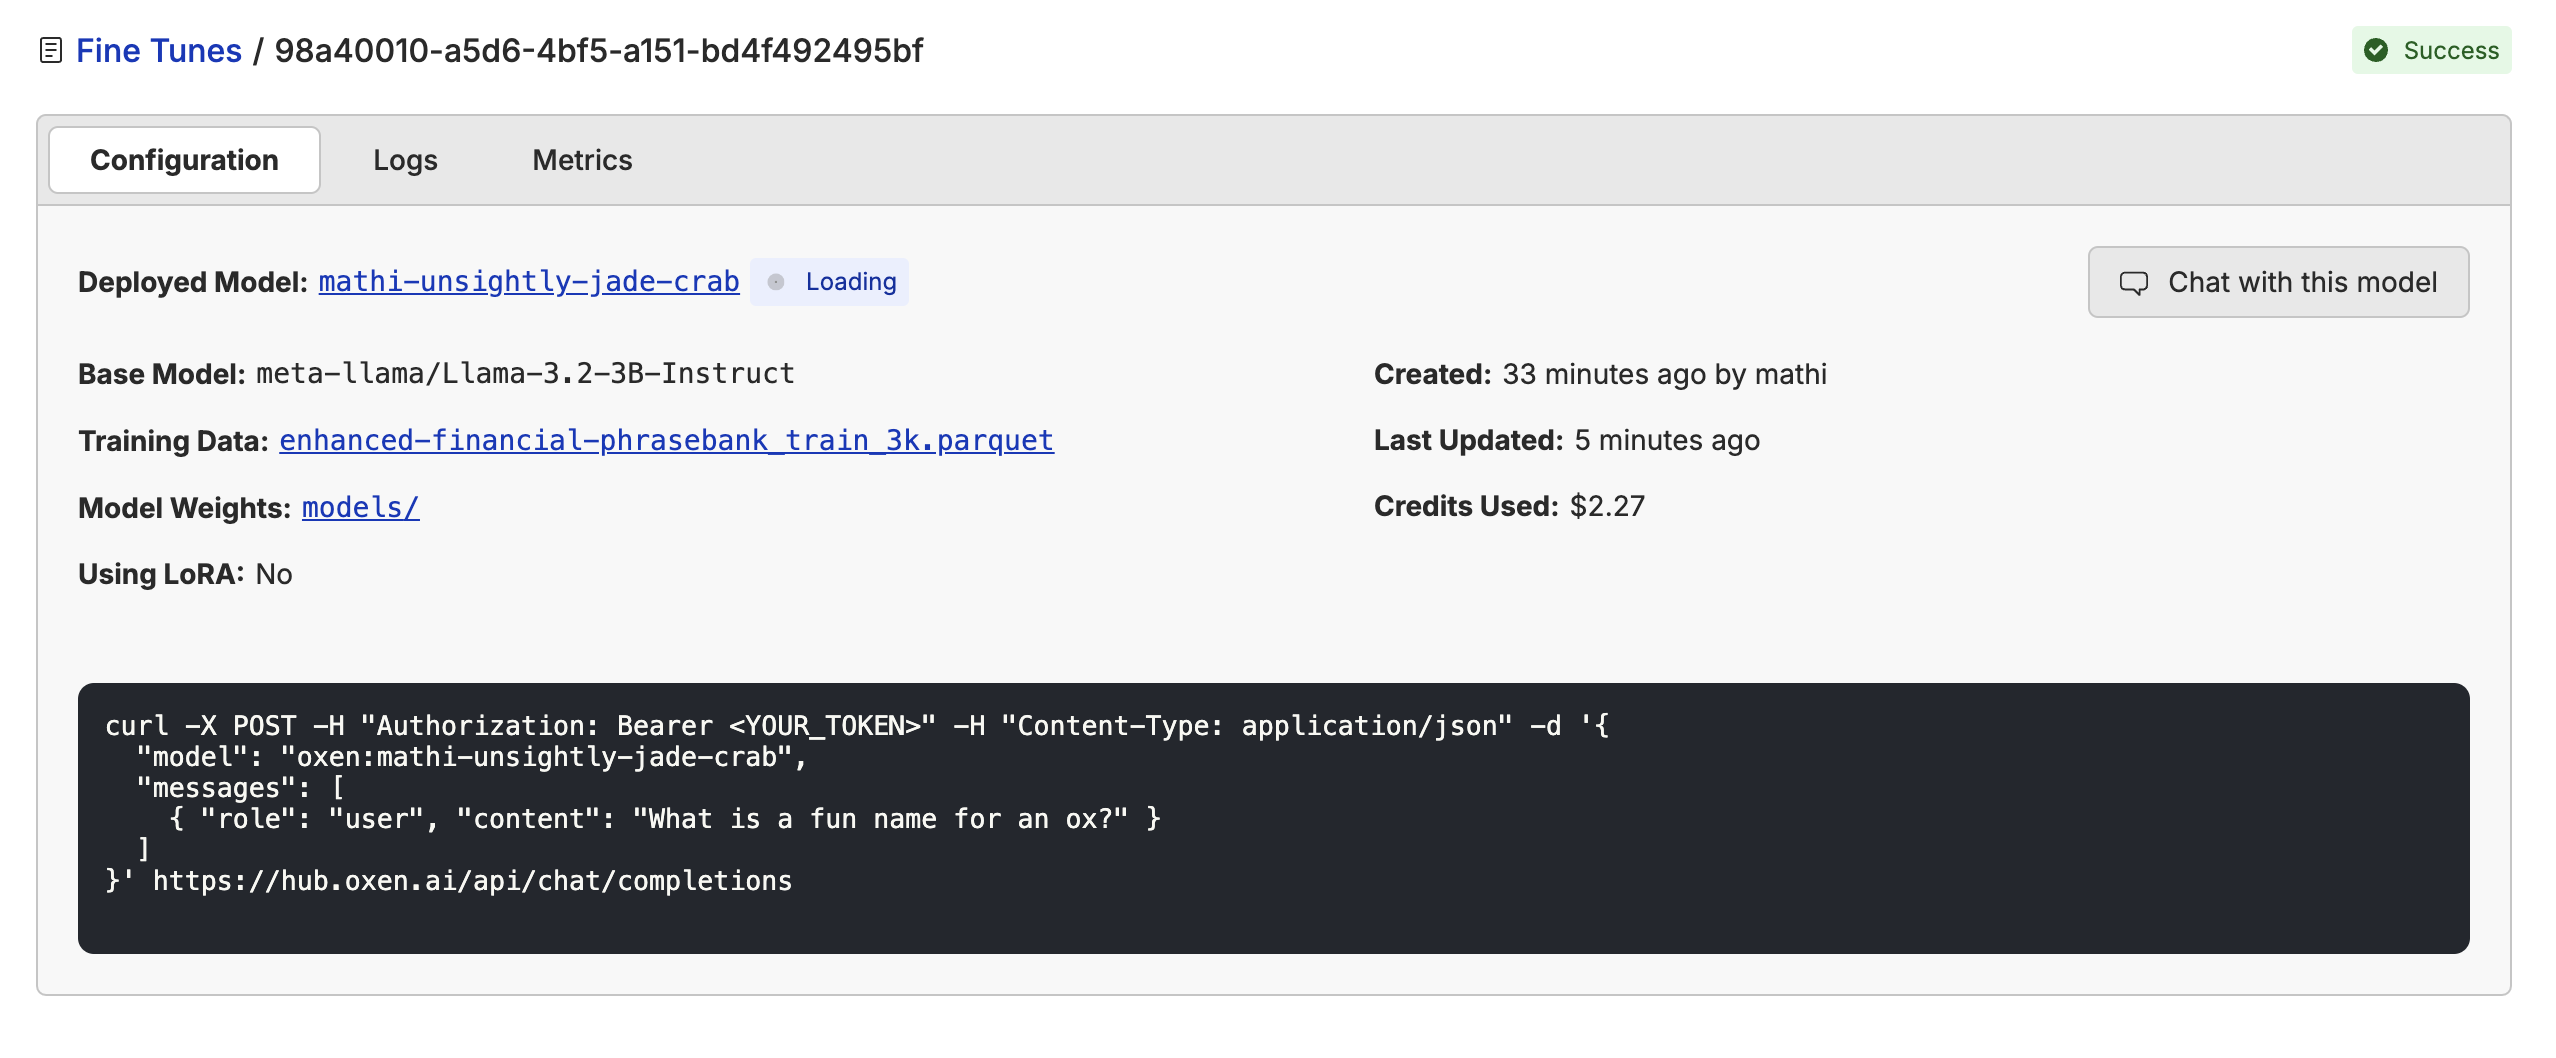
4. Fine-Tuning Llama 3.2 3B

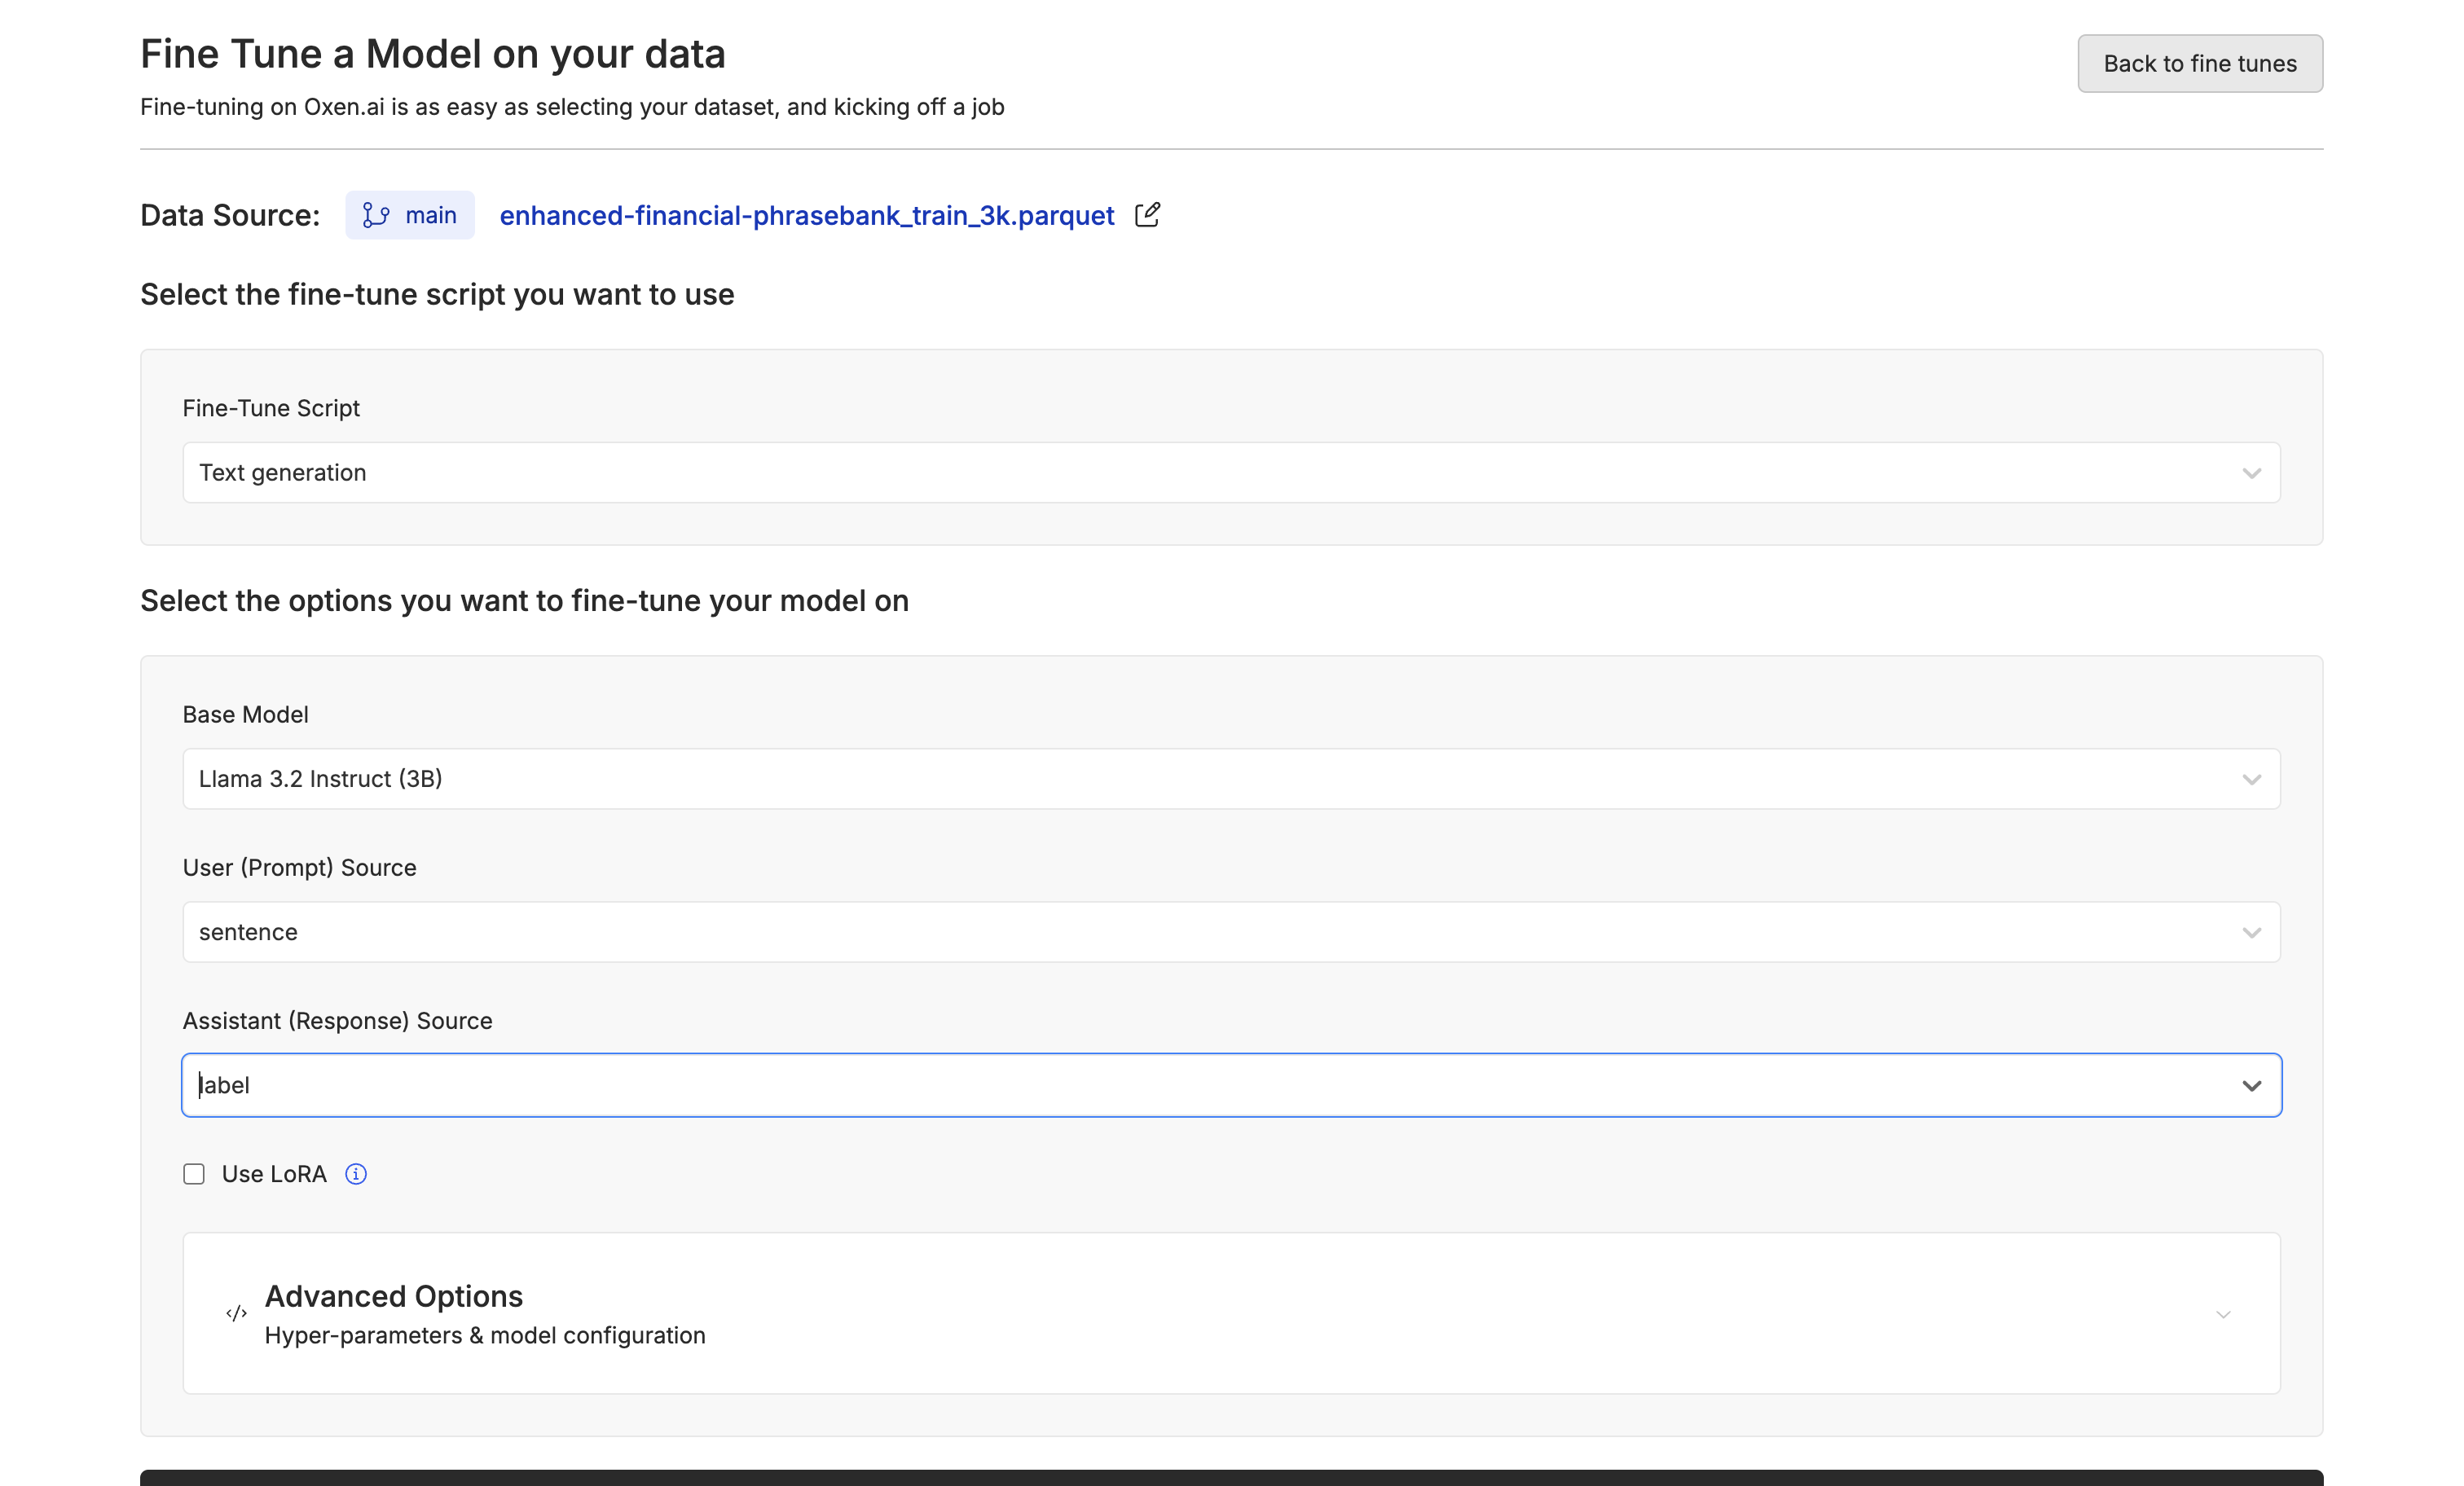
Next, let’s fine-tune Llama 3.2 3B on our dataset. Go to the train dataset, click ā€œActionsā€ and select ā€œFine-tune a modelā€. Fine-tune button Here, you’ll be able to select your script type (in this case text generation), base model, the prompt source, the response source, if you’d like to use LoRA, and if you want advanced control (like learning rate, batch size, and number of epochs) over the fine-tune. Since we are fine-tuning a small model, we won’t use LoRA and stick to the default settings. After evaluating the fine-tuned model, we can tweak parameters, like training for more than 1 epoch, to see if there are any improvements. chat-icon While the model is training, we can see the configuration, logs, and metrics. Metrics example Once your fine-tuning is complete, go to the configuration page and click ā€œDeployā€. From there, you will not only have a unified API endpoint with a funny model name, but you will also be able to chat with your fine-tuned model to get a sense of how it’s doing. Deploy example After giving the model a few simple financial news statements, we can see it’s doing pretty well at giving us a label of 0, 1, or 2. fine-tuned chatbot

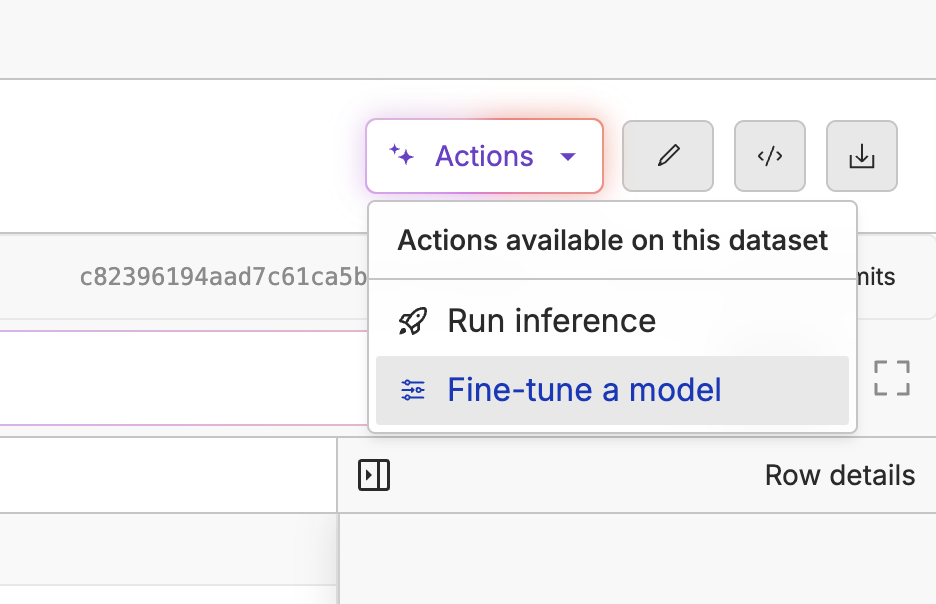
5. Evaluate the Fine-Tuned Model

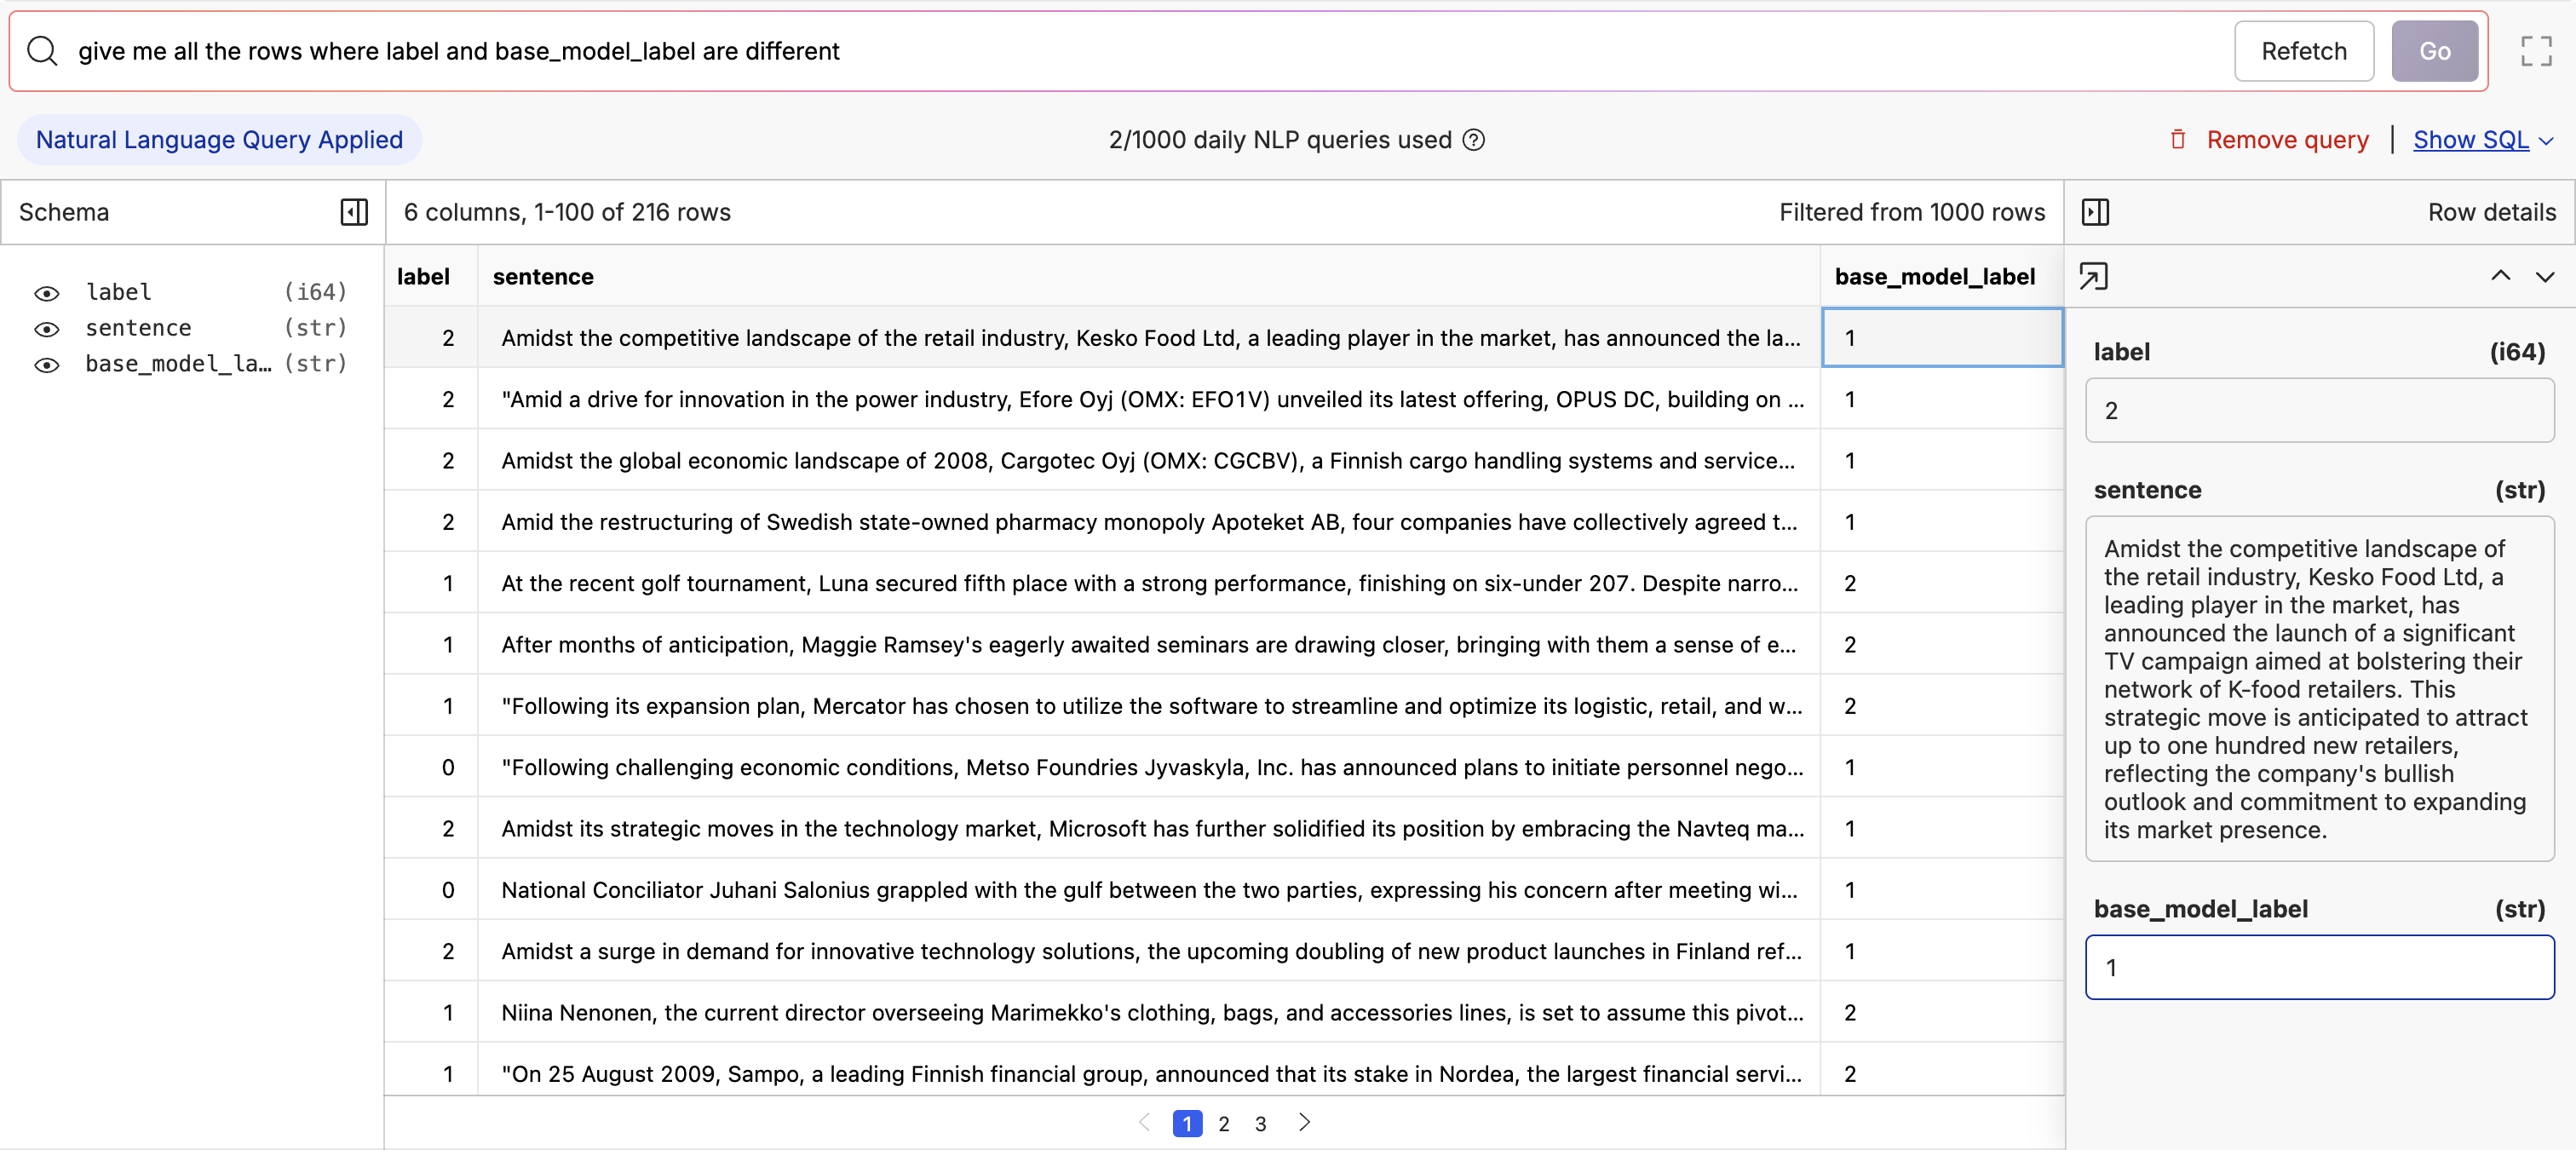
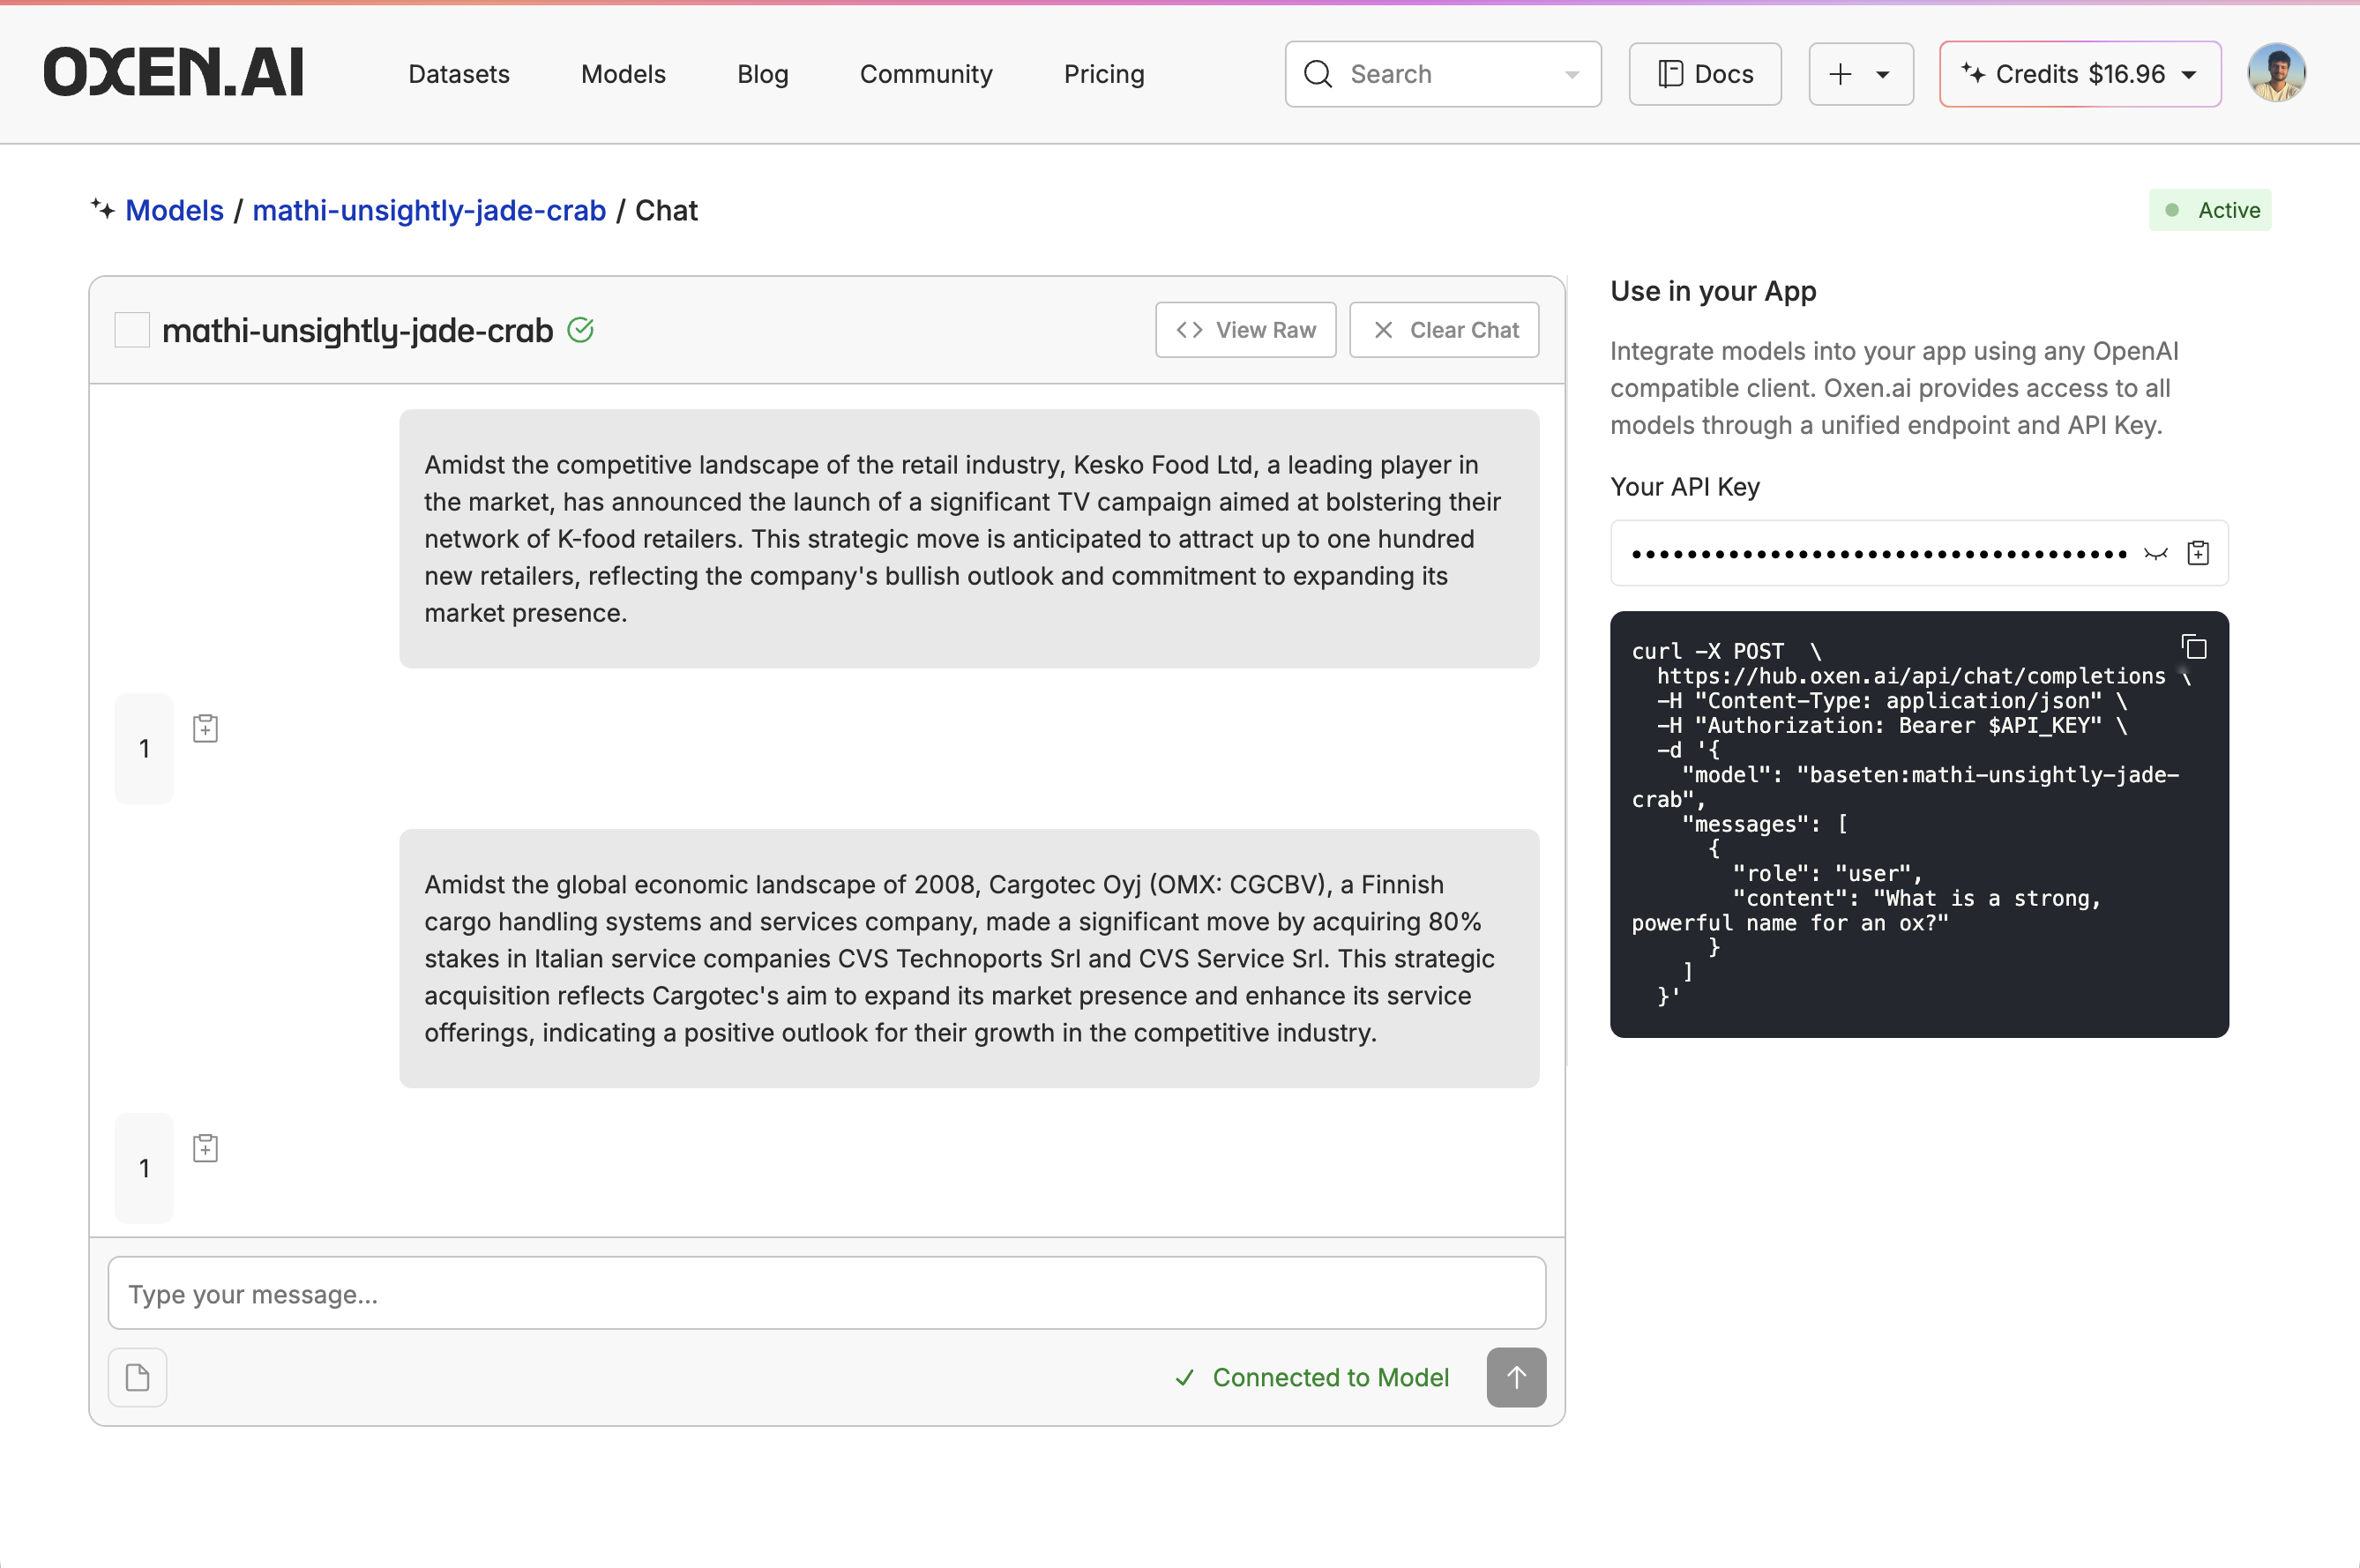
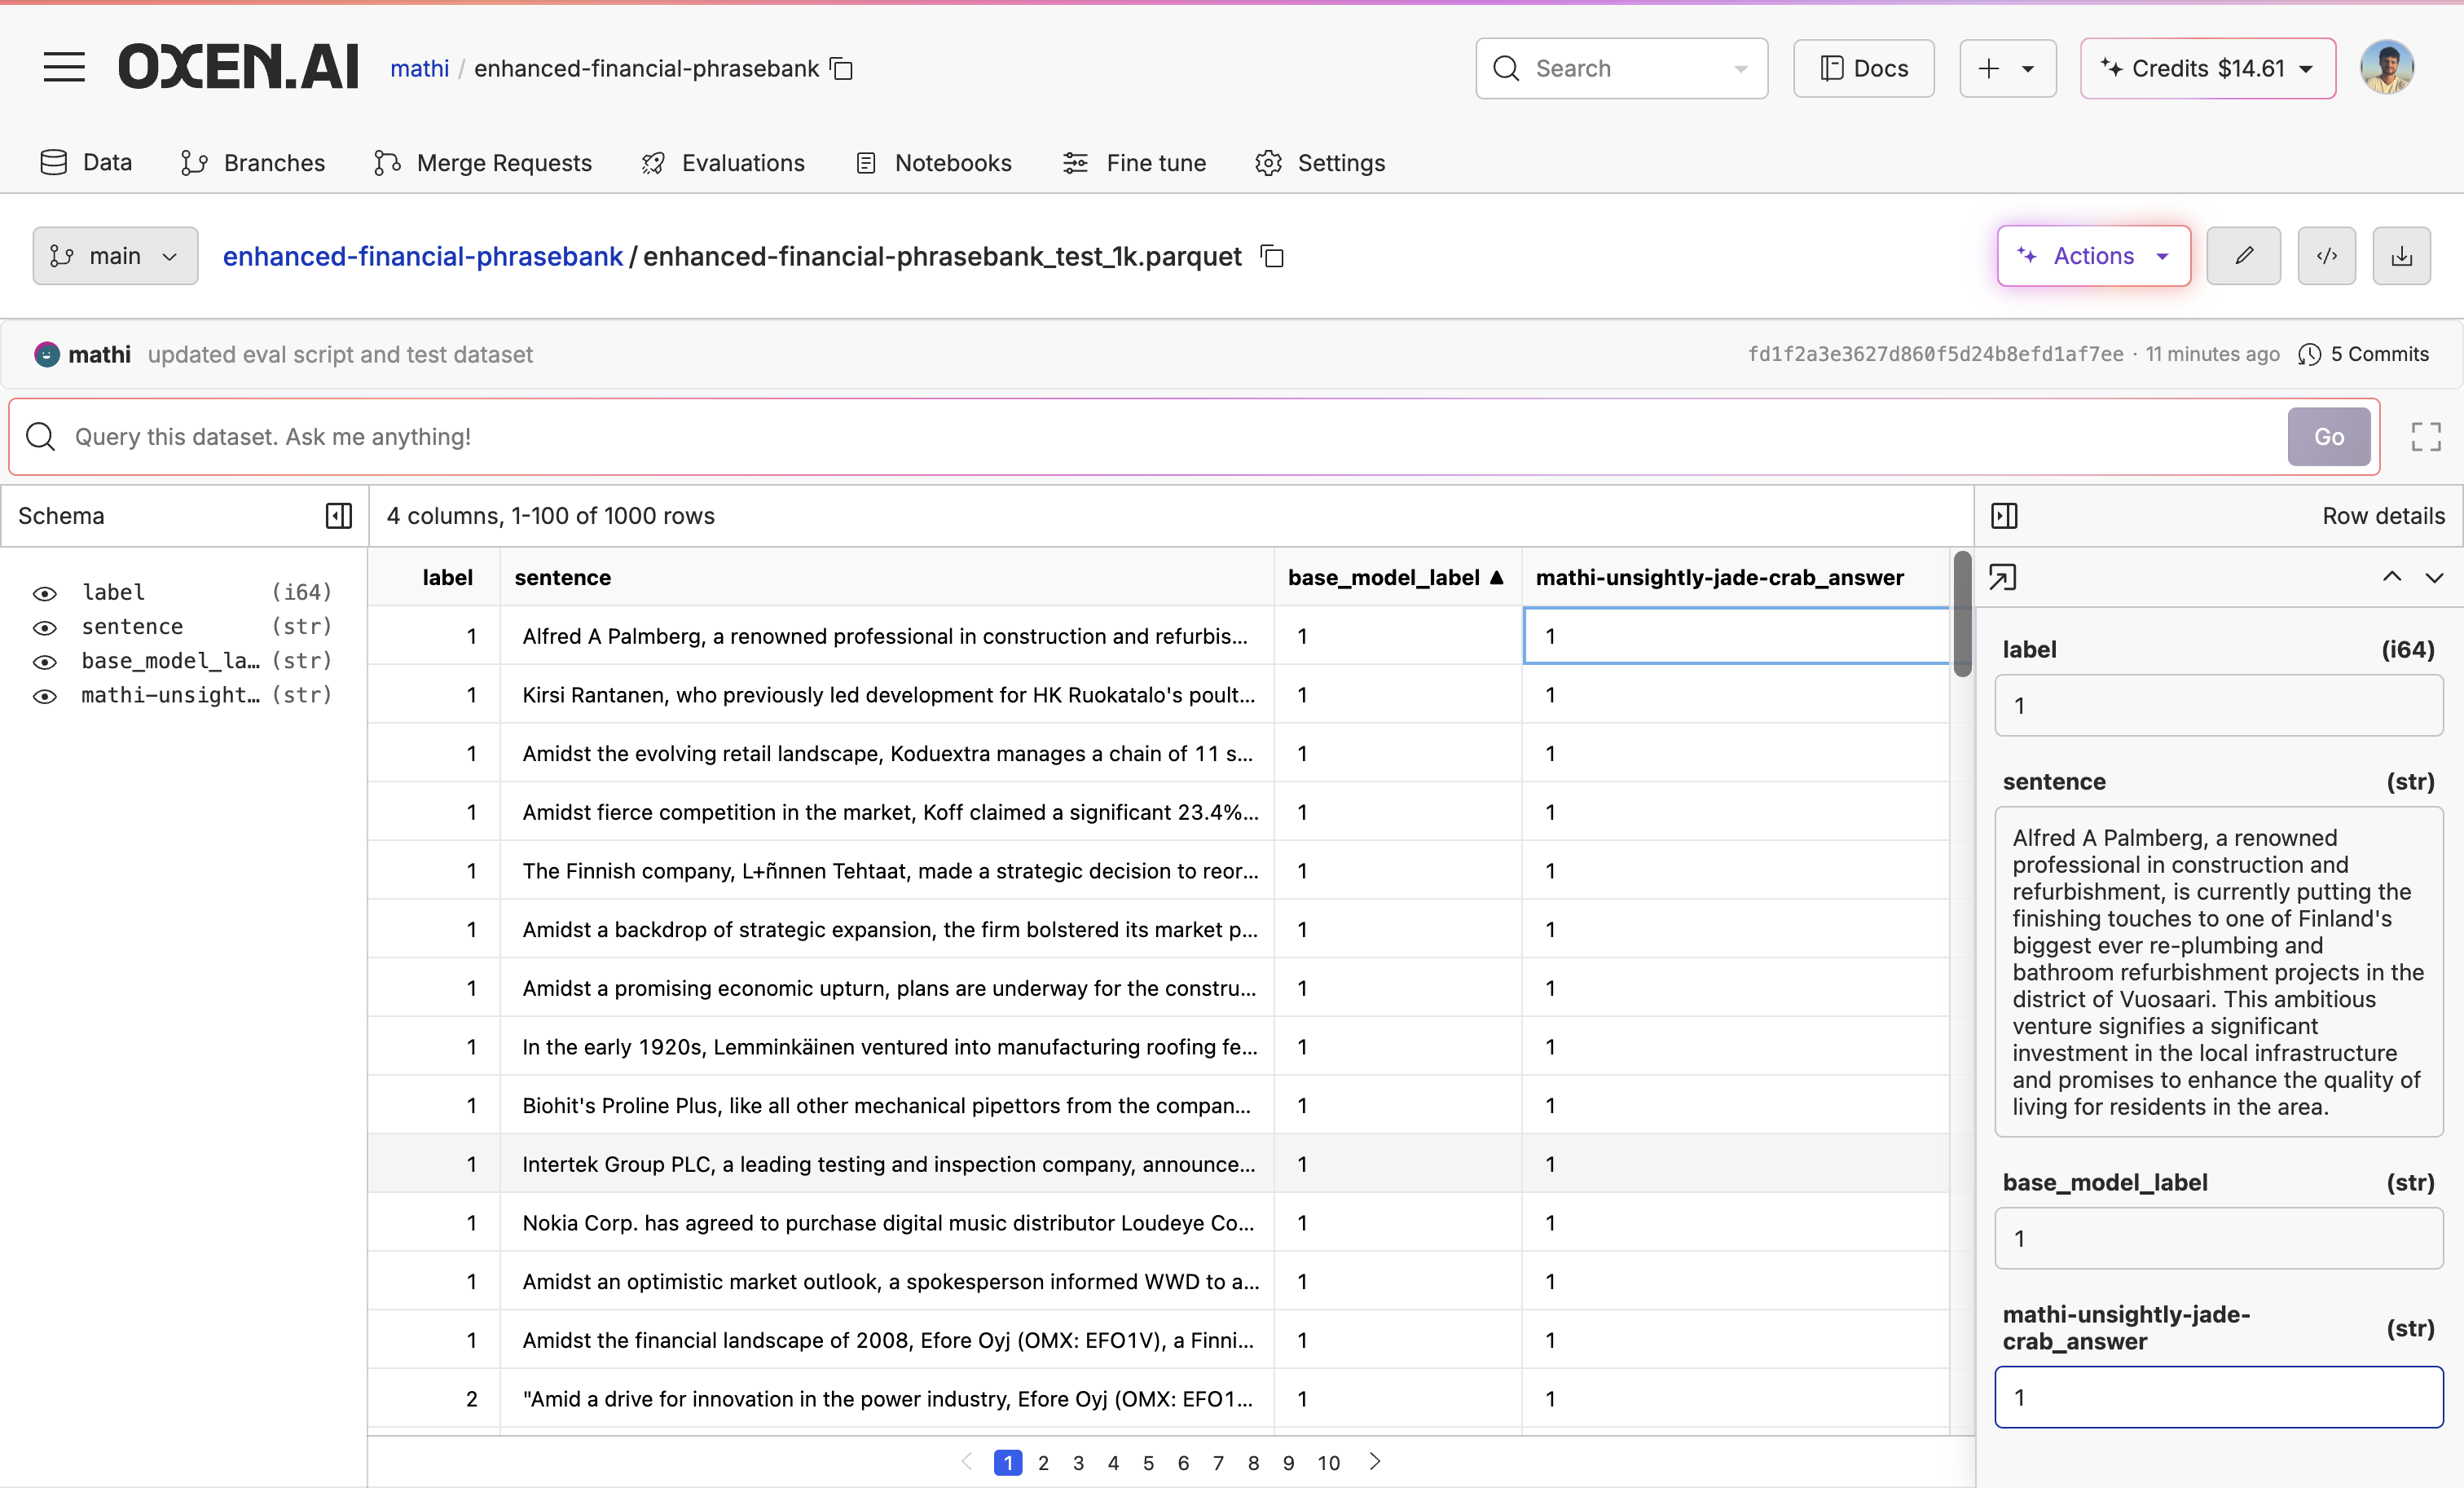
Now the fine-tuning is complete, let’s evaluate the new model and compare it with our base model. I wrote a script that used the model API to run the model over the test dataset and then created a new column named after the model (in this case mathi-unsightly-jade-crab_answers) with the model’s responses. The advantage of our unified API is that I was able to reuse an old evaluation script and just change the model name and the dataset it was evaluating instead of writing a new API configuration.
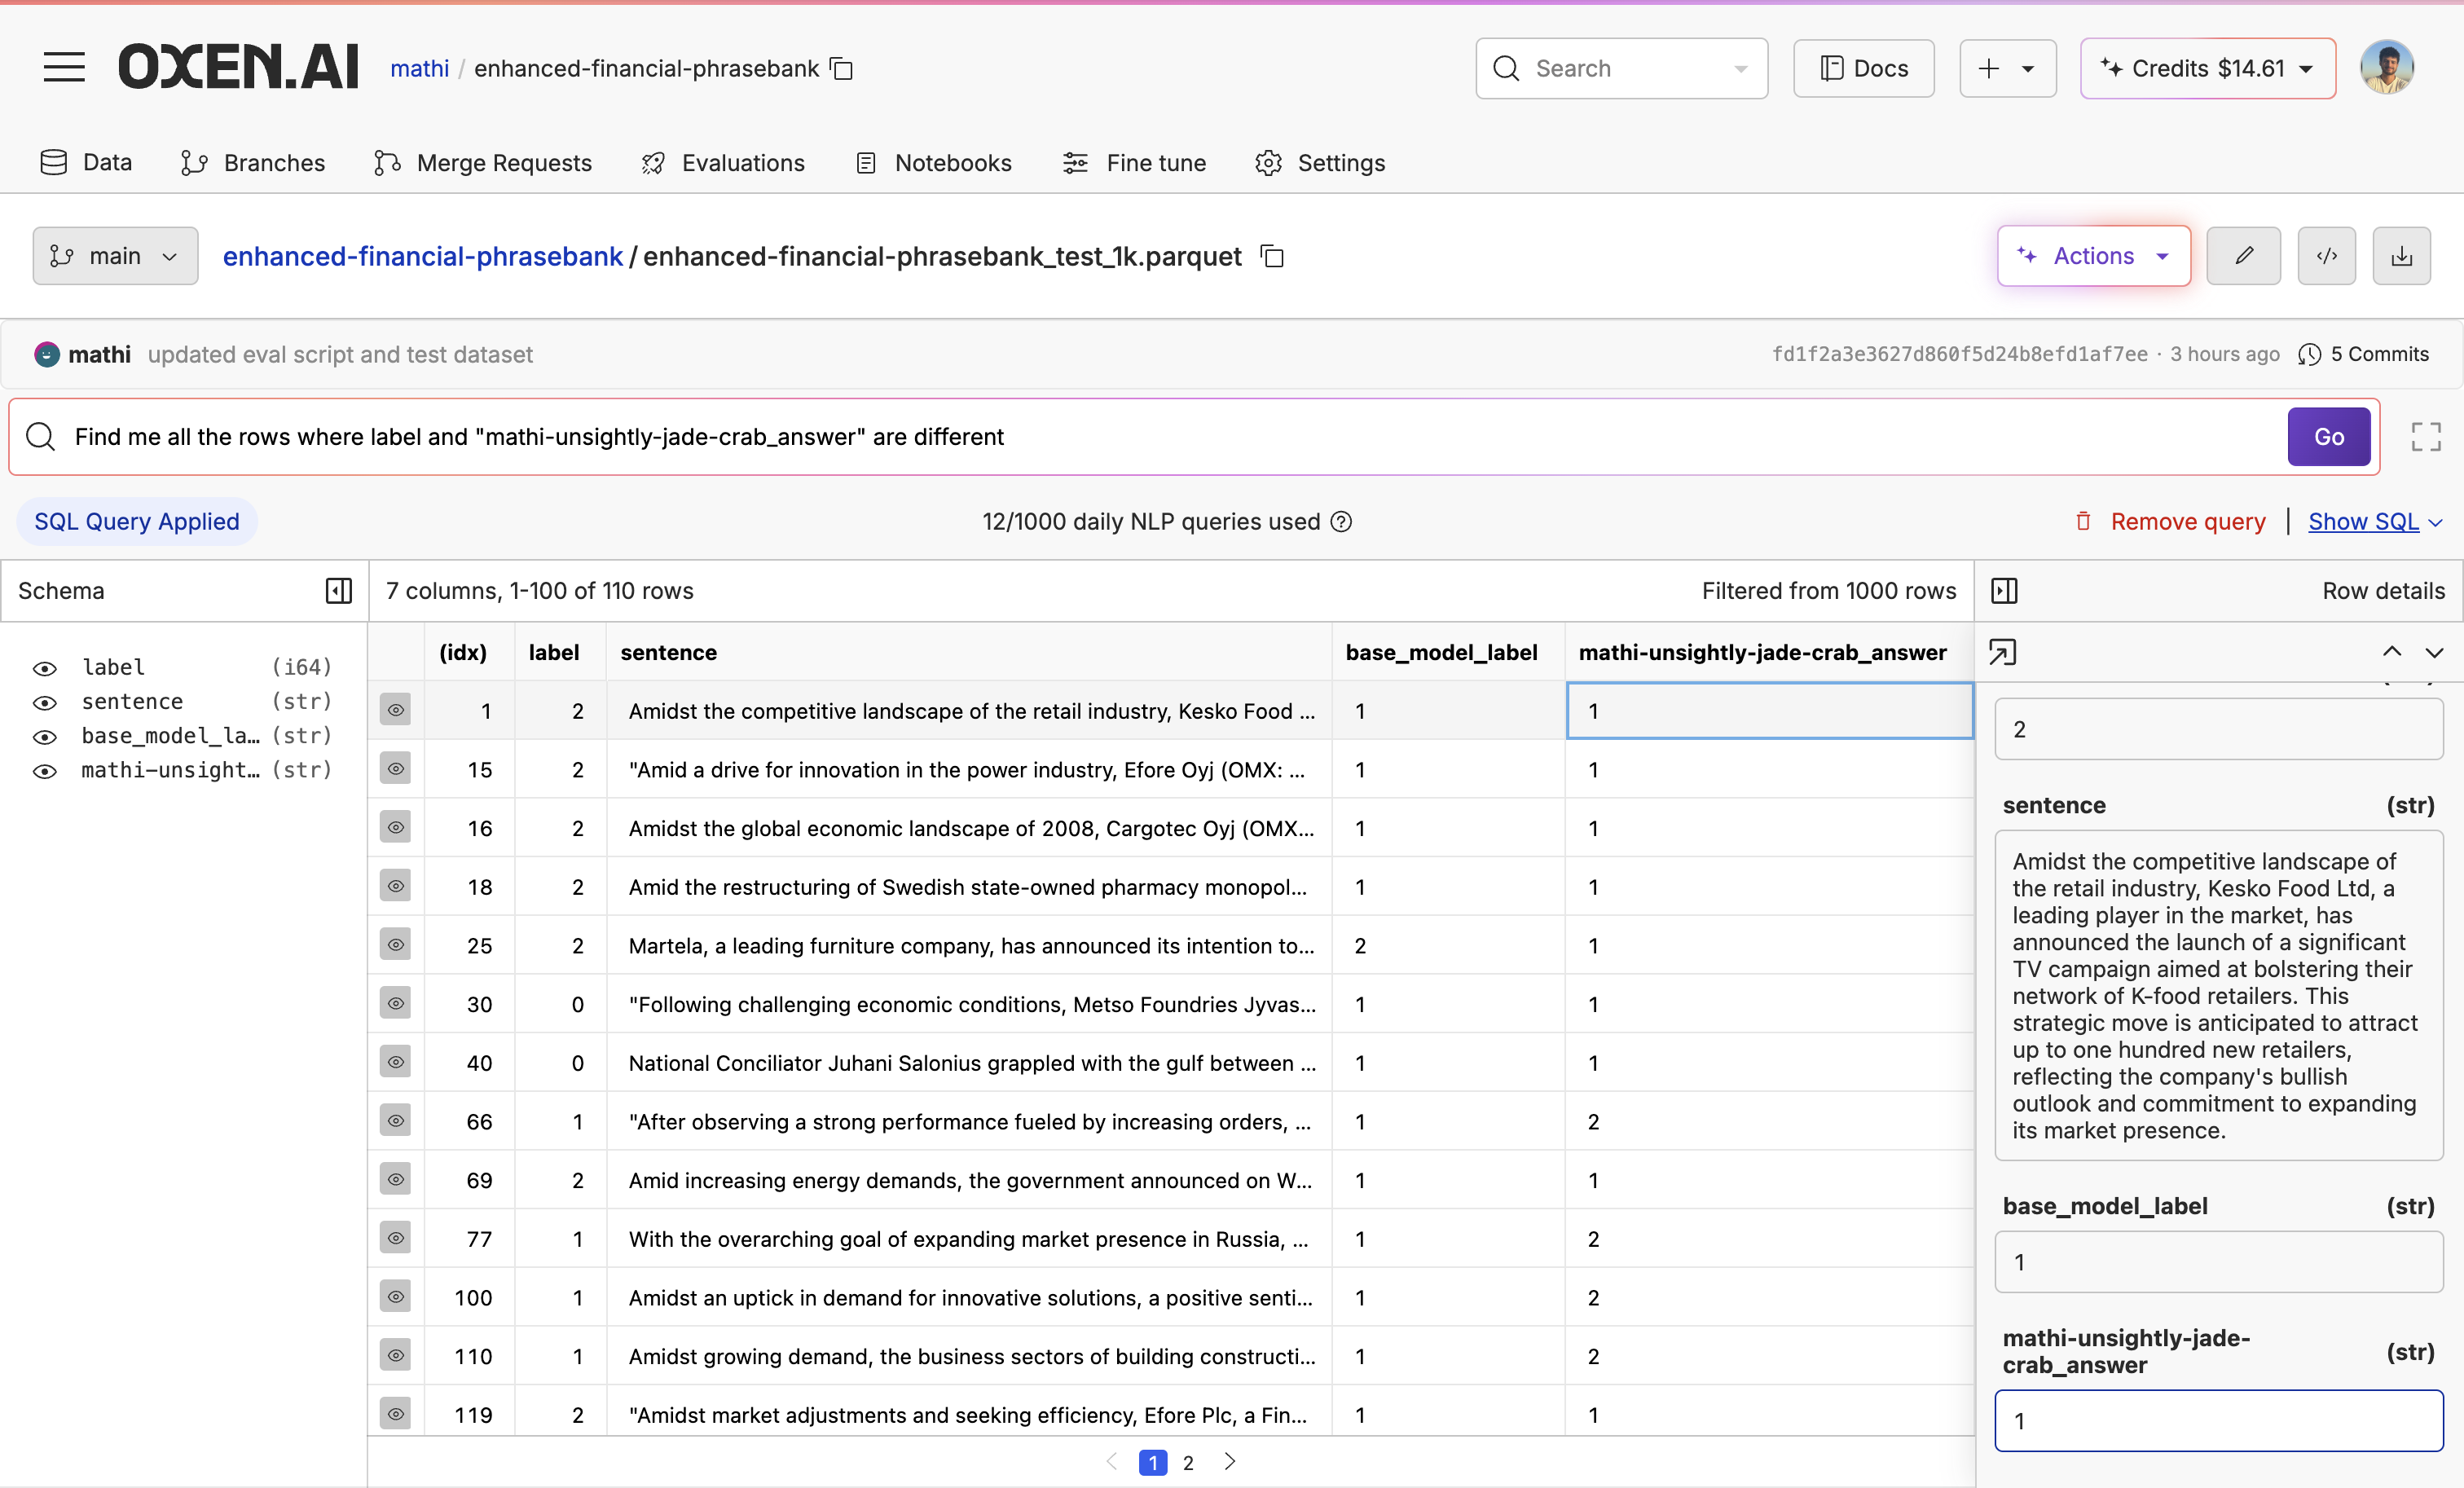
While it seems like the model is doing pretty well, we can see there are still a couple of mistakes. base model evals Now let’s use our text to SQL engine again to get an accuracy score. base model evals 110 of 1,000 rows were incorrect, so our fine-tuned model has an accuracy score of 89% from 78.4%. Not bad at all for a small model.

6. Next Steps

If you are happy with the results, start using the model API. If not, there are many ways we can try to improve the model:
  • Plow through the data and see if you need to clean, augment, or transform it.
  • Keep fine-tuning different models to see which works best for your use case and data.
  • Tweak the advanced settings to see if you can get a better model.
In this case, some of the financial news statements were a bit ambiguous as to whether they were good or neutral news, so when the labels say 2 and our new fine-tuned model says 1, it may not be an inaccuracy, but we simply need to clarify or create more detailed labels. Try fine-tuning today and let us know how it goes!

In addition to simplifying your fine-tuning pipeline, Oxen.ai offers fine-tuning consultations and services if you are struggling with training a production-ready model. Sign up here to set up a meeting with our ML experts.