The Task
For this example, we are going to fine-tune Qwen-Image to be able to generate images of models wearing a specific outfit.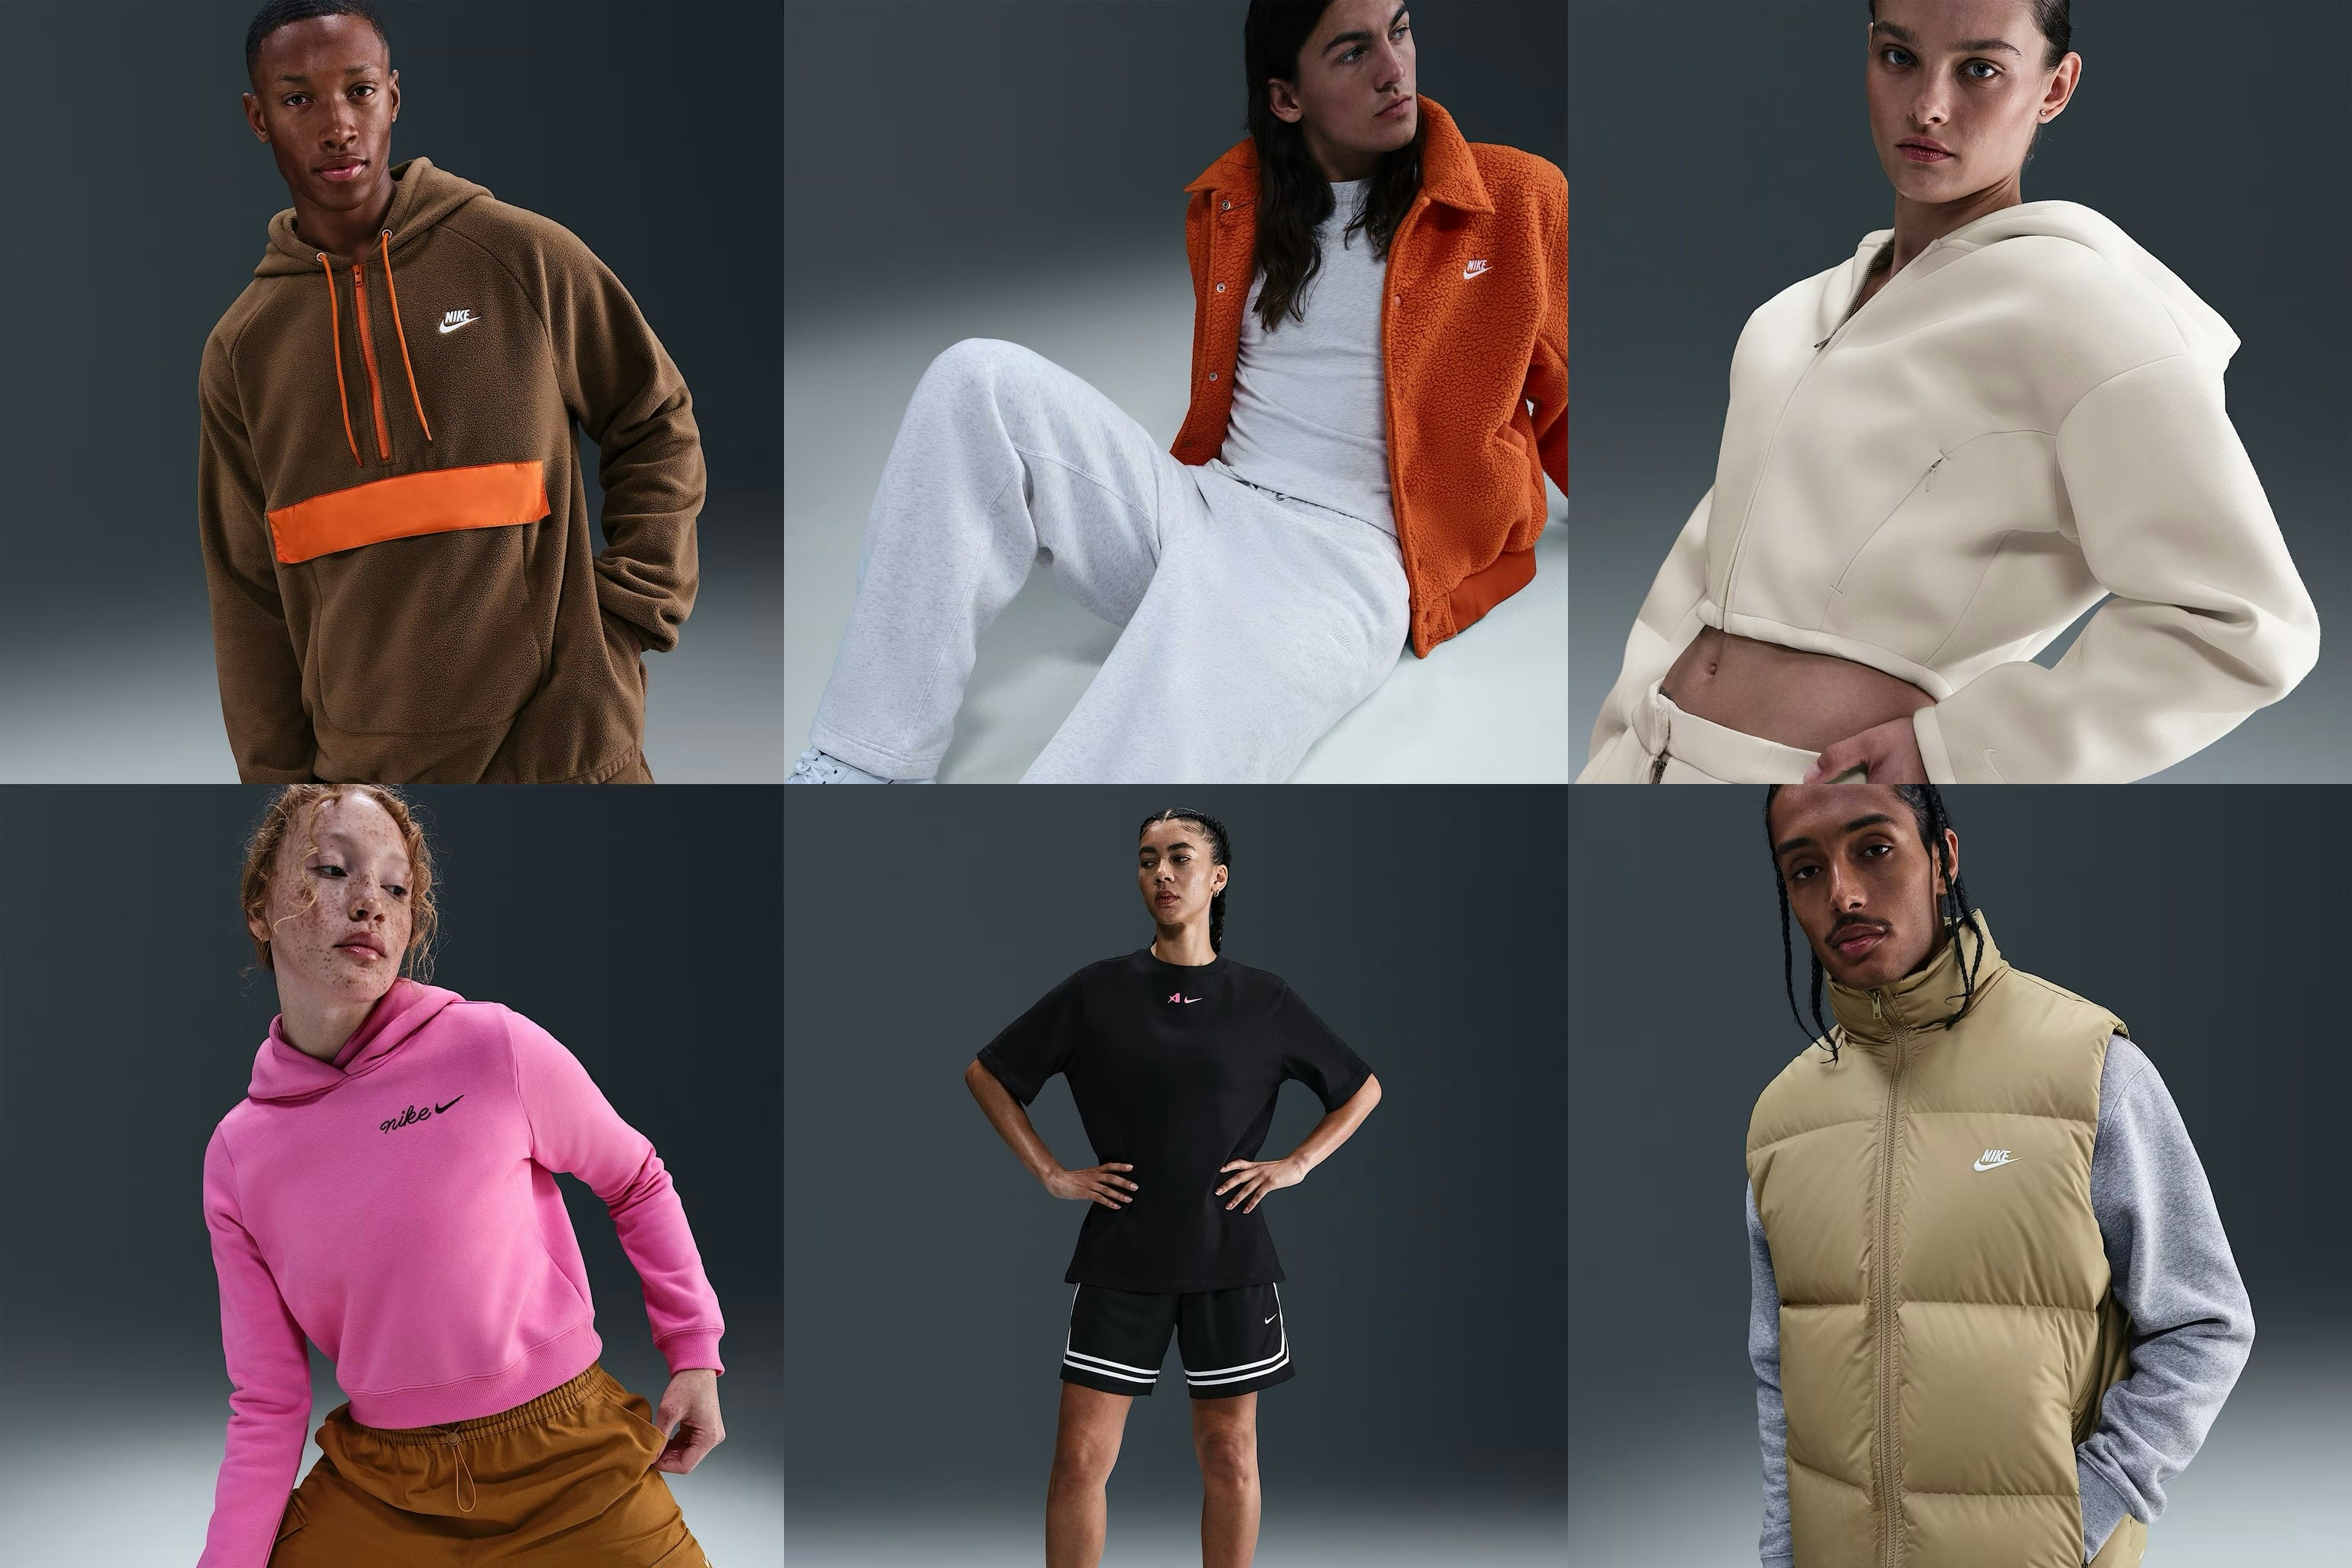
Dataset Format
When fine-tuning image generation models, you need a dataset that contains the images and descriptions of the images. The expected format is a csv, jsonl, or parquet file with a column that contains the relative path to the image in the repository, and a column that contains the description of the image.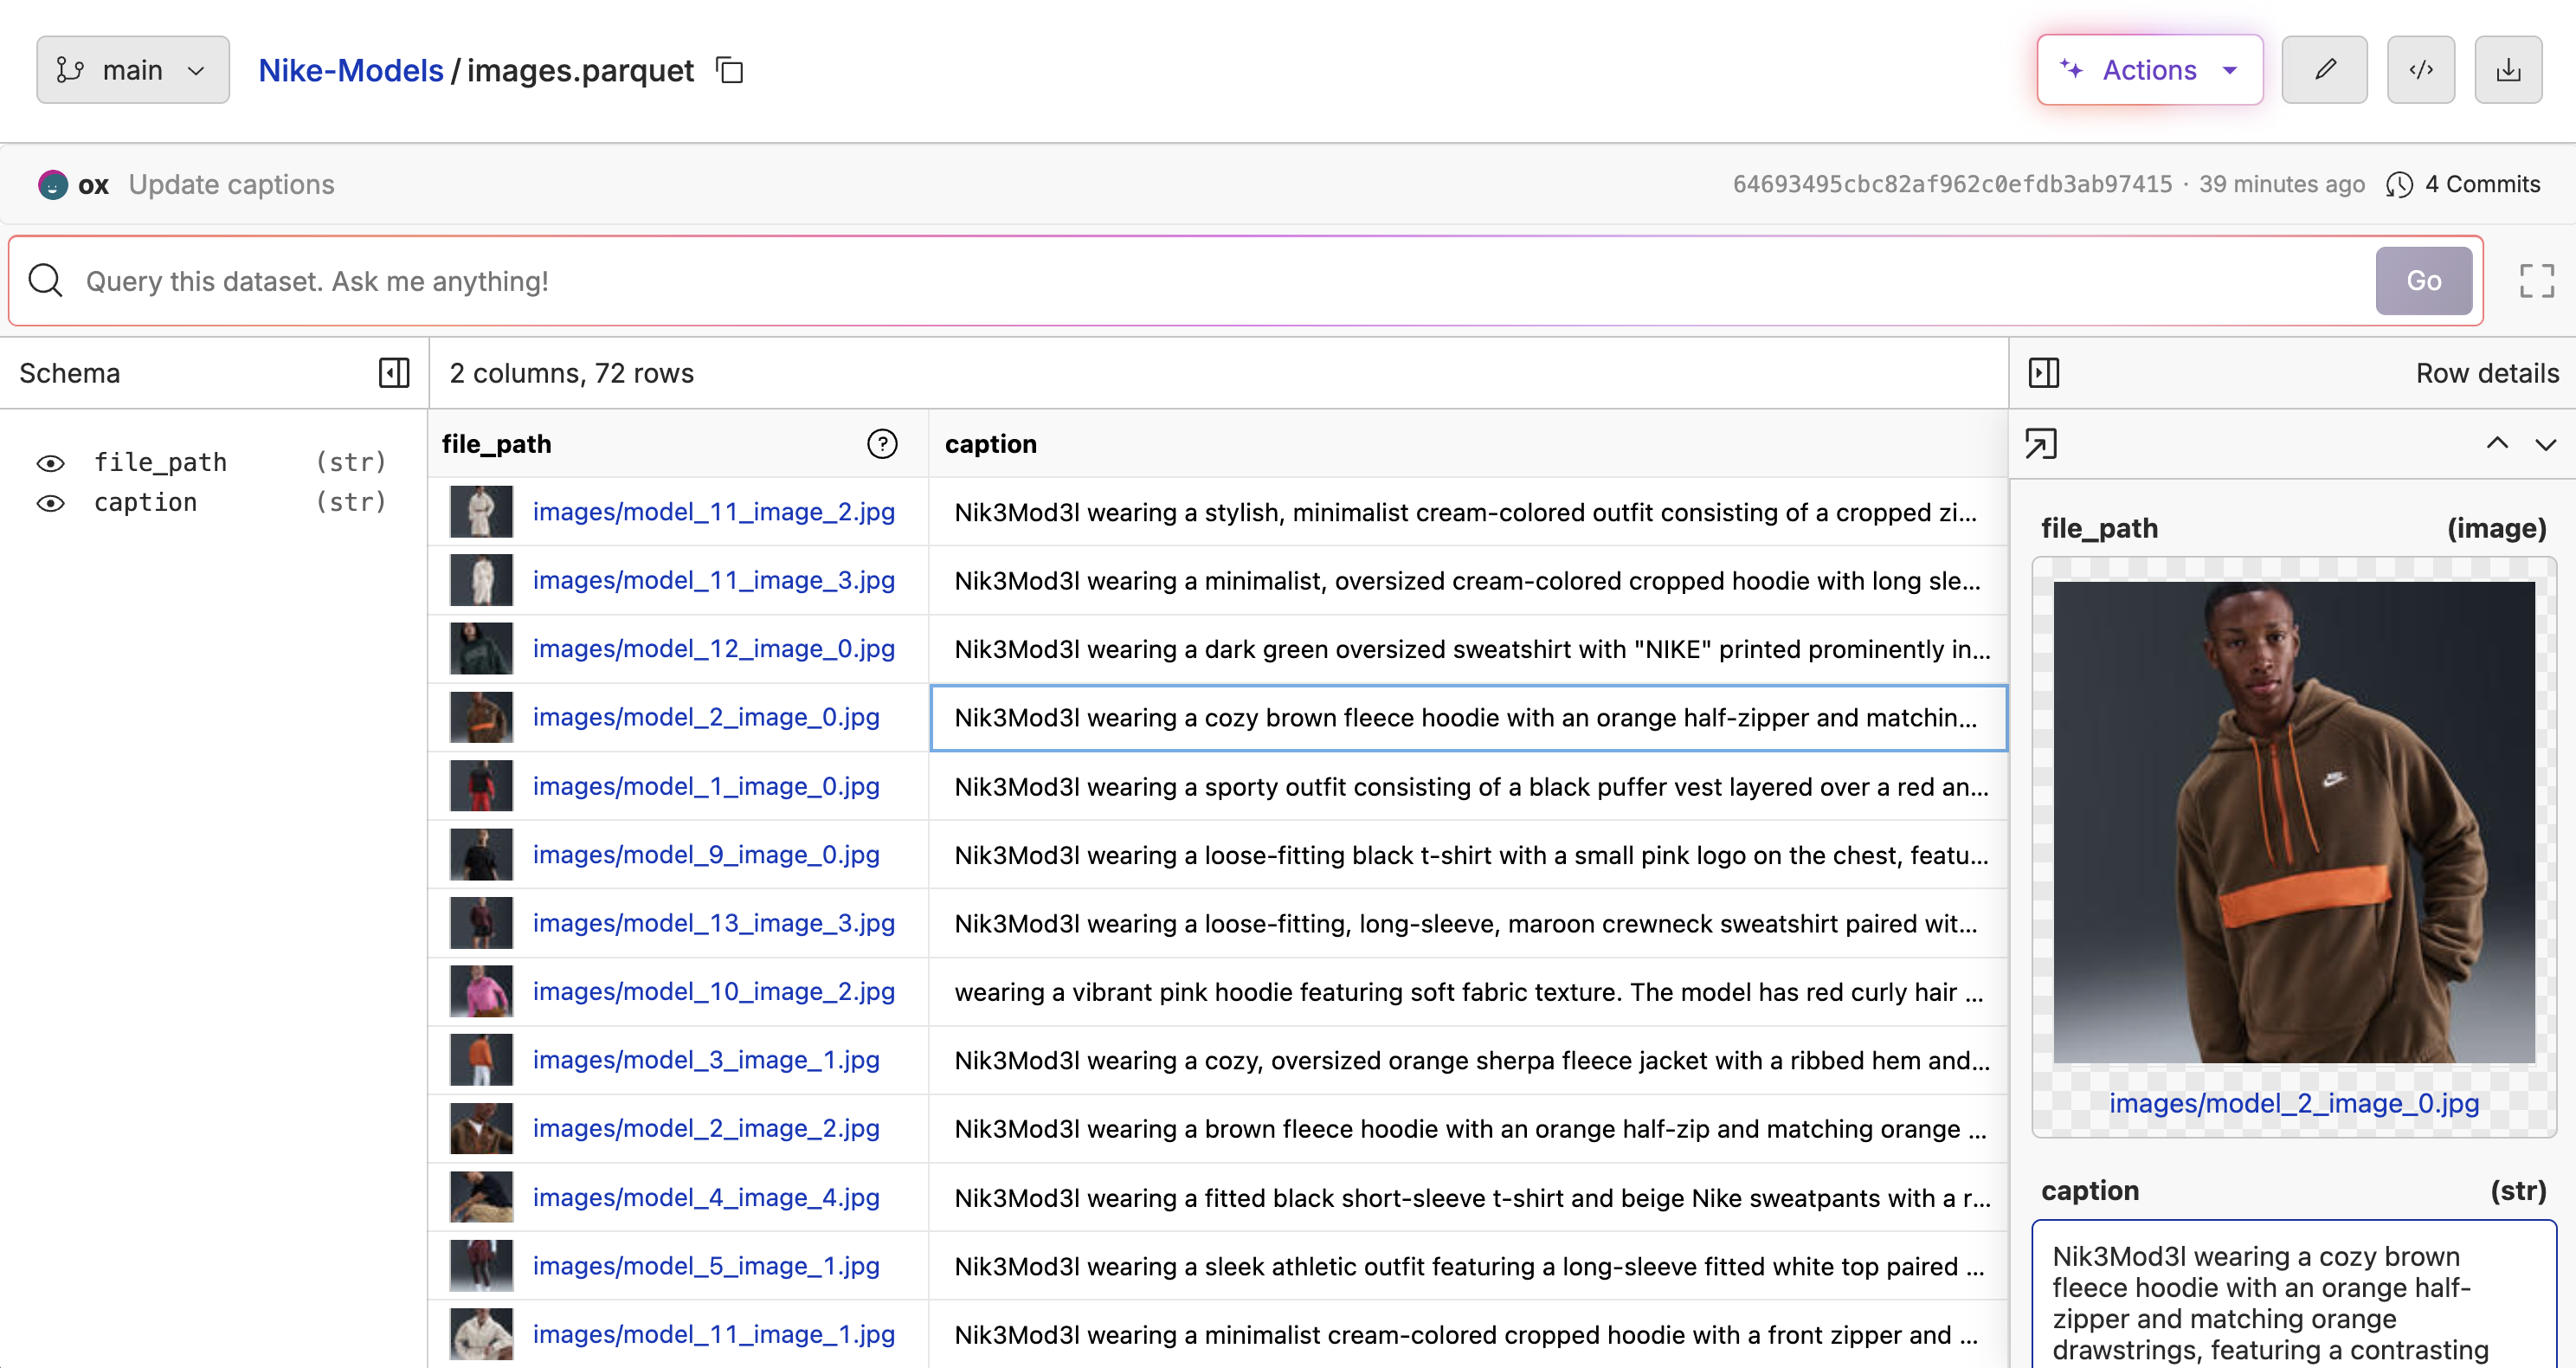
Creating a Repository
Oxen.ai repositories are used to store and version your data and models. We can create a new repository by clicking the “Create New Repository” button in your Oxen.ai dashboard.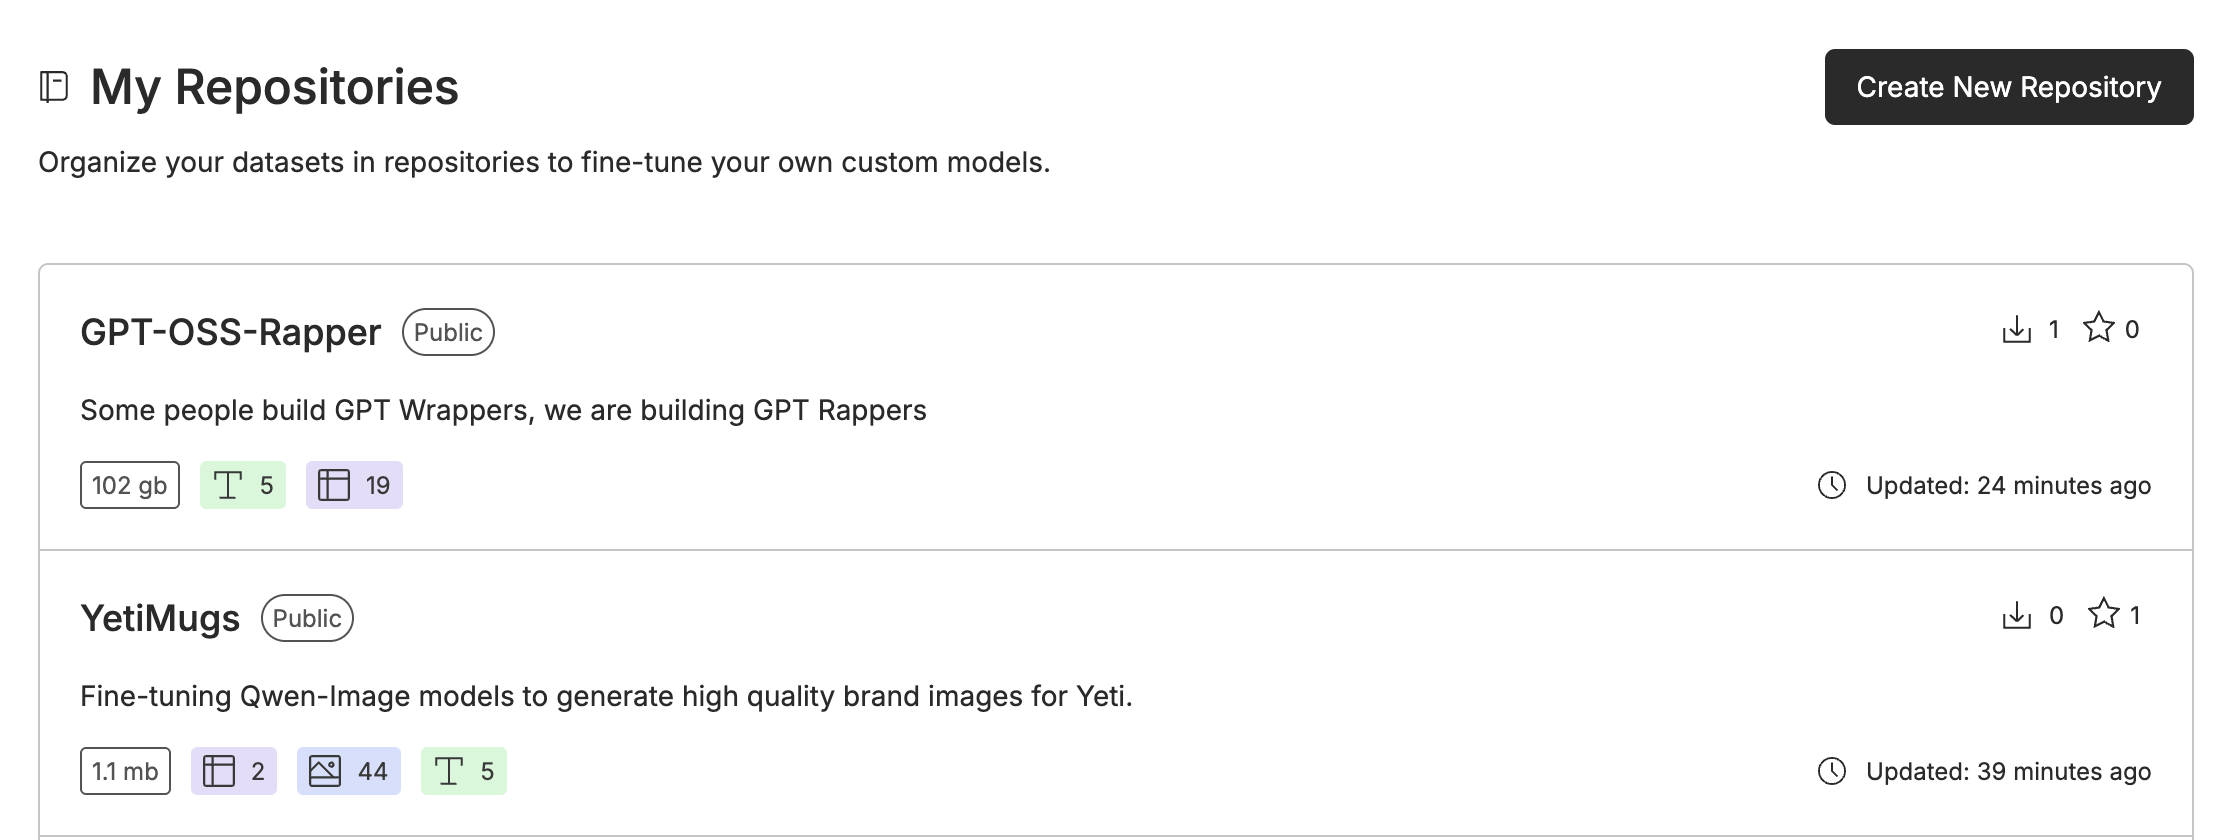
Uploading the Images
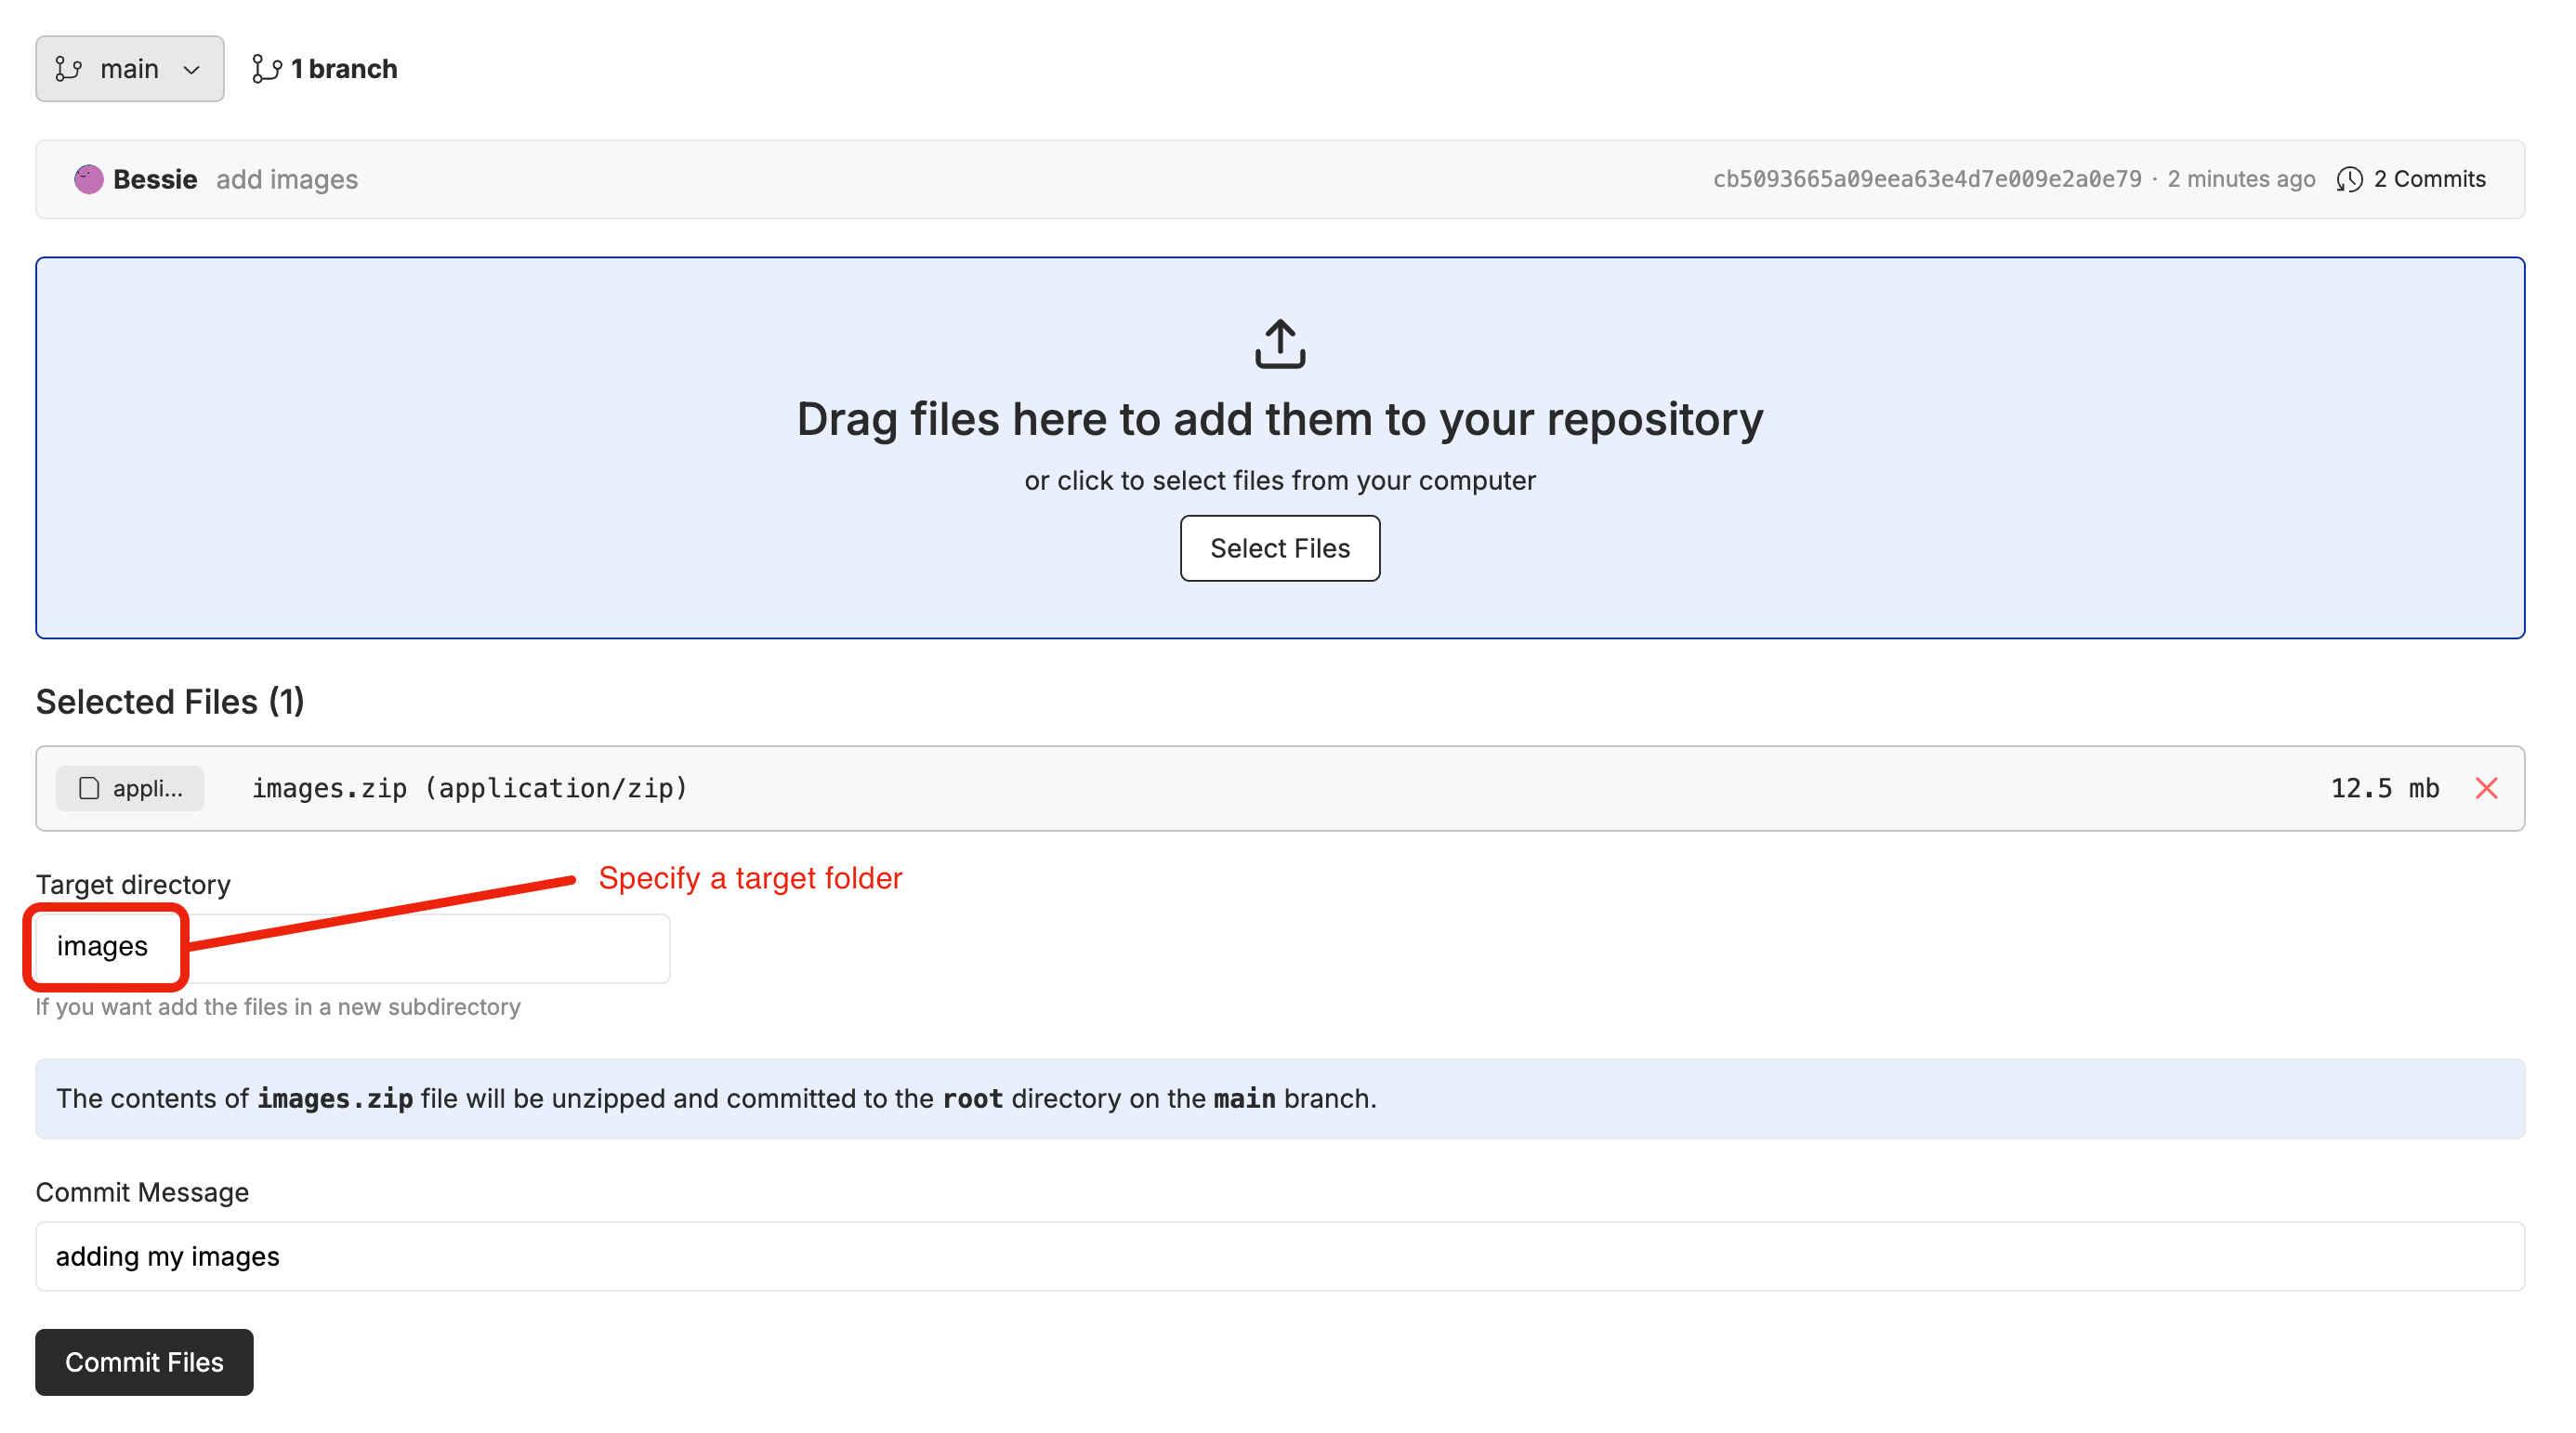
From your repository, you can click the “Add File” button to upload your dataset of images. If you upload a zip file, it will automatically be unpacked into the repository in the specified directory.Note: When uploading your images, organize your files in a folder by specifying a “Target Directory” when uploading the files.
Turn Your Images into a Dataset
In order to fine-tune in Oxen.ai, you need a csv, jsonl, or parquet file that contains the images and their captions. With your images uploaded, you can convert the directory of images into a dataset that can be used for the fine-tune. Navigate to the directory of images and click the “Folder to Dataset” button.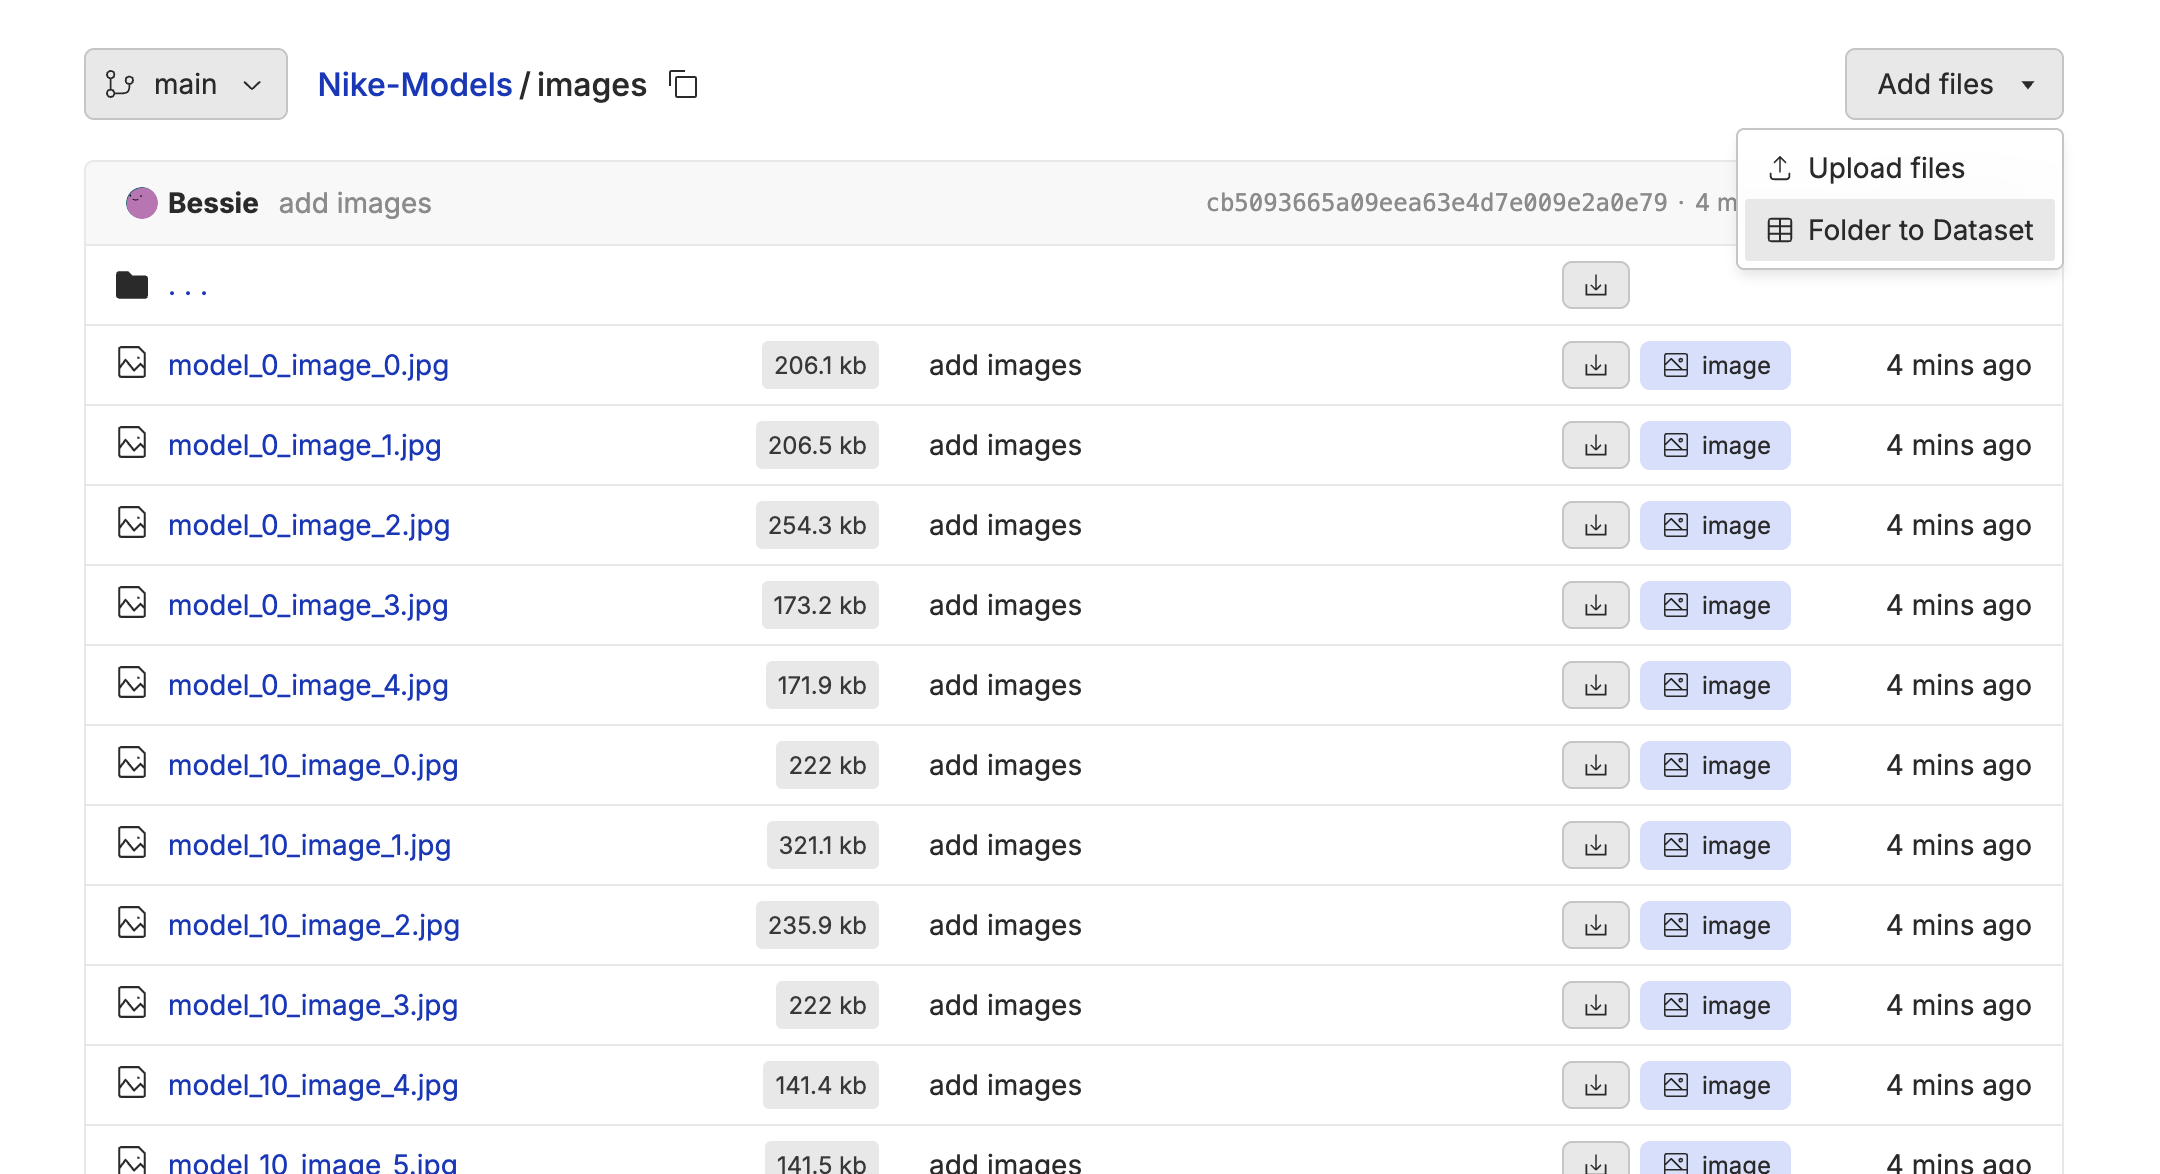
file_path that contains the relative path to the image.

file_path column. Click the “✏️” edit button above the dataset, then edit the column to enable image rendering. The video below shows the whole process.
Captioning The Images
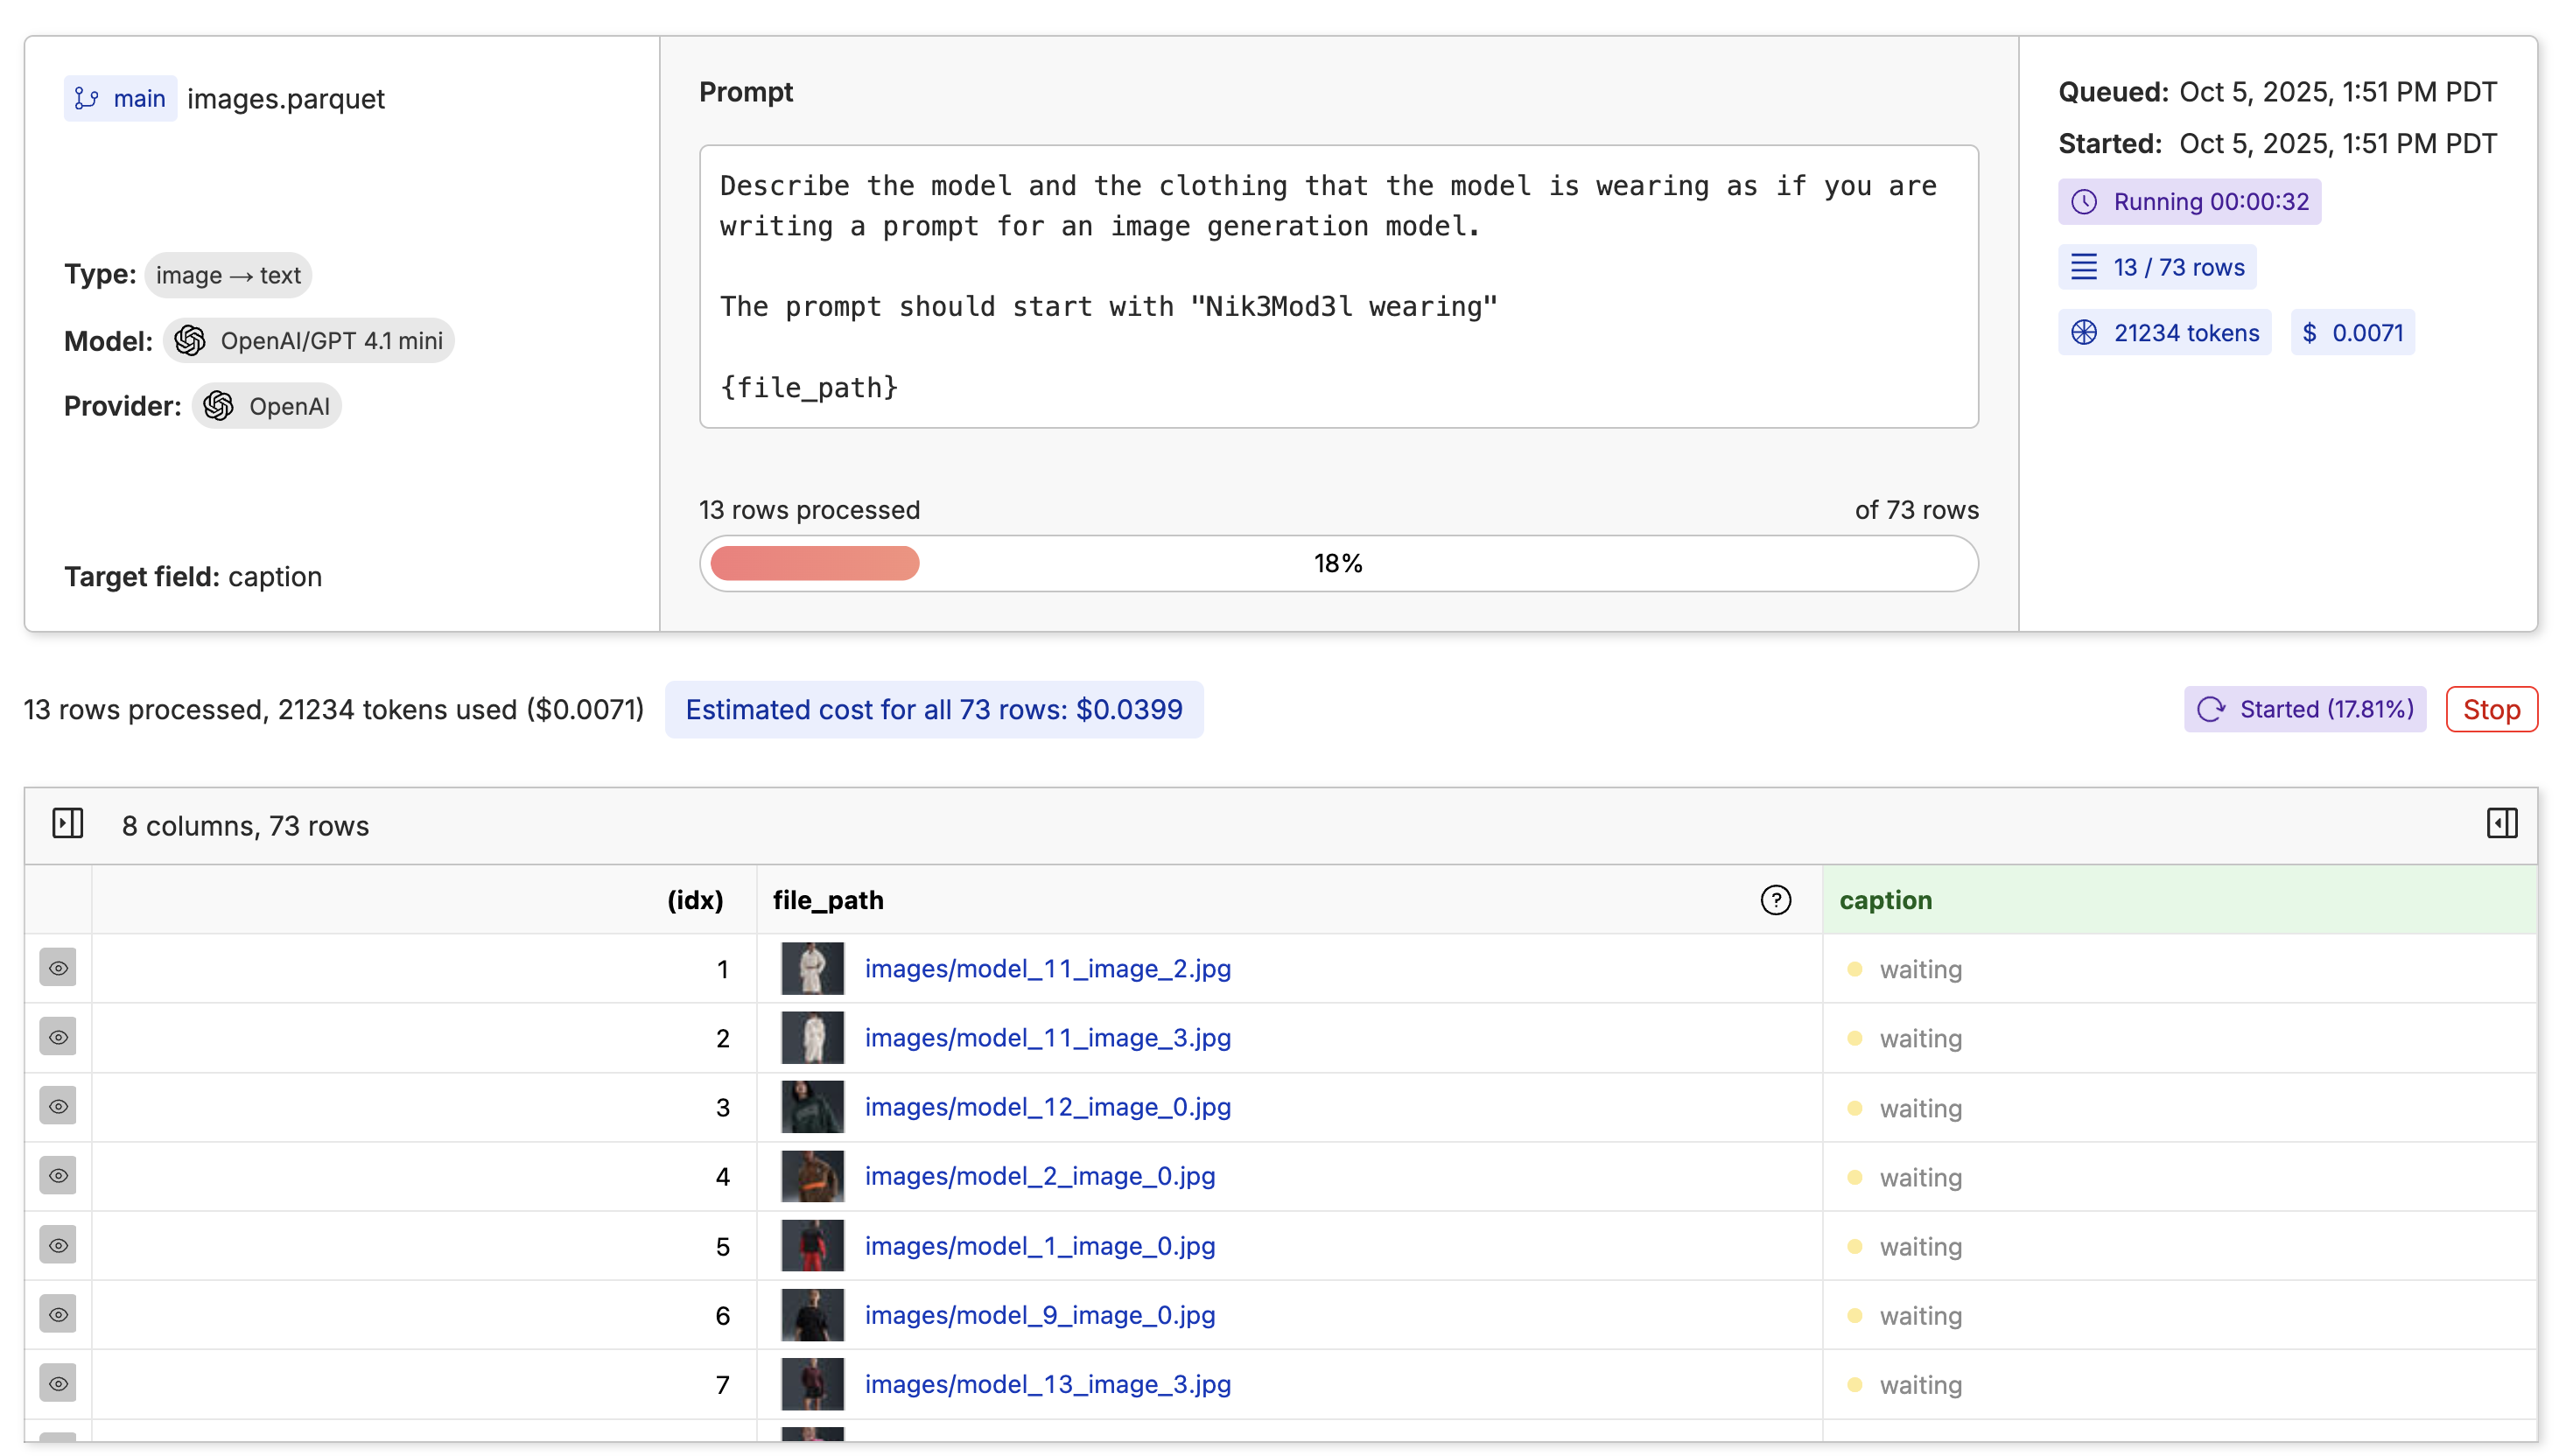
In order for the fine-tune to learn a mapping from text to images, we’ll need a prompt column that contains a description of each image. Oxen.ai makes it easy to run models on each row of the dataset in order to automatically generate captions. Click the “Actions” button above the dataset, then select “Run Inference”.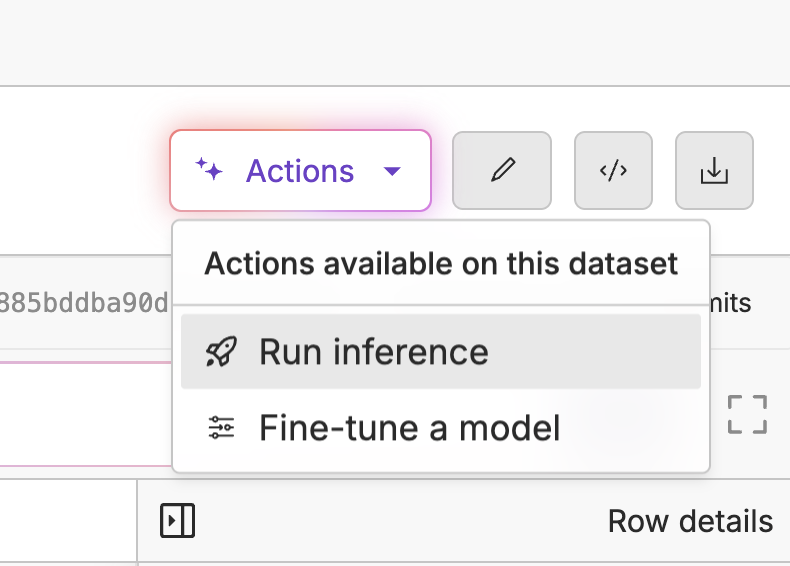
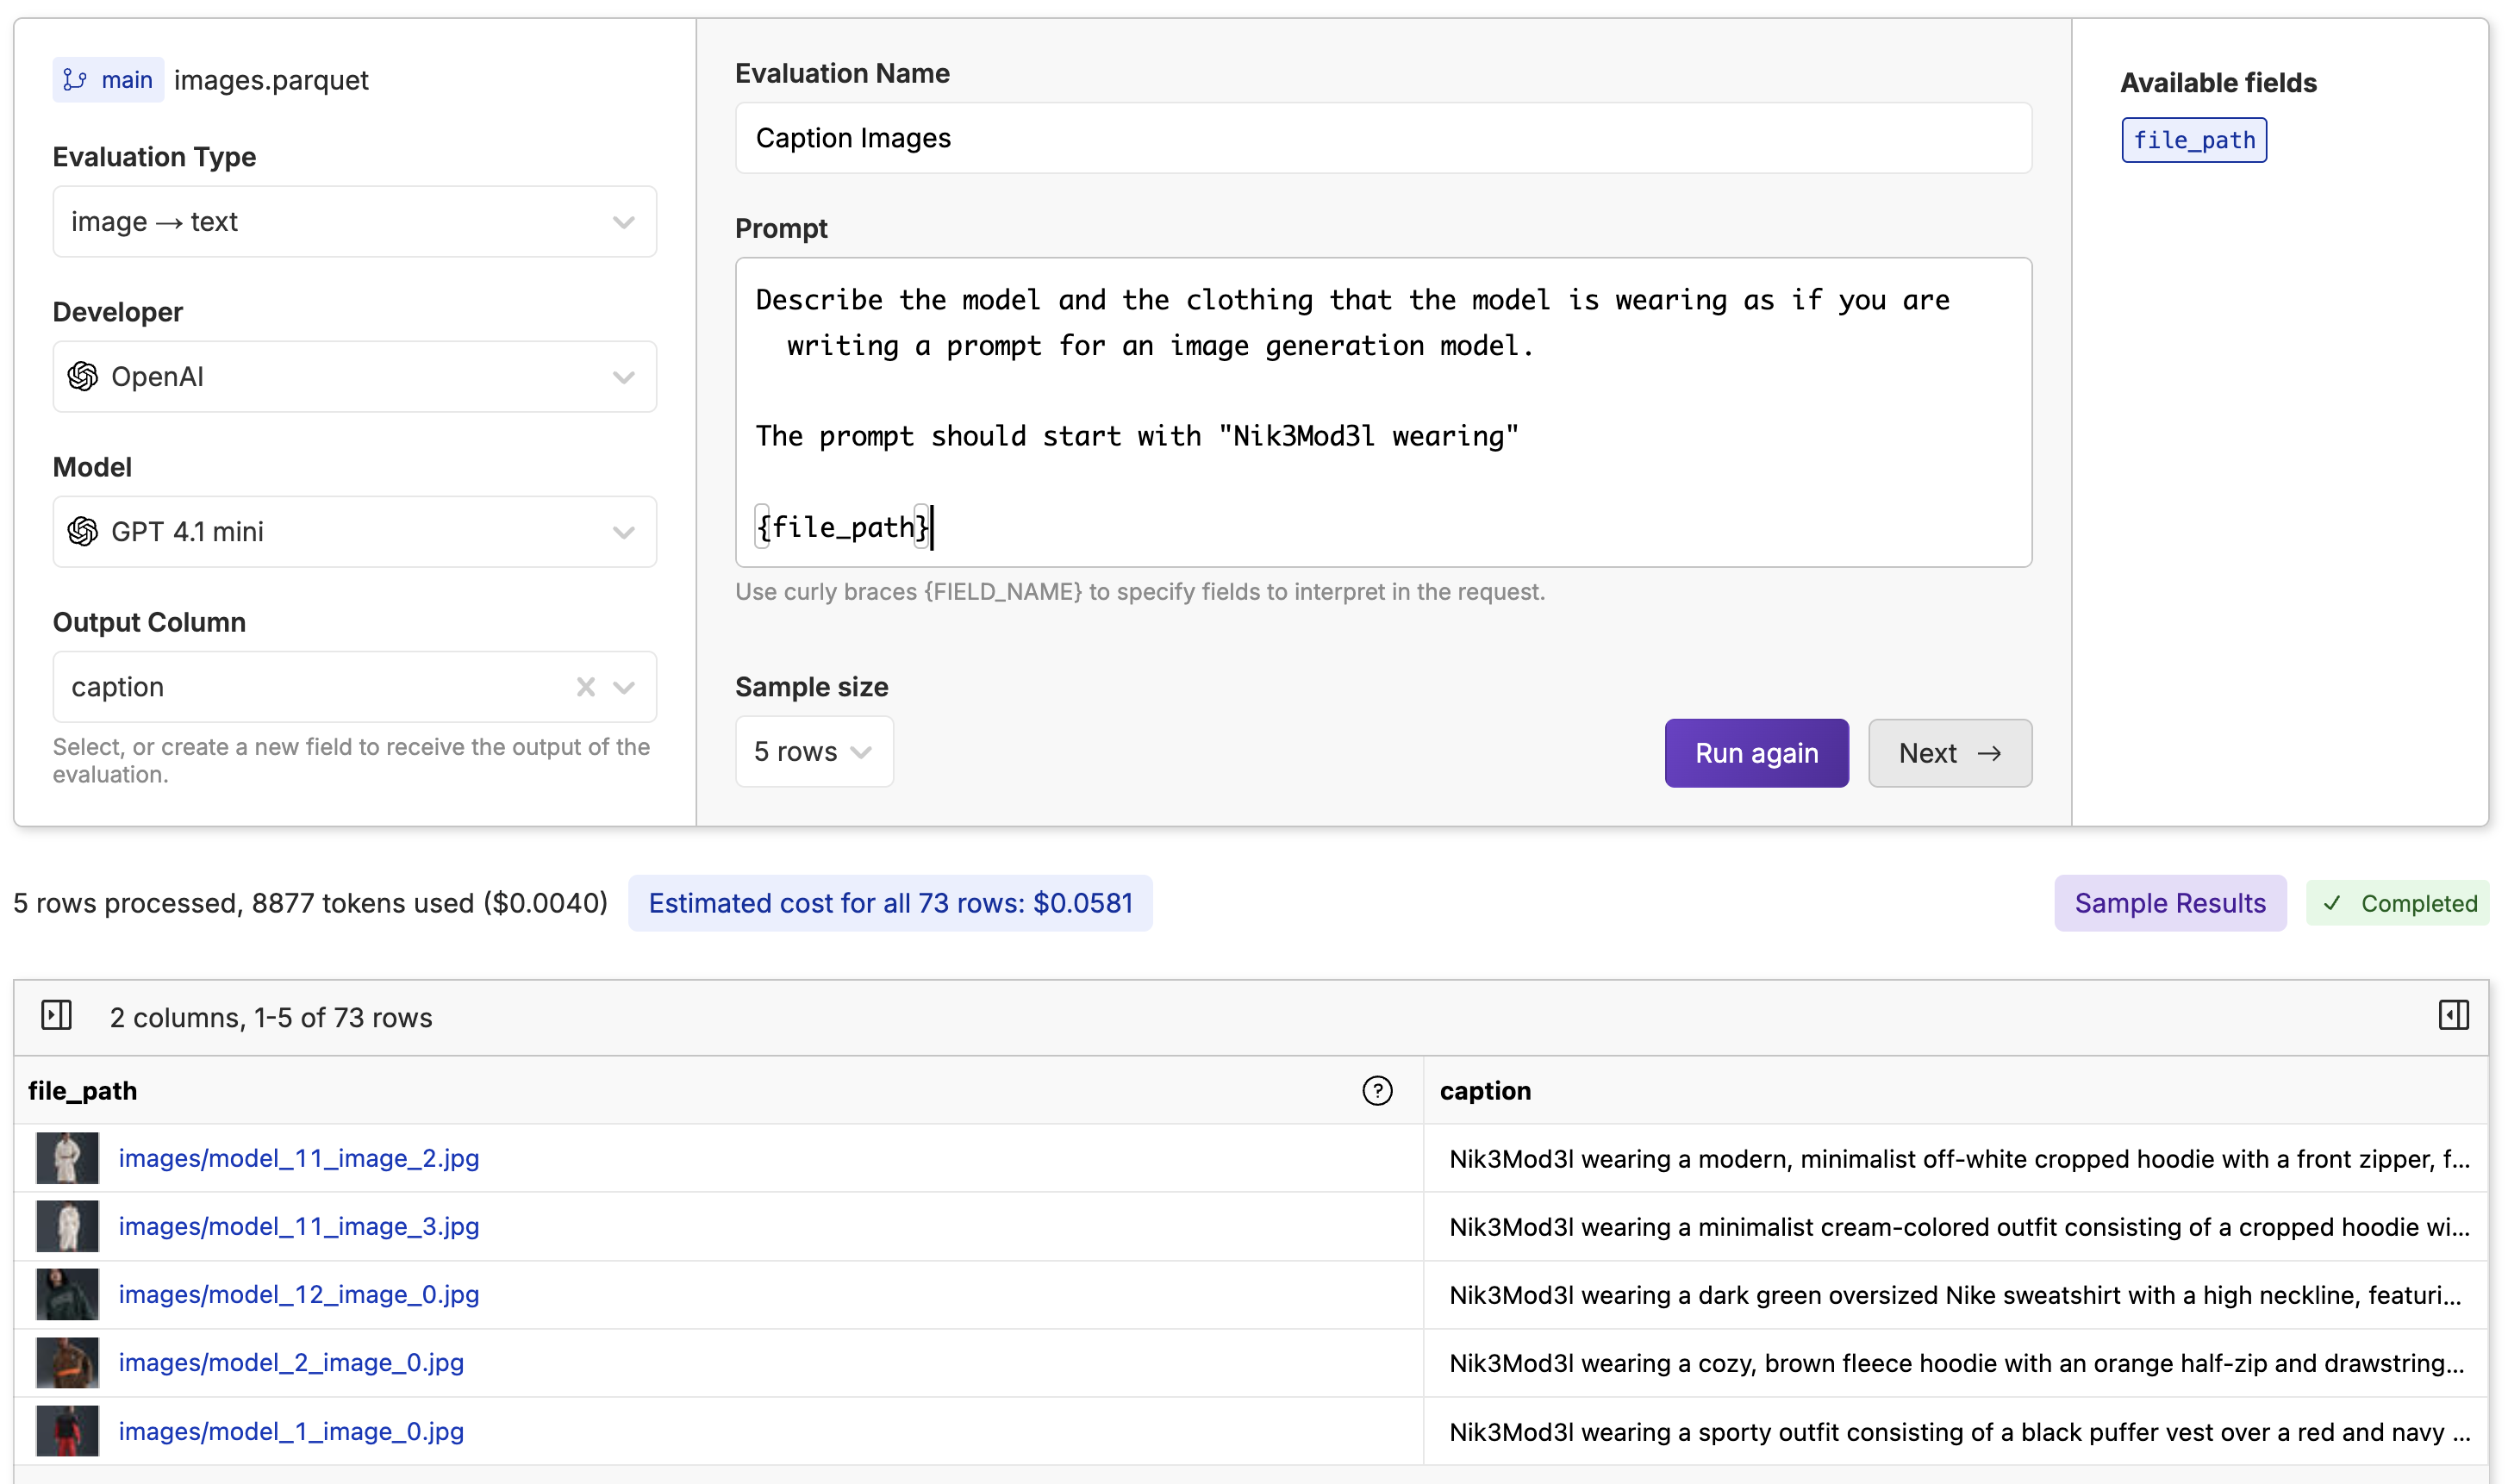
Note: You must supply the curly braces
{} around the file_path column in the prompt to know what column to use for the image.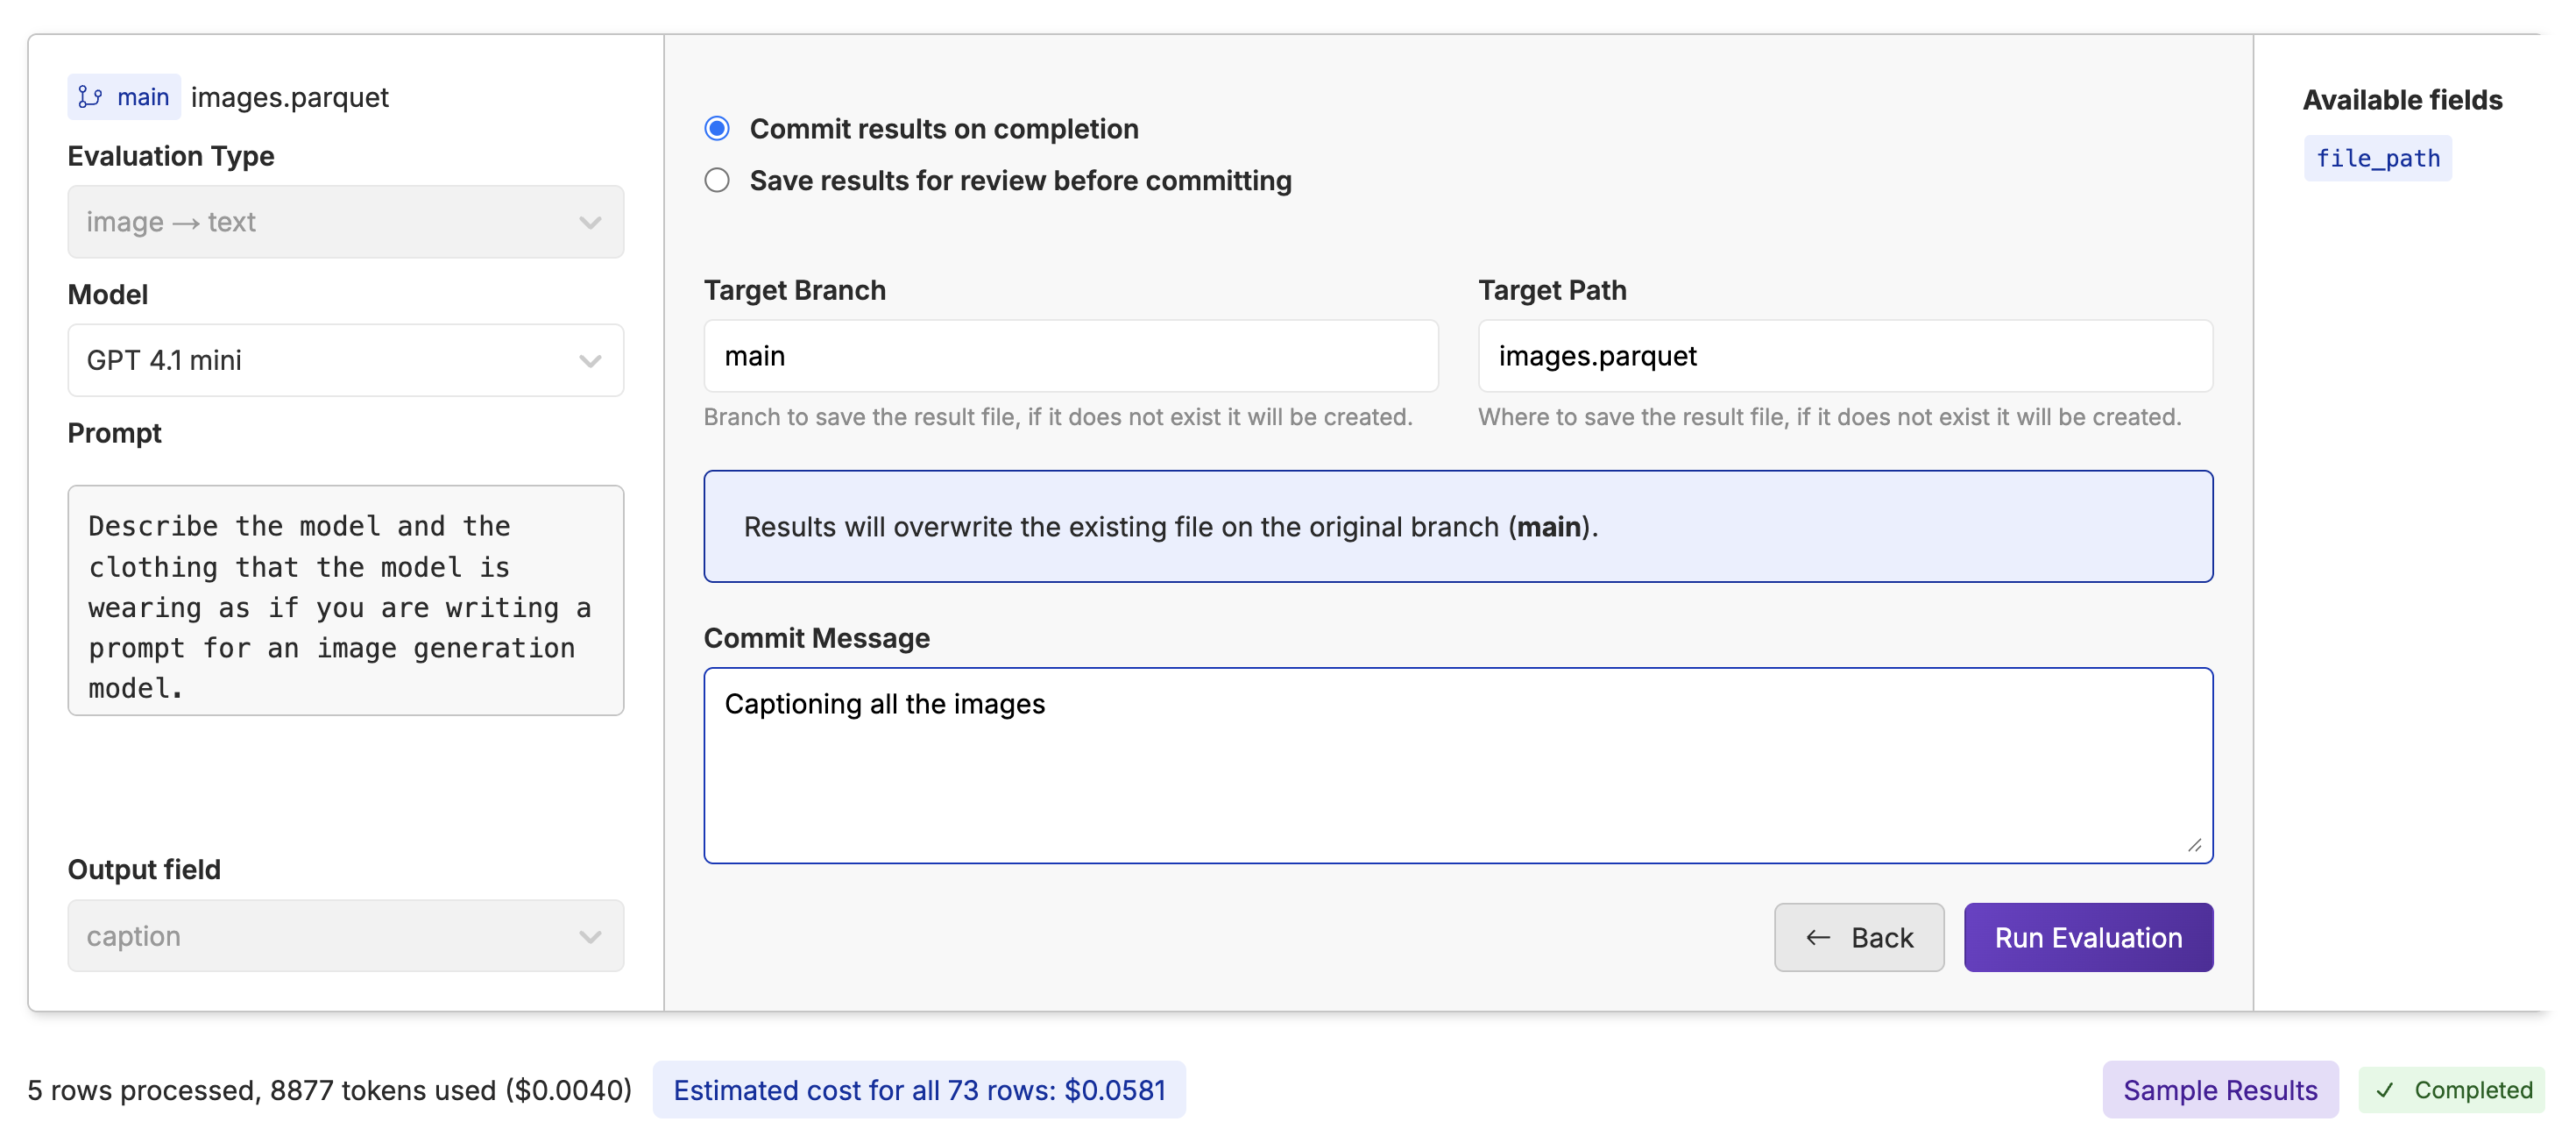
Kicking off the Fine-Tune
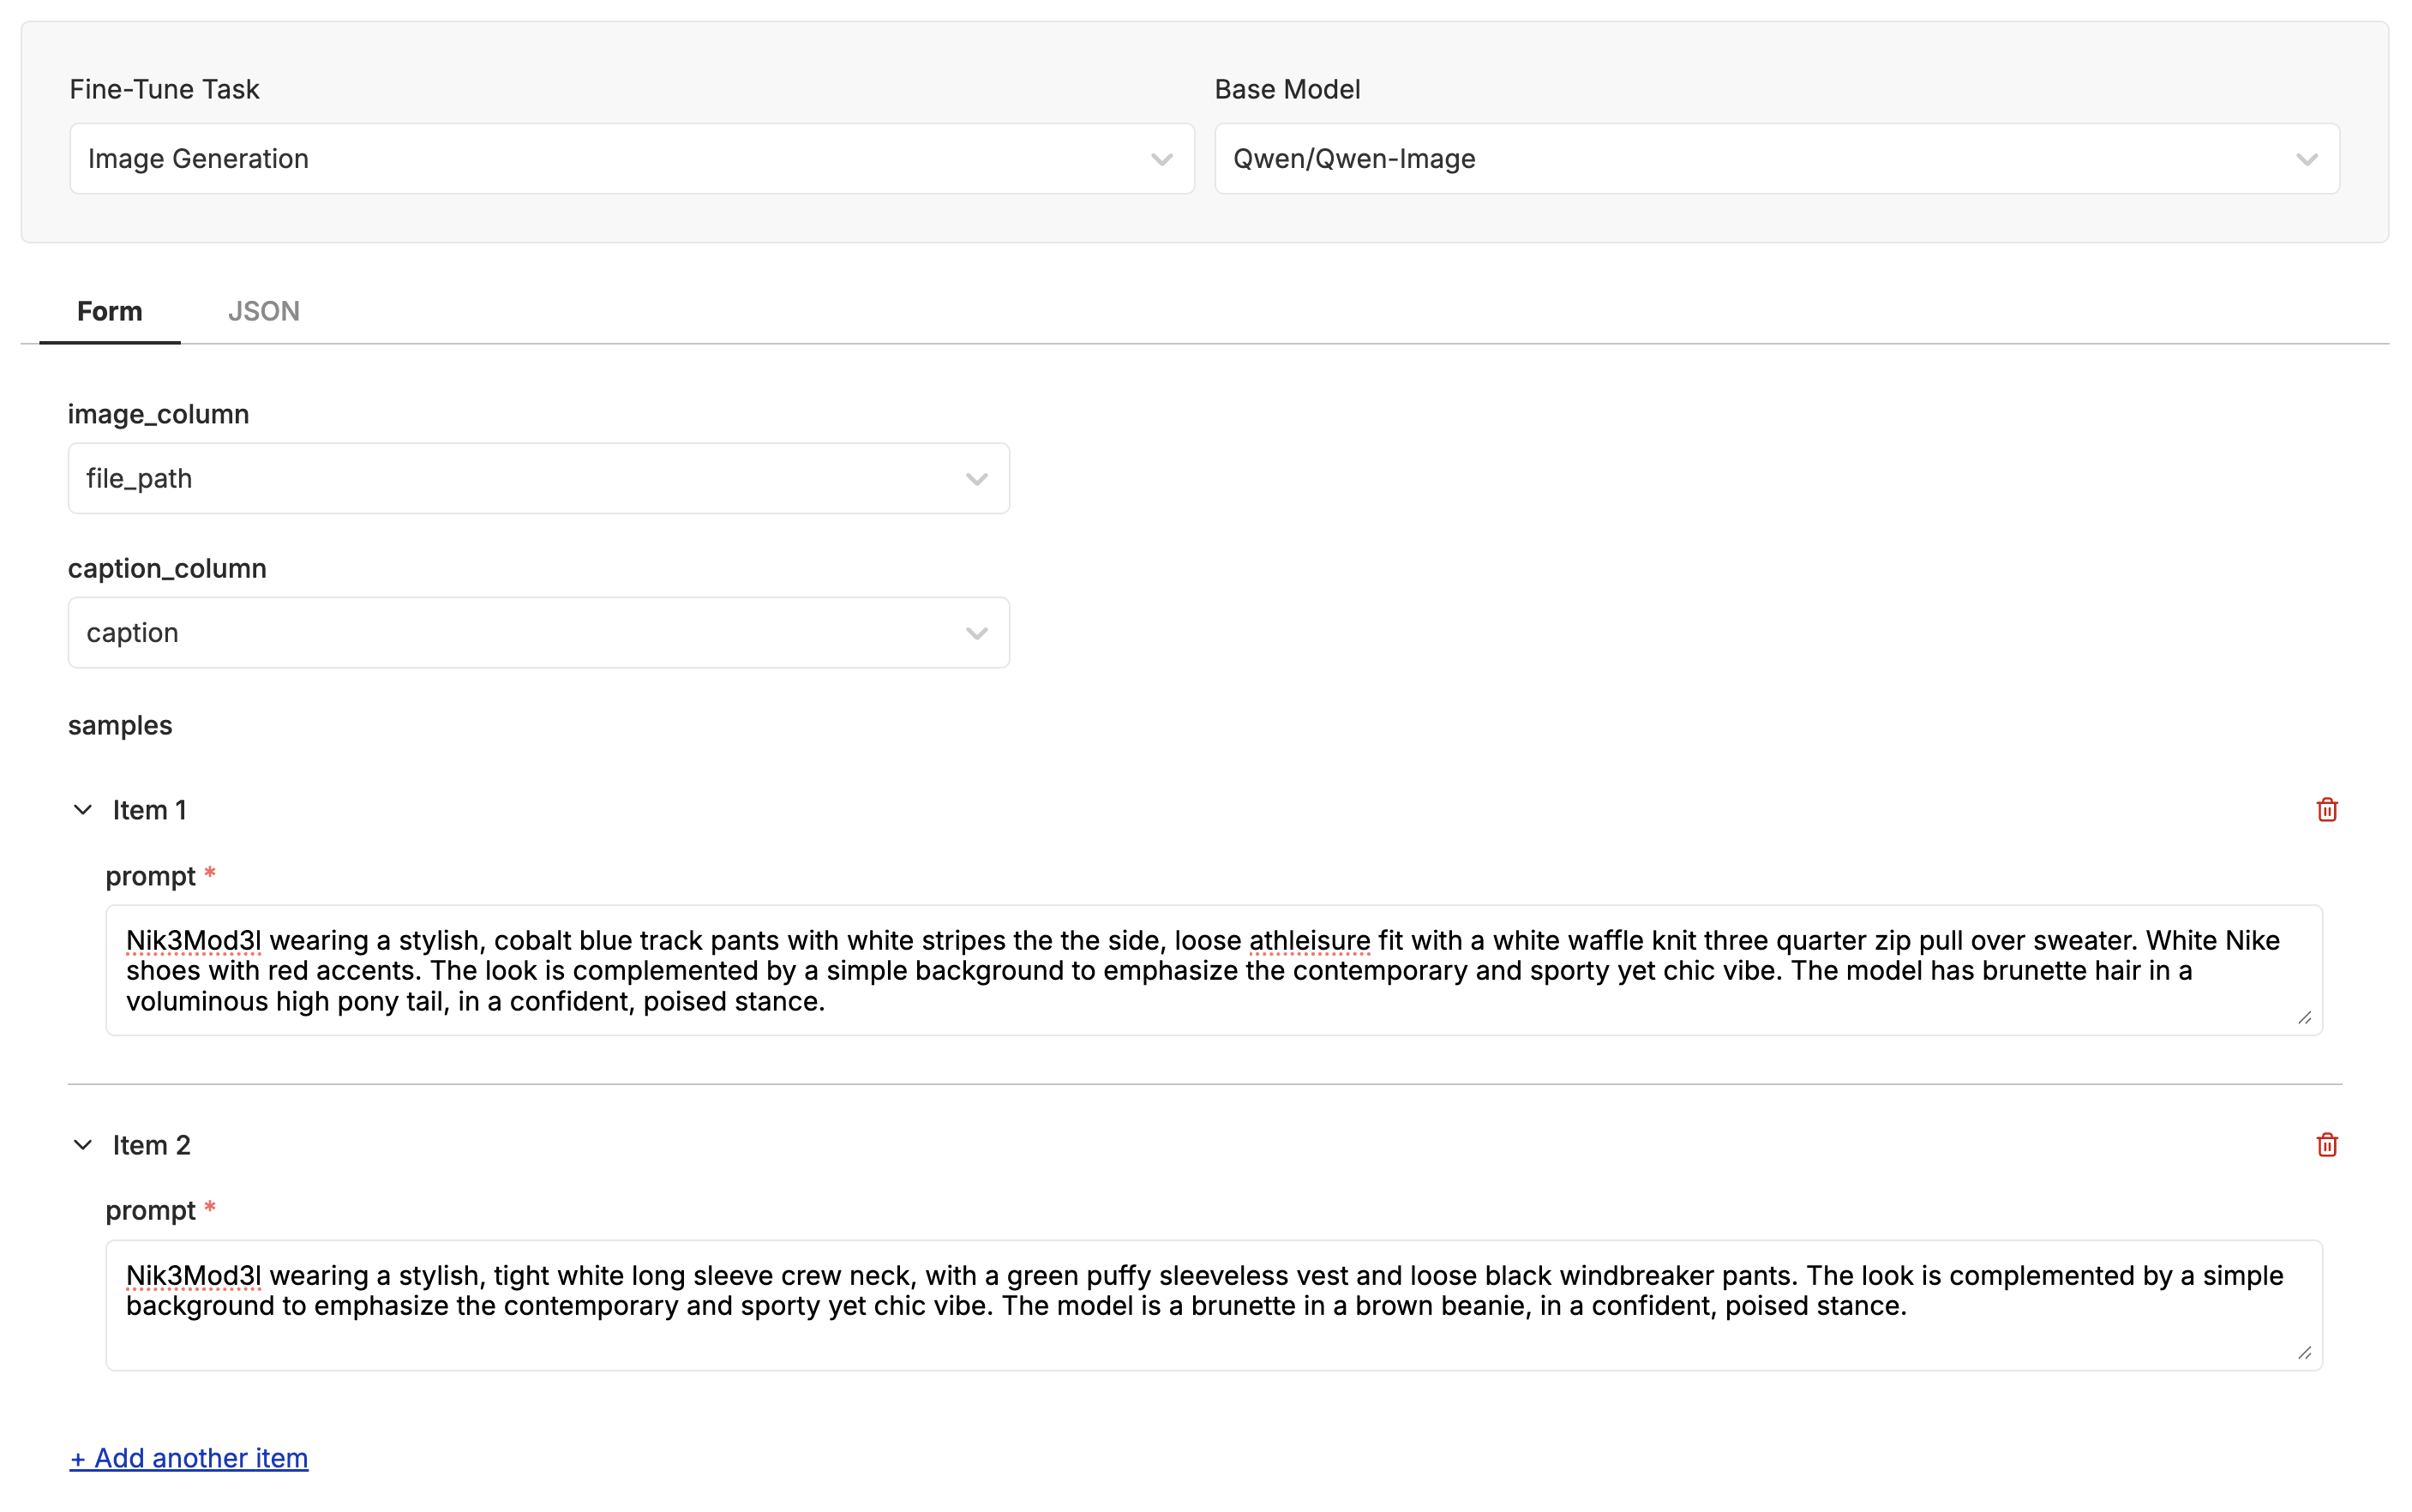
With our images captioned, now we can kick off the fine-tune! Click the “Actions” button and select “Fine-Tune a Model”.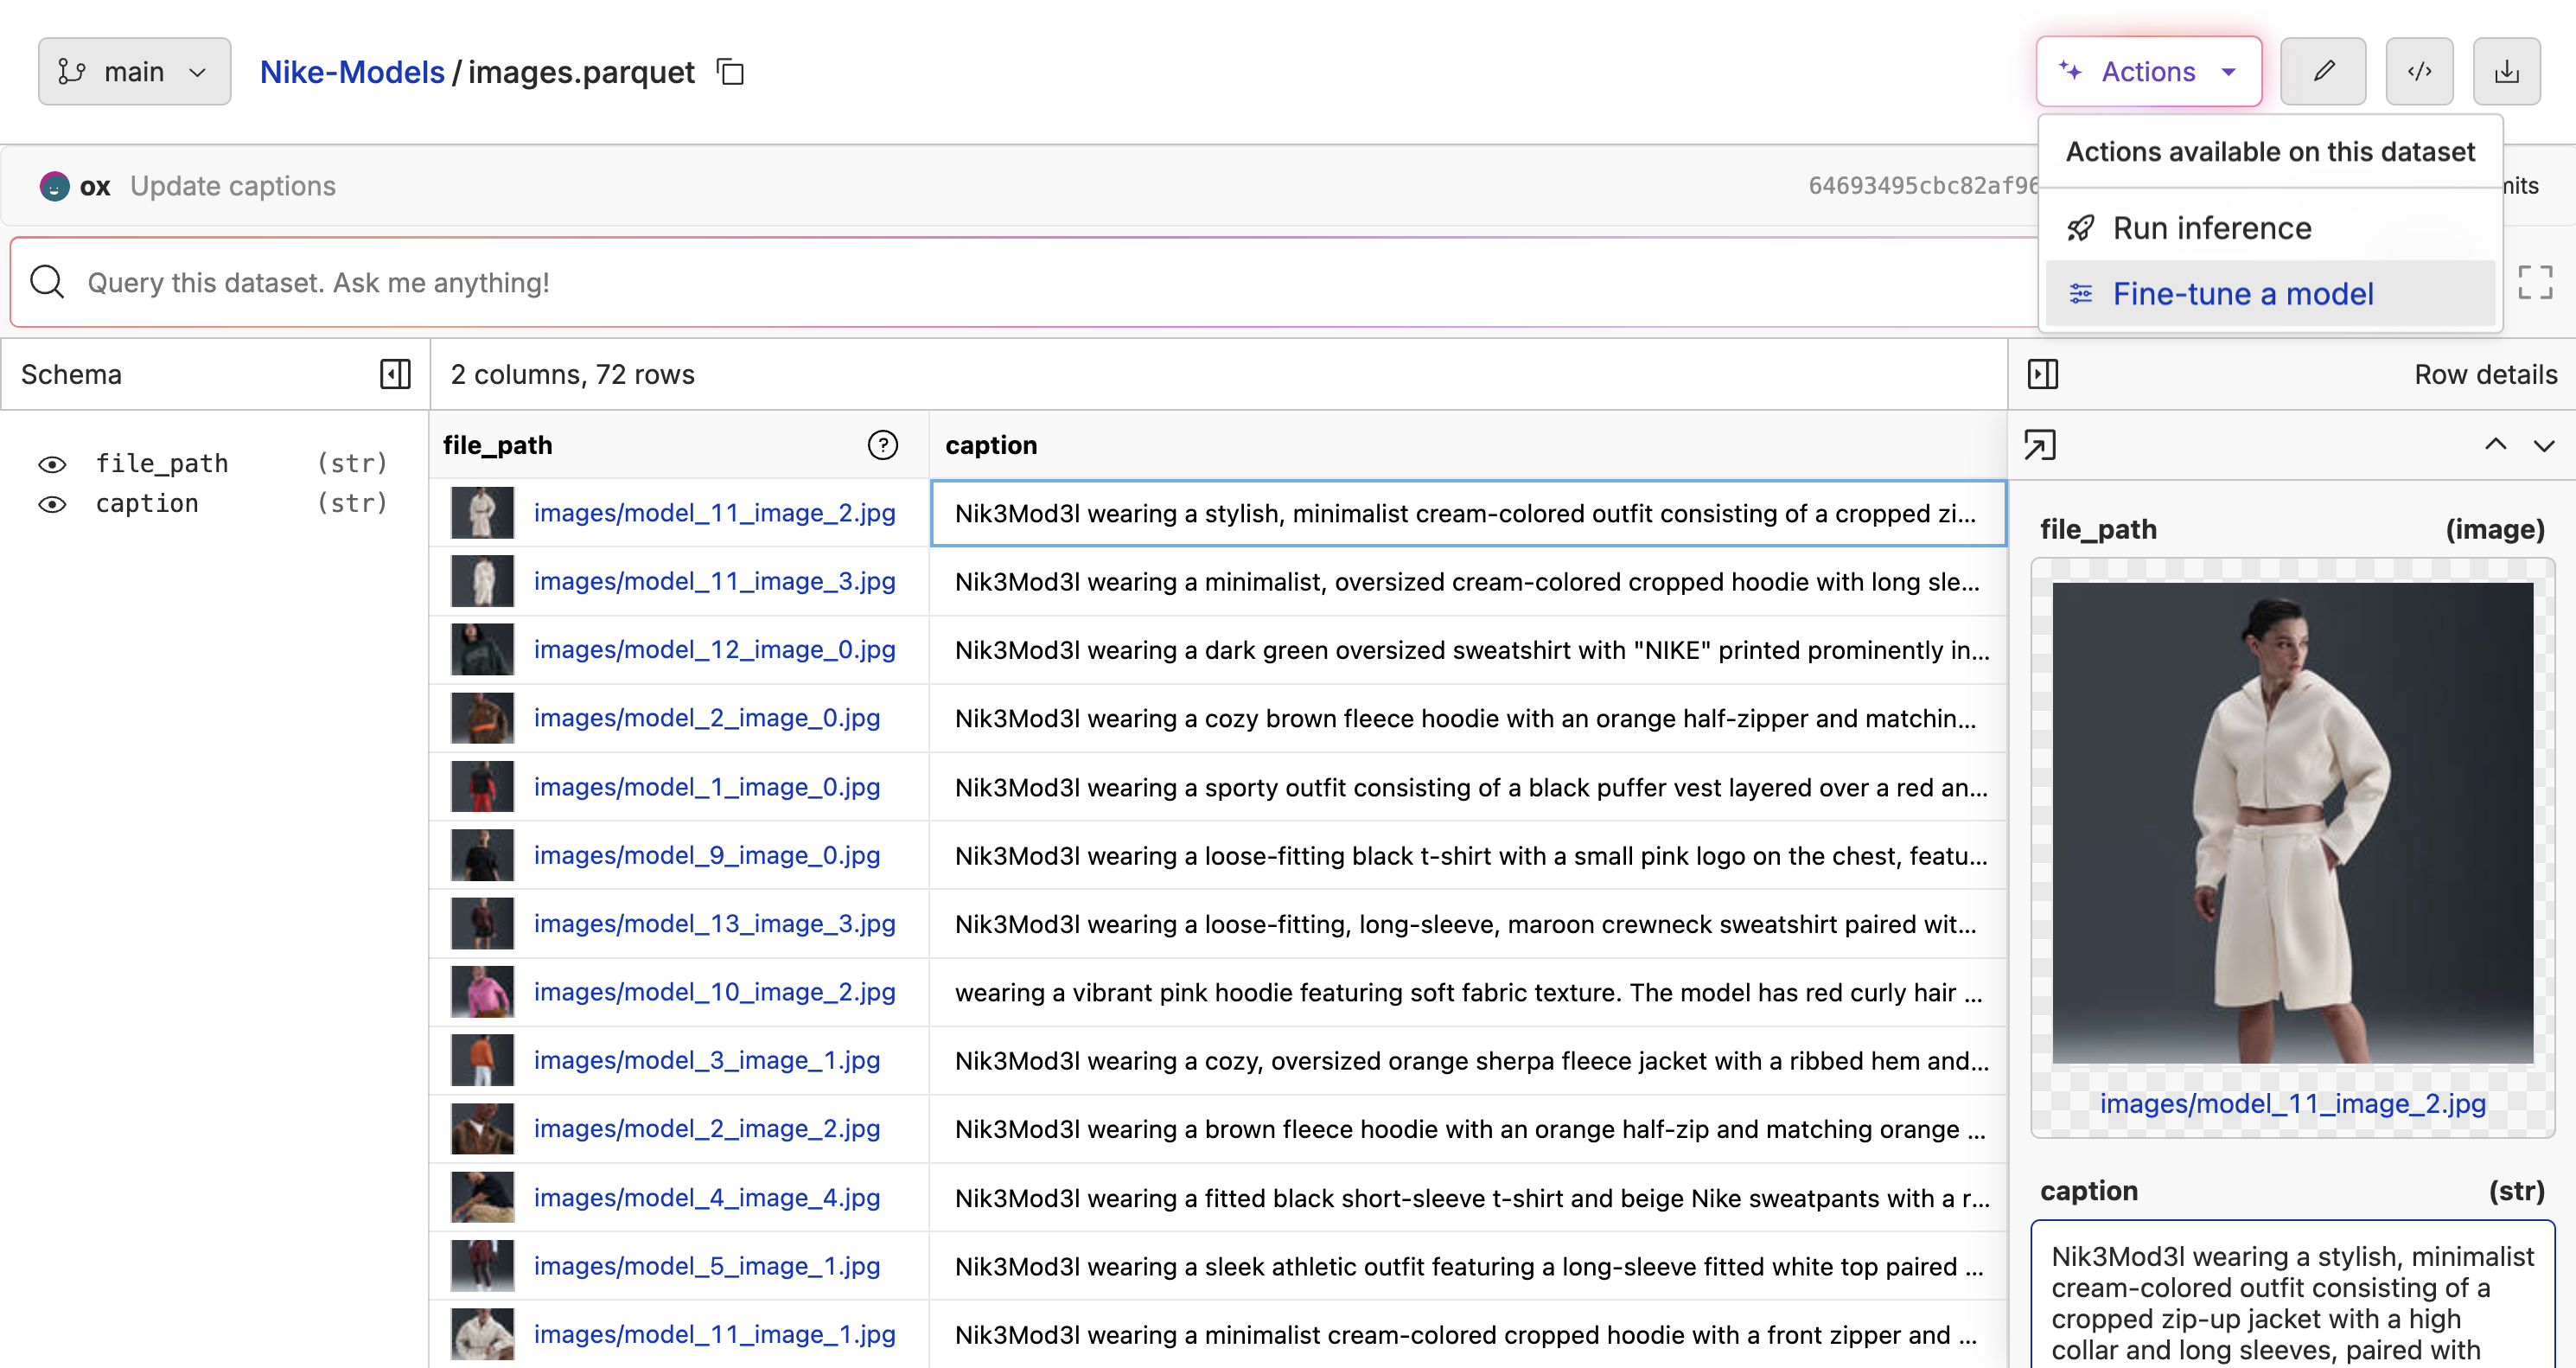
file_path column, and the “Prompt” column is set to the caption column.
Advanced Parameters
Click the “Advanced Parameters” button to see the advanced parameters for the fine-tune. You can set the learning rate, batch size, number of steps, and other parameters here. One of the best parts of fine-tuning with Oxen.ai is that we track all your experiments for you, so that you can always refer back to the parameters that worked best for future fine-tunes.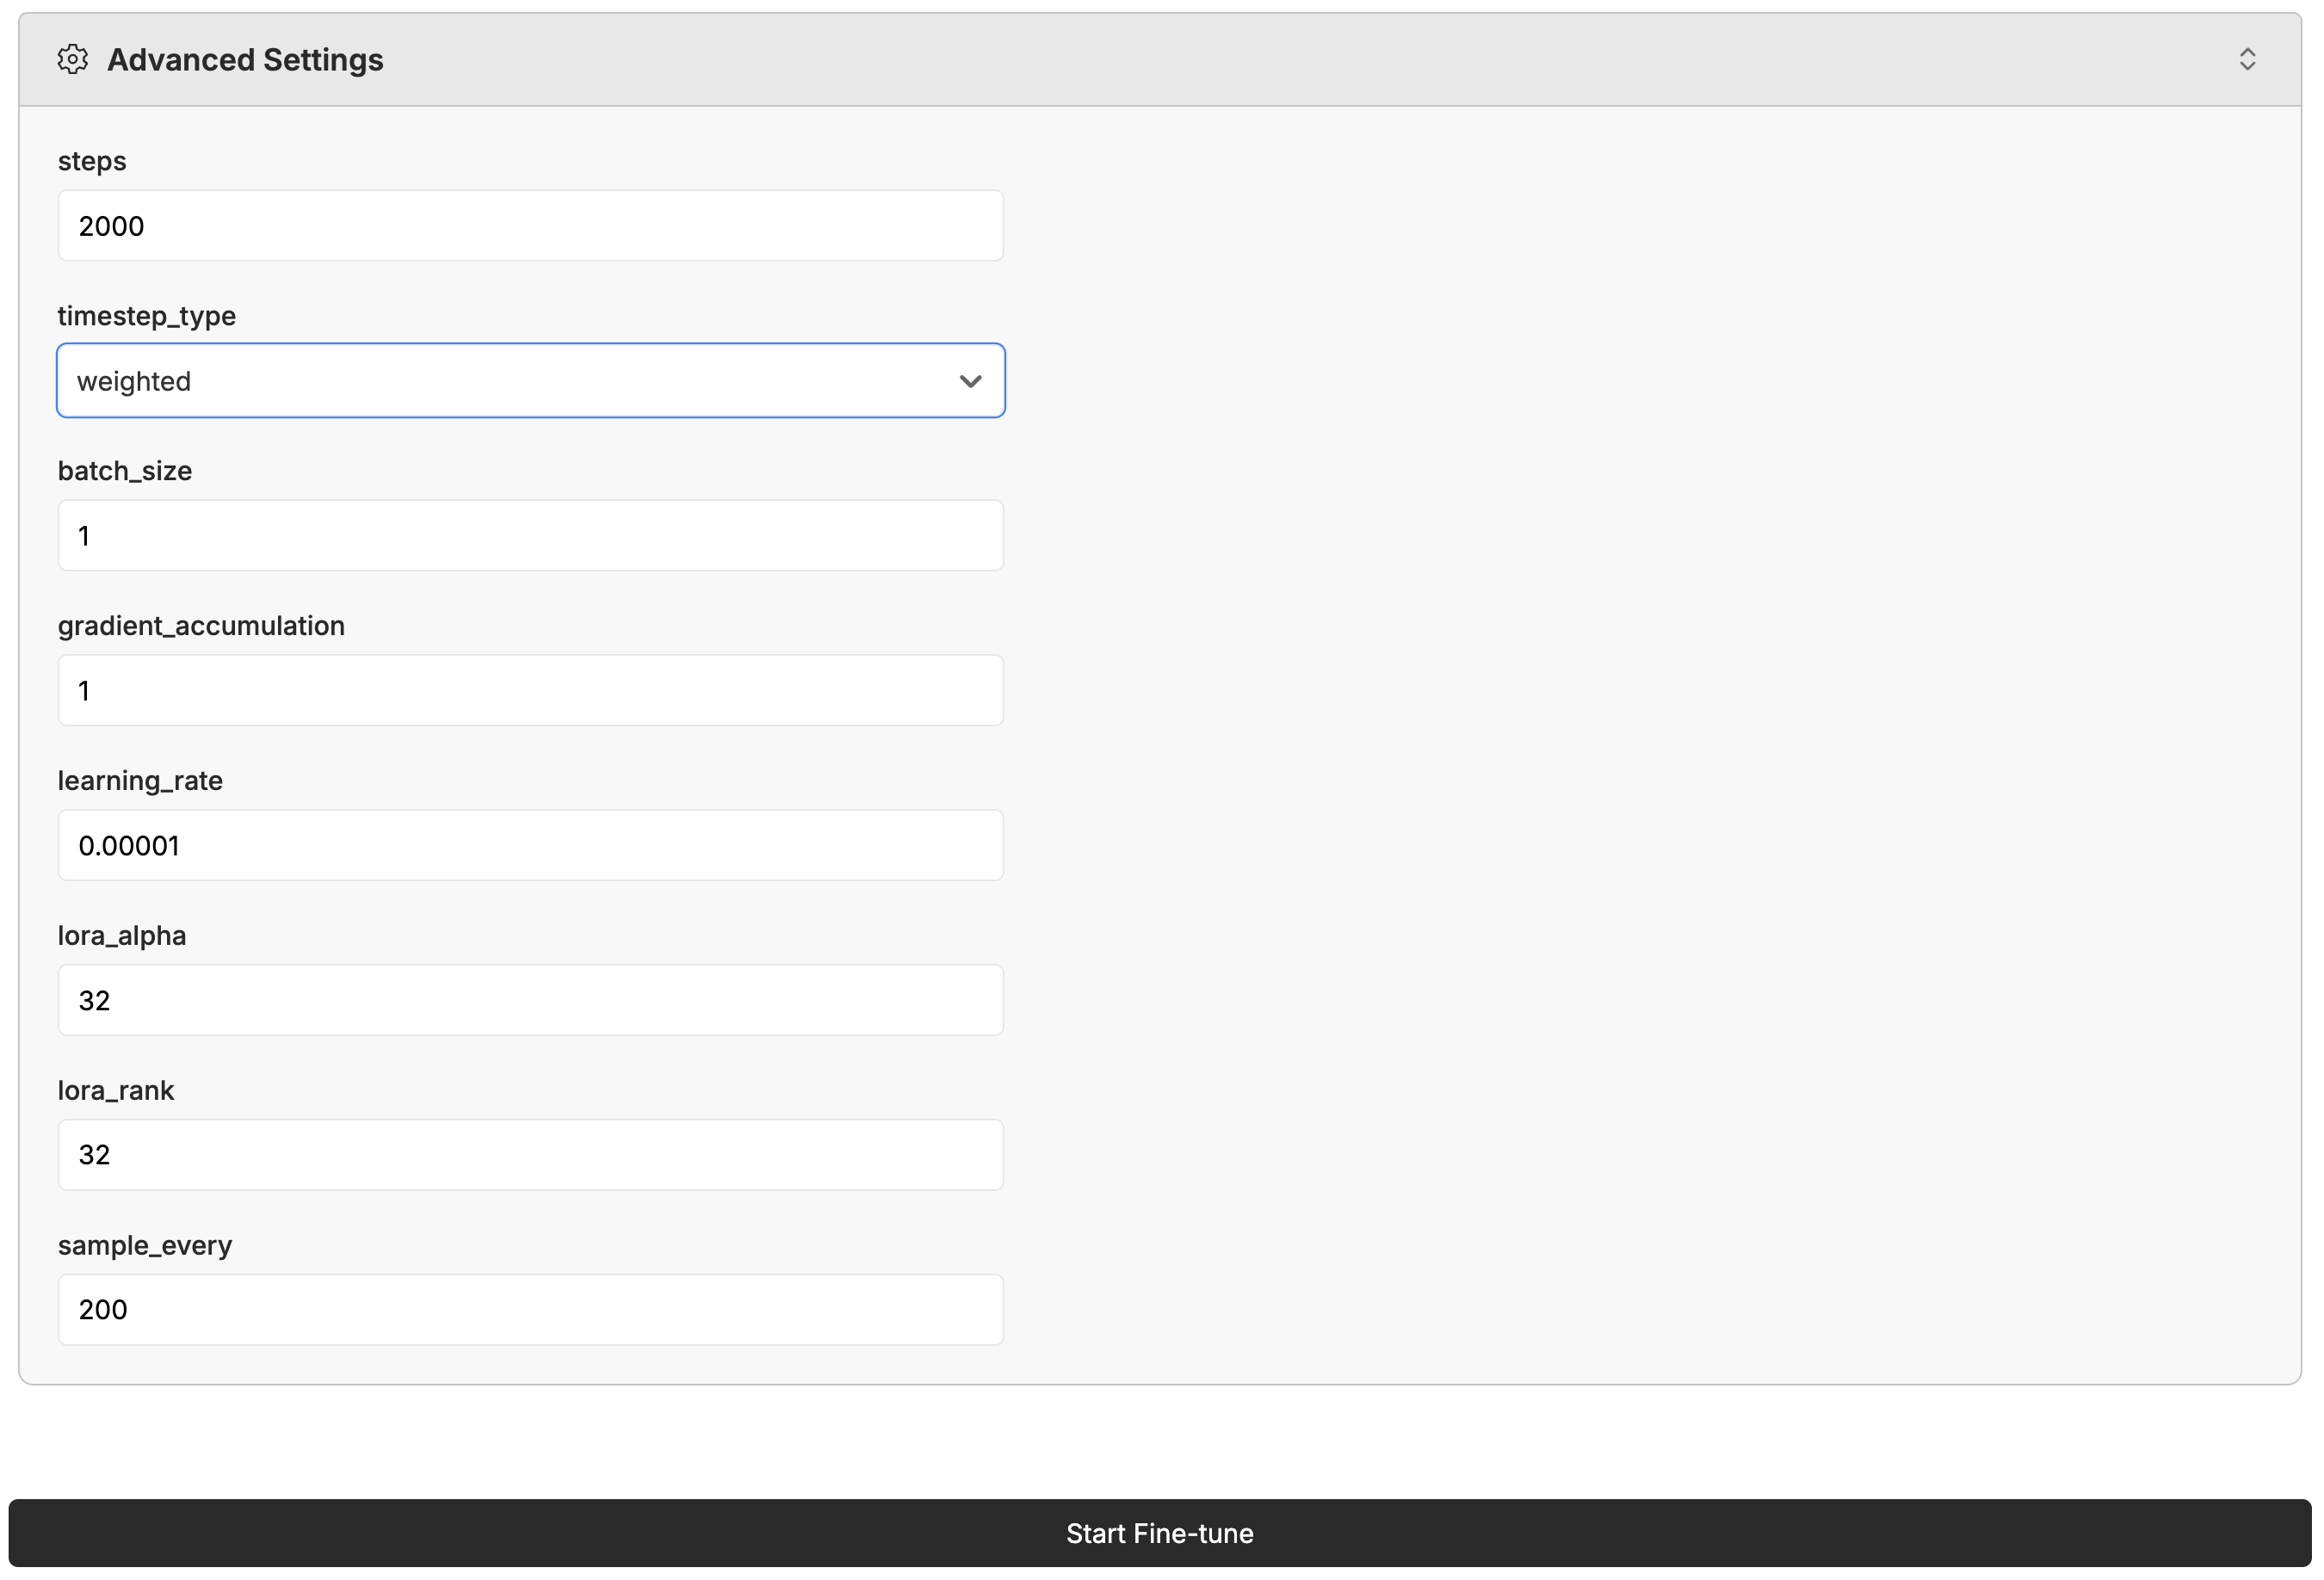
Monitoring the Fine-Tune
As the model is training, you can monitor the progress by clicking the “Samples” tab. This will show you the images that the model has generated so far.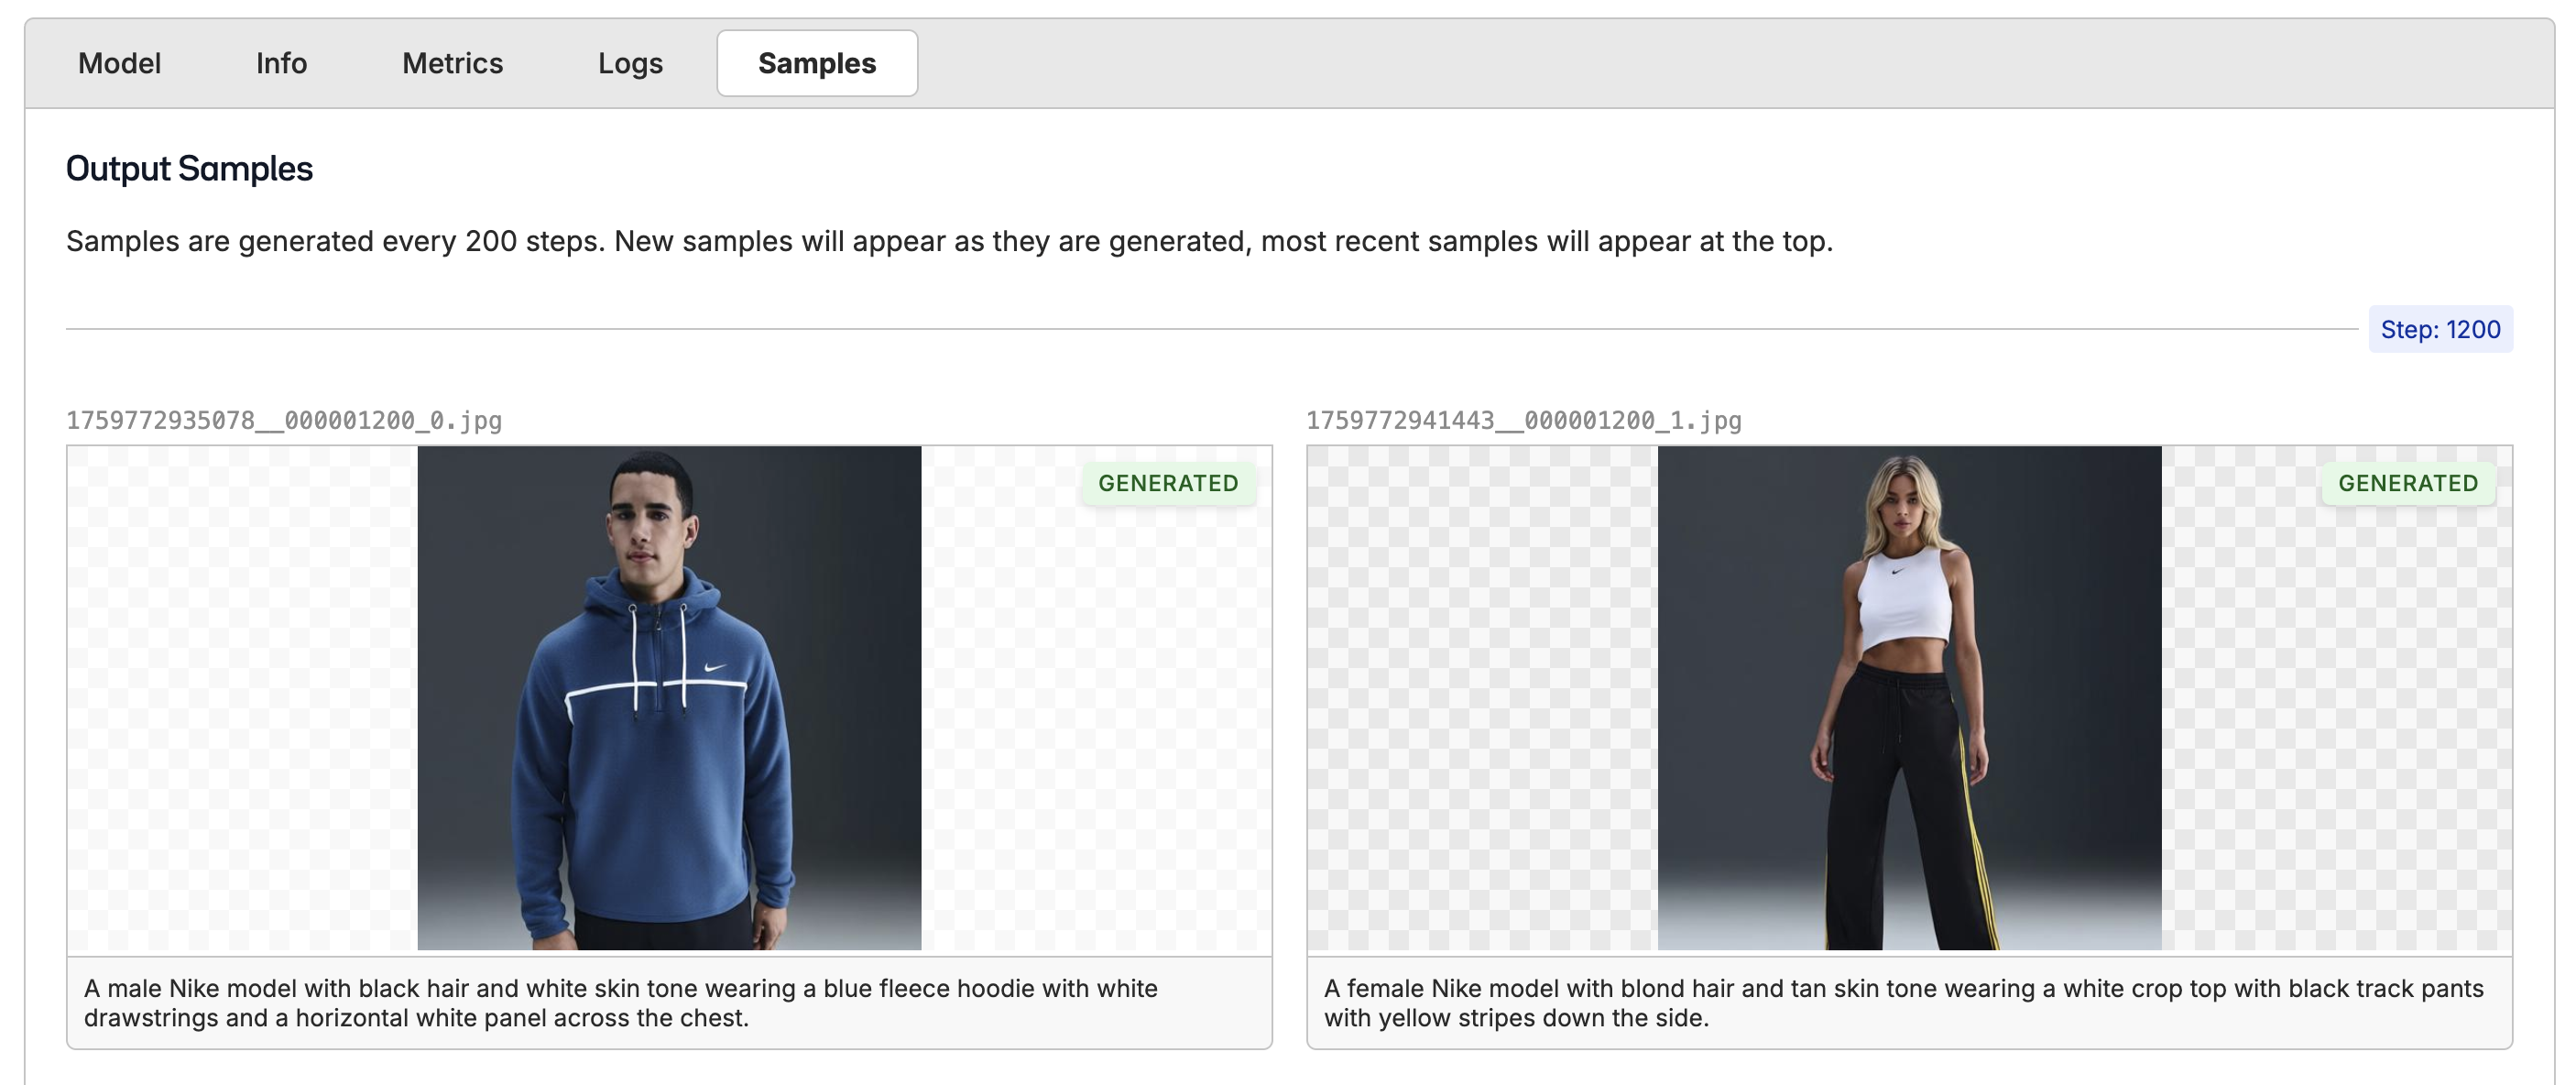
Deploying the Model
When the model has finished training, you can deploy it to a new model by clicking the “Deploy Model” button. The deployment will take a few minutes to complete.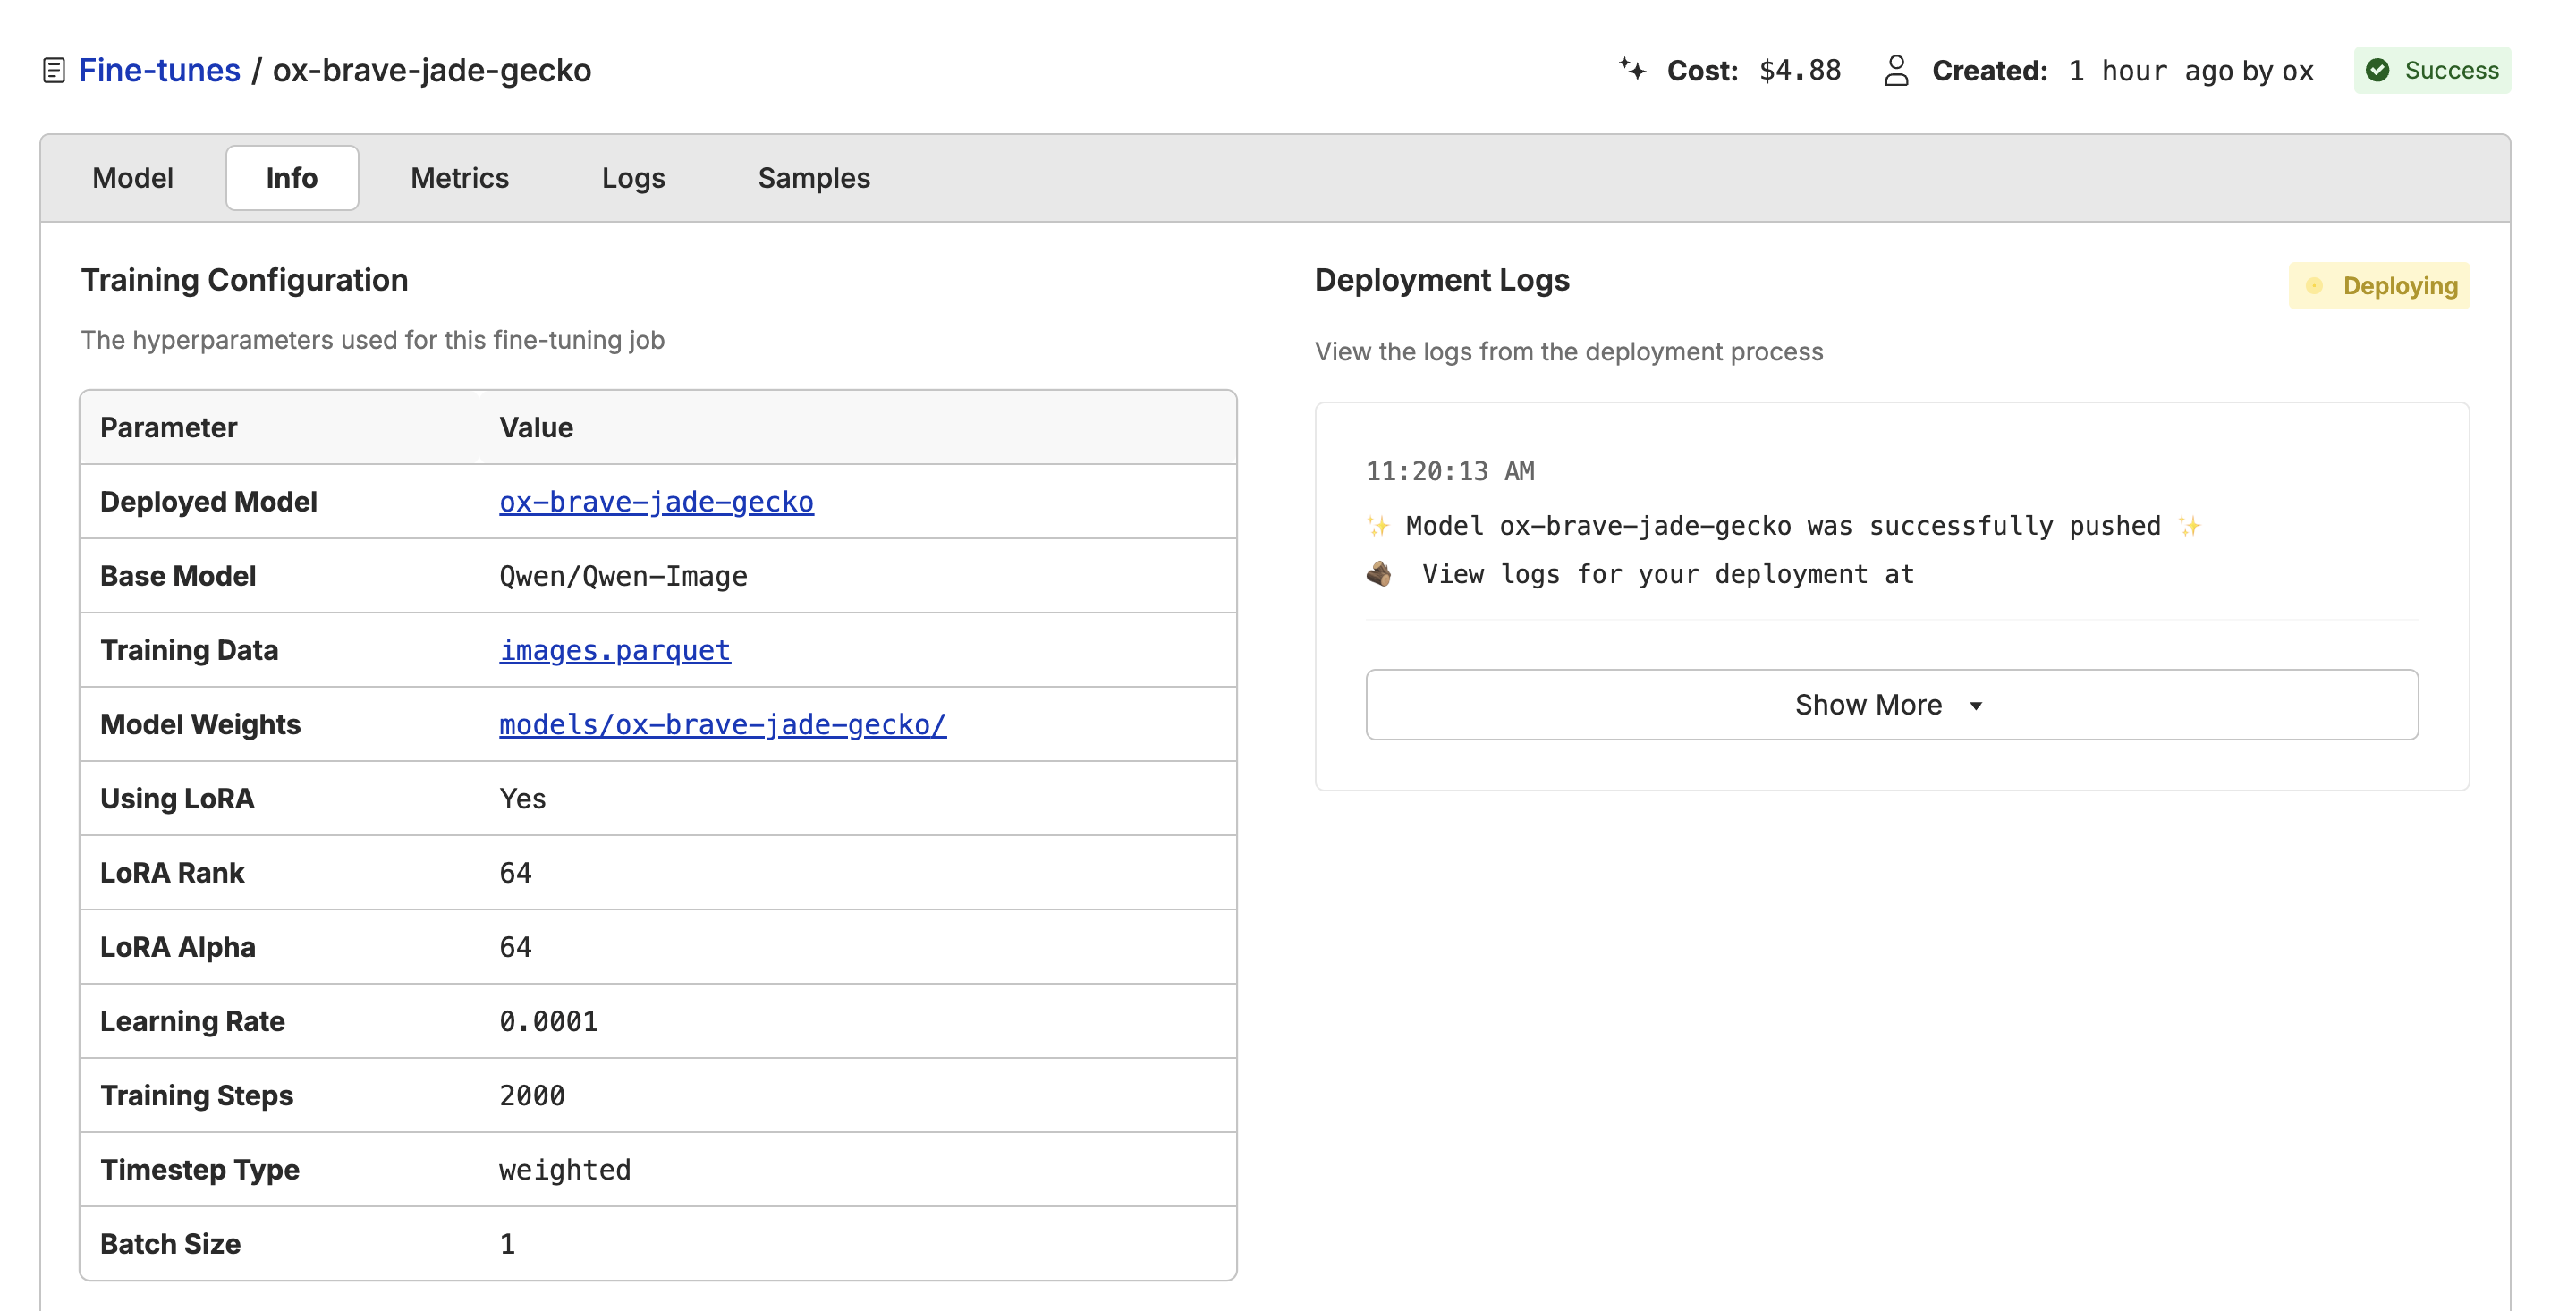
Using the Playground
Click the “Open Playground” button to use the model in the playground. This allows you to prompt the model with different images and prompts to see how it performs.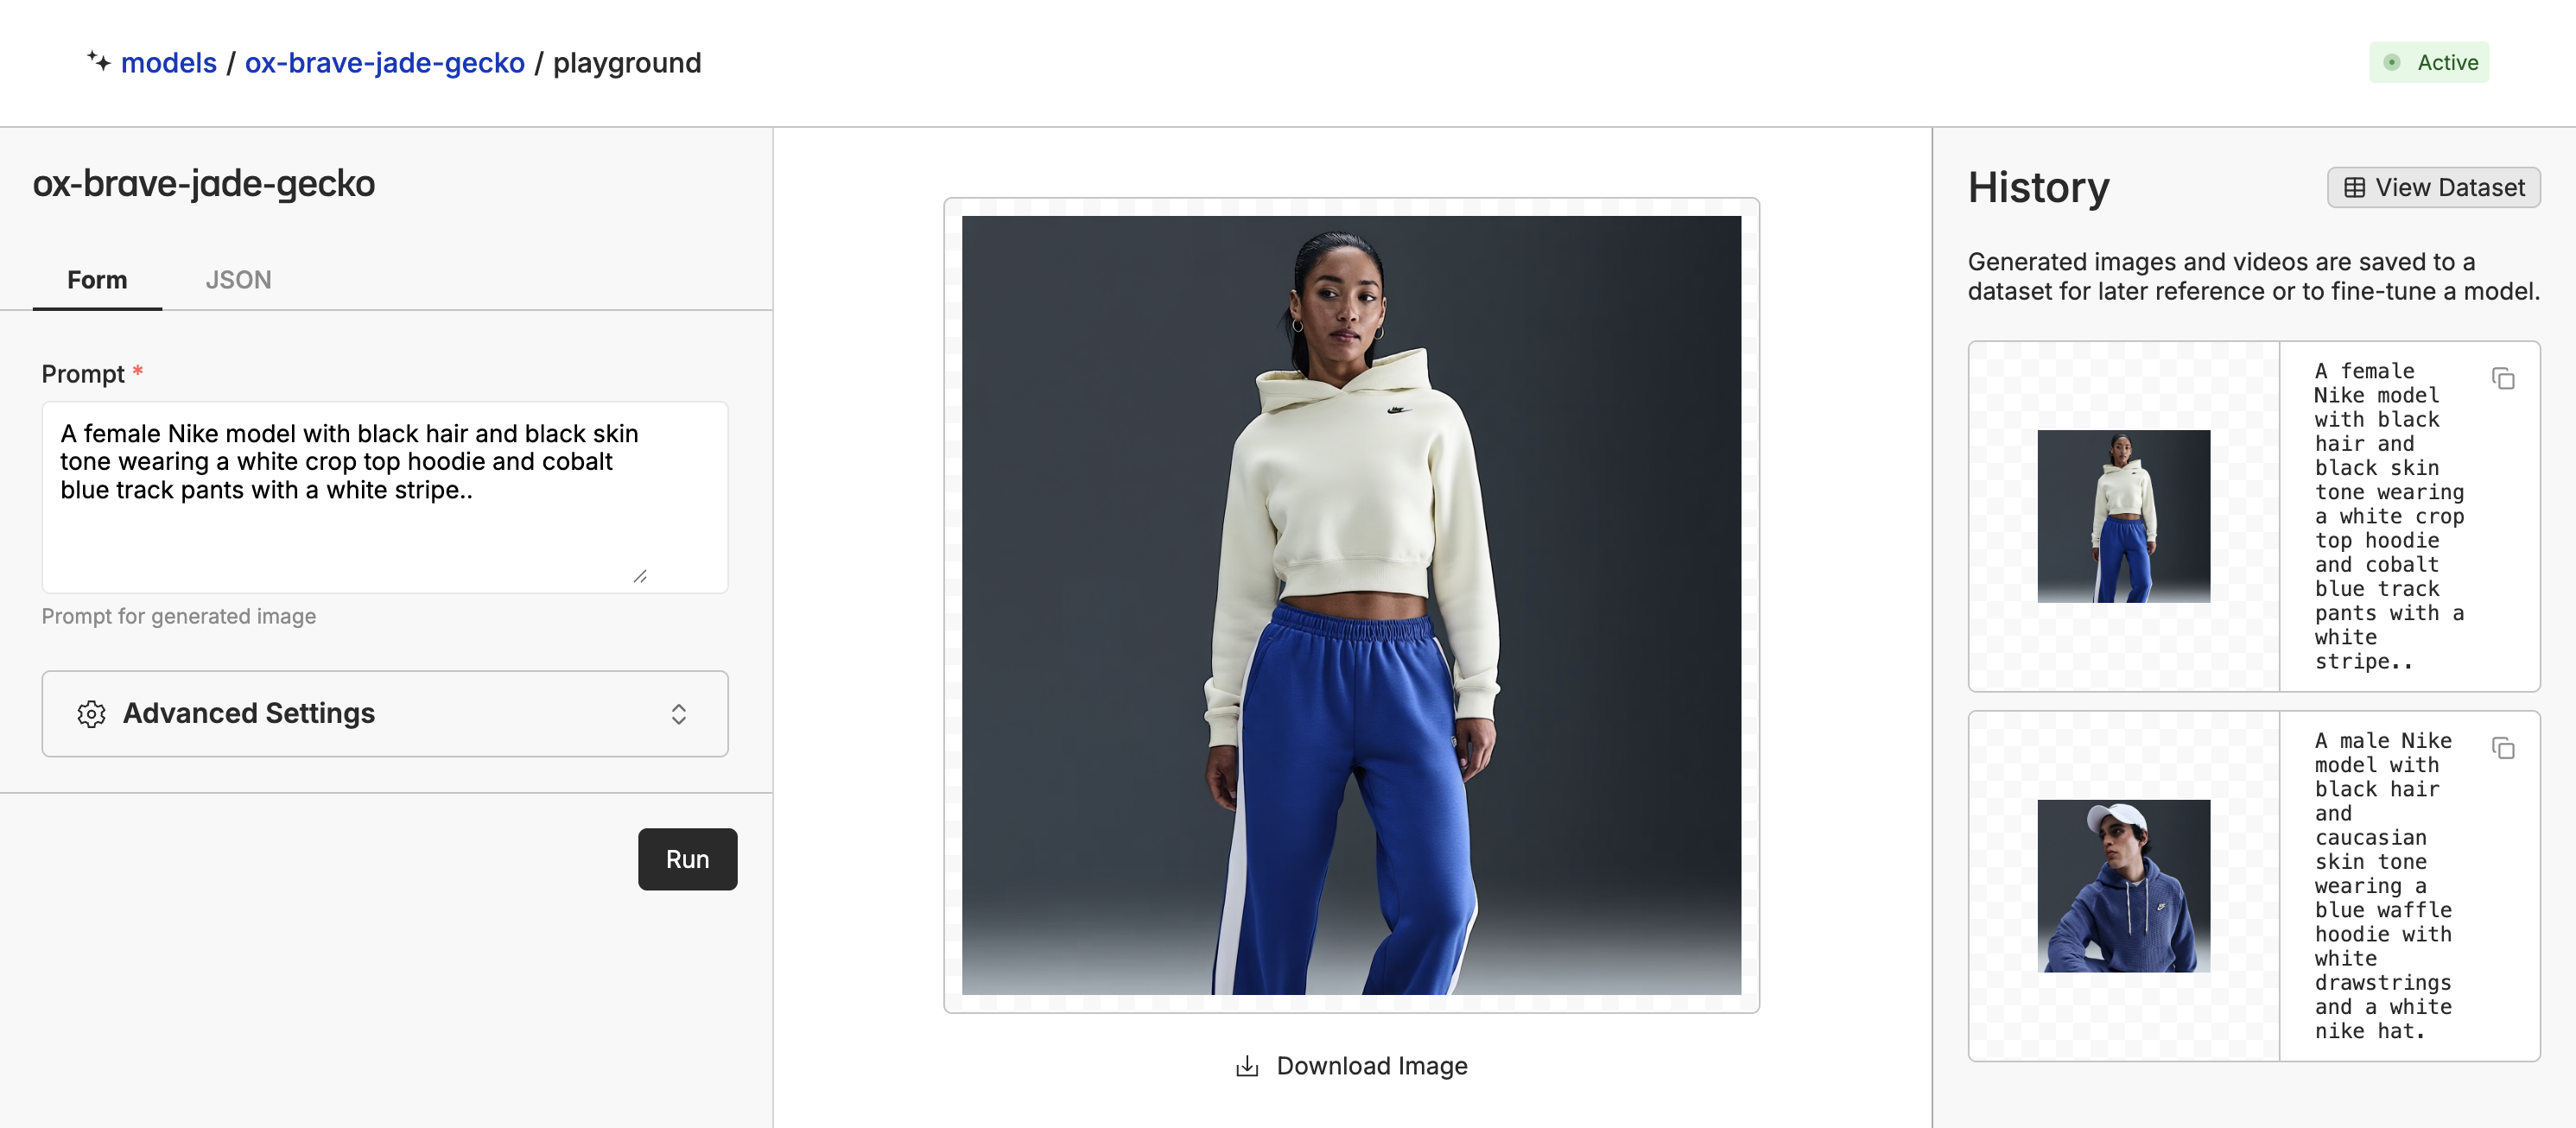
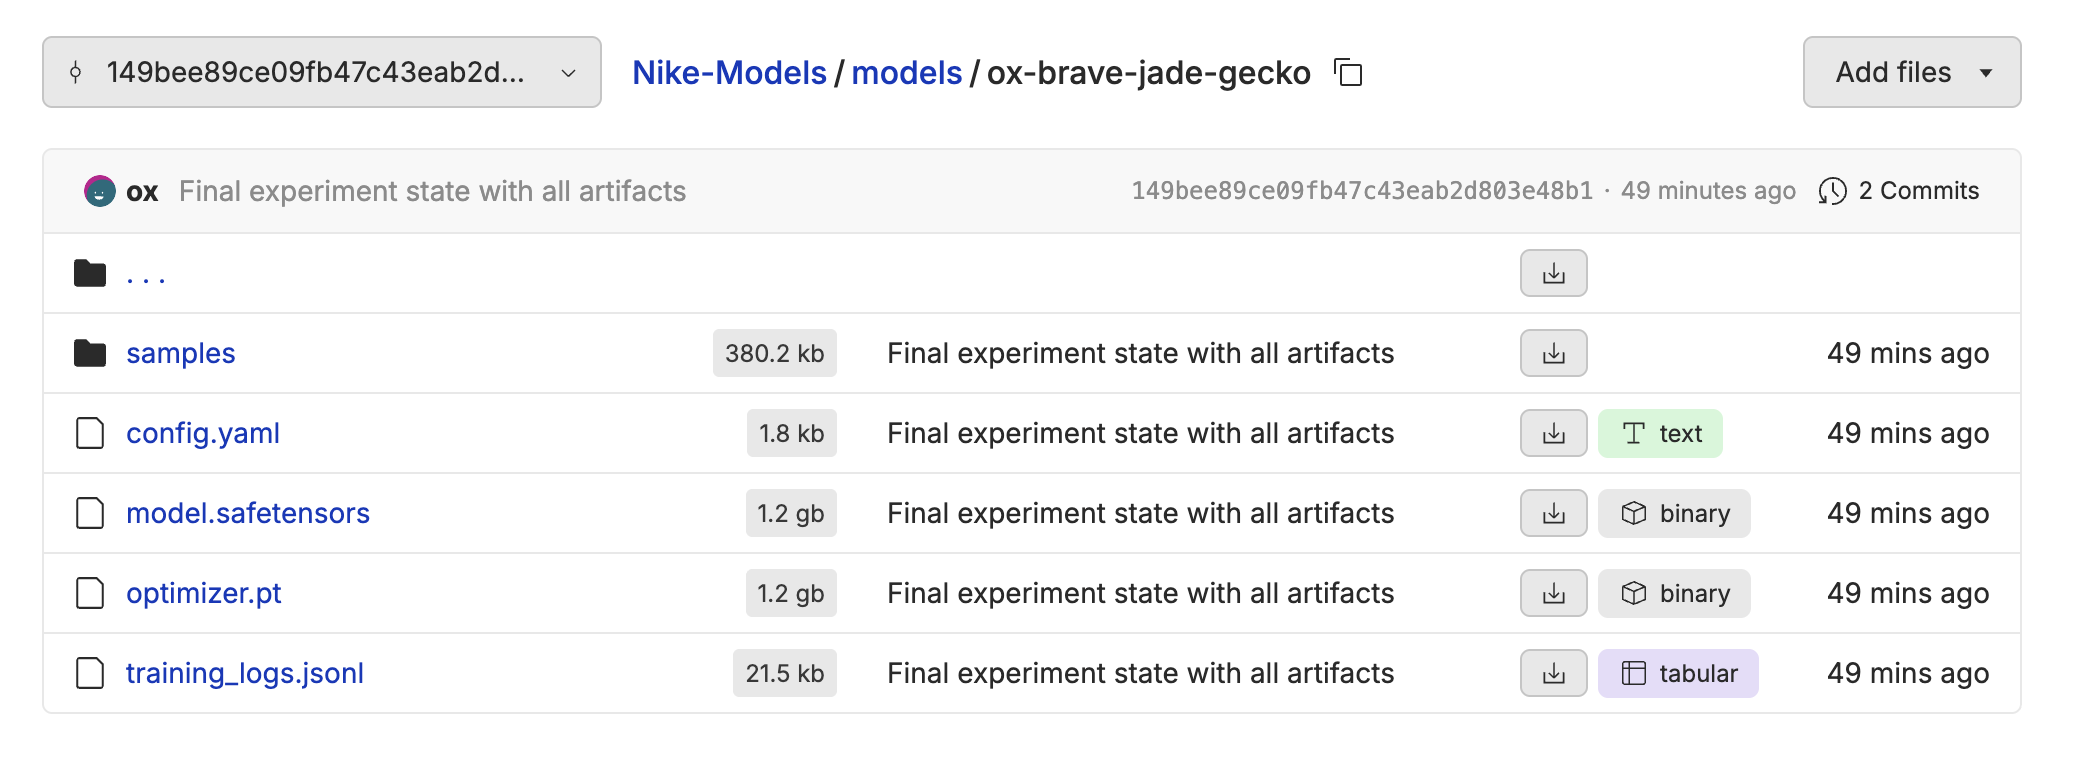
Exporting the Model
All of the model weights are stored back in your repository when the fine-tune is complete. Navigate to the fine-tune info tab, and you will see a link to the model weights. This is helpful if you want to download the weights to run in ComfyUI or your own infrastructure.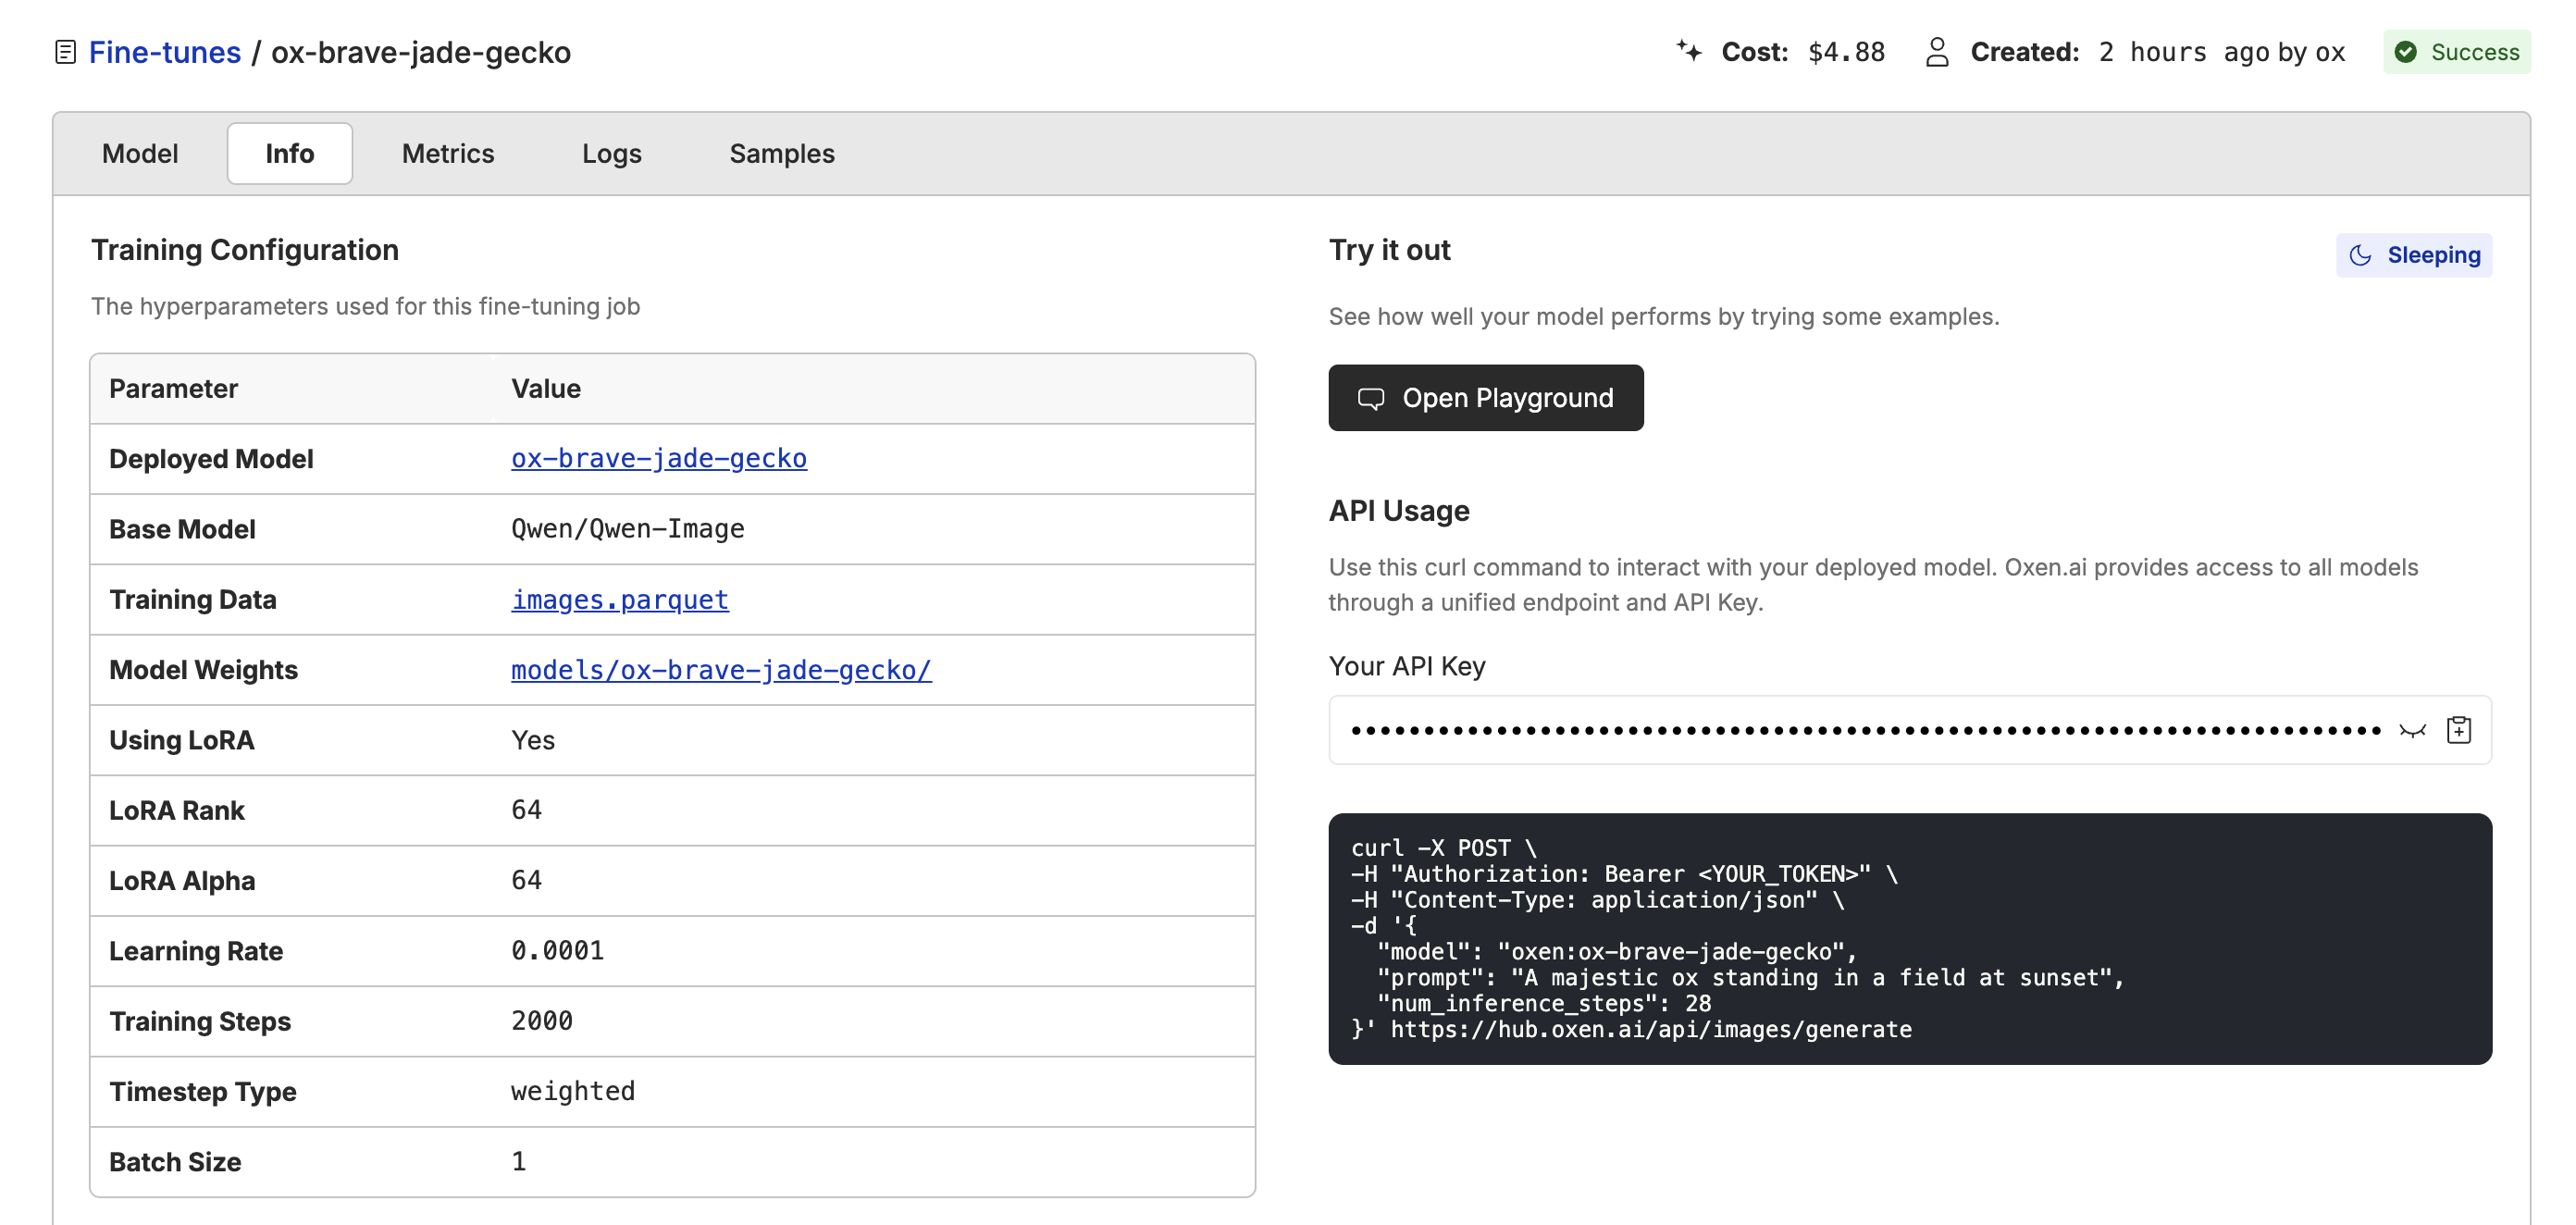
.safetensors file.